In this post I will show you how to properly configure ProtonMail Bridge SMTP config with Apple Mail on macOS Big Sur. Online privacy is something I am very concerned with and that’s why it was a logical move for me to switch to ProtonMail. You can argue why not self host? Well for my personal situation I think setting up and maintaining a mailserver is just not worth my time. I am happy to pay ProtonMail and have my mind at ease.
If you found this post you most likely already know what ProtonMail Bridge is. Let me quote them because it basically explains it all:
ProtonMail Bridge is an application available to all paid users that enables the integration of your ProtonMail account with popular email clients, such as Microsoft Outlook, Mozilla Thunderbird, or Apple Mail. Bridge runs in the background by seamlessly encrypting and decrypting messages as they enter and leave your computer. The app is compatible with most email clients supporting IMAP and SMTP protocols.
The situation at hand
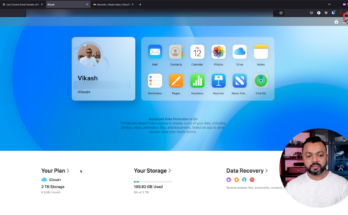
I must say I love their webmail solution but I still prefer using a dedicated mail app on my MacBook. Since I am on macOS I use Apple Mail because I fulfils my every need for a simple straight-forward mail client. I am hoping that they eventually develop a dedicated app for macOS just like the app on iOS (I hope you read this ProtonMail :)). Anyway, after installing the ProtonMail Bridge app I followed their manuals for setting up Apple Mail. You can find their manuals here. Basically ProtonMail Bridge creates a profile which you have to accept and install. This profile then automatically configures Apple Mail. Great!
To make sure that everything works I rebooted my MacBook before starting Apple Mail. Immediately my ProtonMail mails and folders started to show up in Apple Mail. Very nice! Then I wanted to test if I could send emails from Apple Mail but I just got an error that there was no SMTP server configured….what now?
Manual setup SMTP server settings
So it turns out that the profile which is created with the ProtonMail Bridge app on your MacBook does not install a SMTP server configuration for Apple Mail. I then went to the website of ProtonMail to check their knowledge base. I did not find any articles there on how to setup a manual configuration on Apple Mail. They do have a article which you can use here but no SMTP configuration in there.
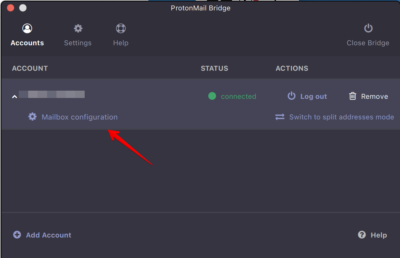
BUT if you open up ProtonMail bridge and click on your account you will see a Mailbox configuration option:
ProtonMail Bridge main window
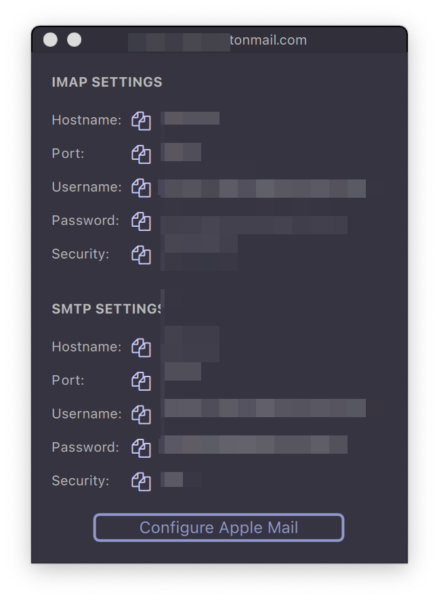
Click on Mailbox configuration to reveal the SMTP information required for Apple Mail:
ProtonMail Bridge Mailbox Configuration window
What is this error?
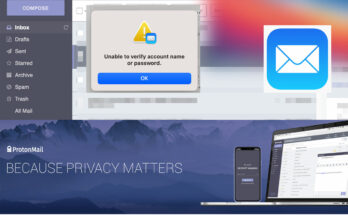
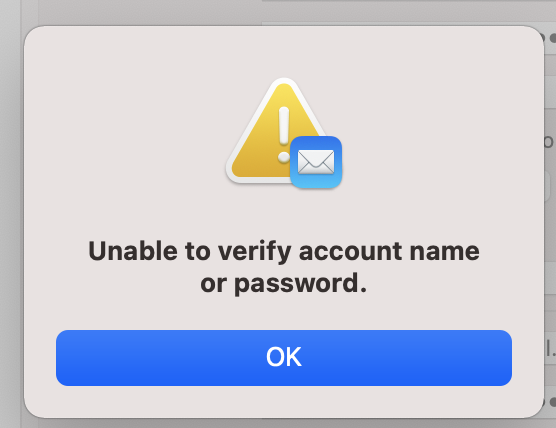
So if you just get the information from the window as described above and enter it in Apple Mail you will get the following error “Unable to verify account name or password.”:
Apple Mail SMTP server error with ProtonMail Bridge
This happens because ProtonMail bridge creates a local SMTP server with default settings for ProtonMail. These defaults are:
Hostname 127.0.0.1
SMTP port 1025
Username <generated during account setup>
Password <generated during account setup>
Security STARTTLS
Manually entering this information in Apple Mail did not work and just shows the error you see in the image above: Unable to verify account name or password.
Proper setup for SMTP in ProtonMail Bridge
I did try reinstall of the profile and also reboot. This does not work. Also when I reboot my MacBook I get an error from ProtonMail Bridge telling me port 1025 is in use. Clearly this is not a working setup.
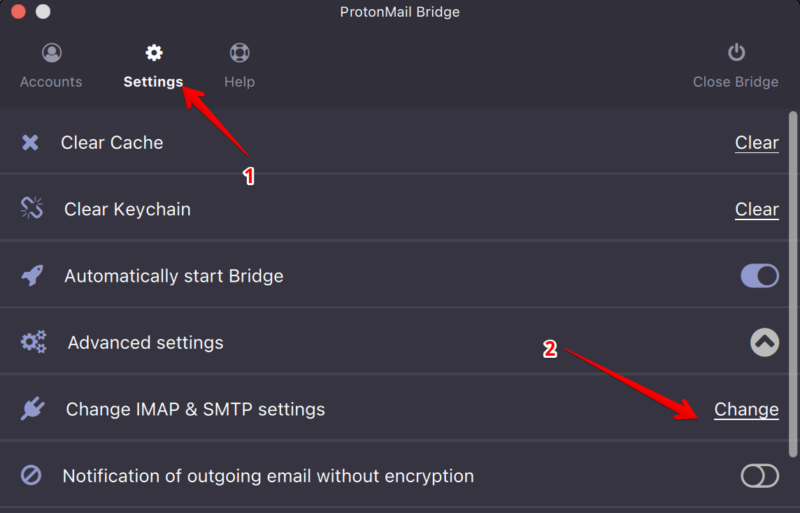
Then the troubleshooting started and I found out what configuration will work! Open the ProtonMail Bridge and click on Settings. Then click on Change IMAP & SMTP settings:
ProtonMail Bridge change server settings
Change the following things:
SMTP port: change this to 2025
SMTP connection mode: change this to SSL
Click on Okay.
ProtonMail Bridge change server and SSL
After changing these settings it is very important to reboot you MacBook. I found that only restarting the ProtonMail Bridge app is not enough.
Proper setup for ProtonMail SMTP server in Apple Mail
Now that your Mac is rebooted is time to setup SMTP with the new settings in Apple Mail.
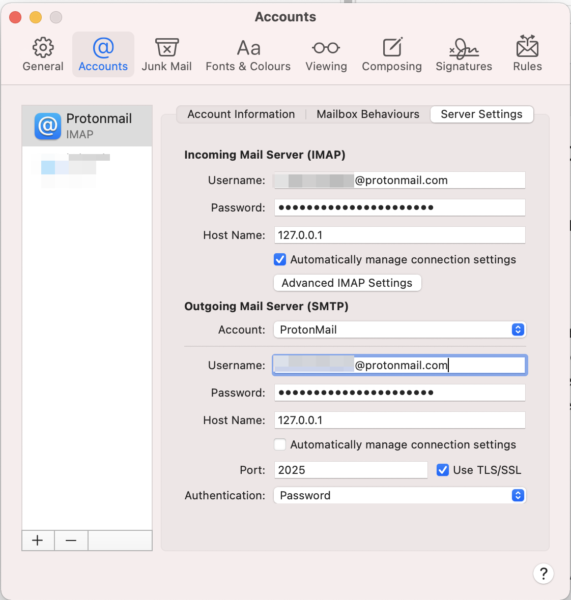
Open Apple Mail and then go to Preferences. The go to the Accounts Tab. In the left column select your ProtonMail account and then click on the Server Settings tab.
In the Server Settings tab you need to enter the following information in the Outgoing Mail Server (SMTP):
Account: select your ProtonMail account
Username: <yourProtonUserName>
Password: this is the password shown in ProtonMail Bridge Mailbox configuration window
Proper SMTP settings for ProtonMail in Apple Mail on macOS Big Sur
With the settings above and the adjustments in ProtonMail Bridge app you should now be able to send mails using ProtonMail in Apple Mail! ProtonMail is already amazing and with this little addition I hope you can enjoy it much more :). This is everything you need to setup ProtonMail Bridge SMTP config with Apple Mail on macOS Big Sur.
Reading Time: 3minutesThe Apple Airport Extreme is my home router and access point. Recently I wanted to use DHCP on my Synology NAS and disable it on the Airport Extreme. Guess what, when you disable DHCP on the Airport Extreme, it also disables NAT! Not what I had in mind. I am a fan of Apple products, and wanted to keep using the Airport Extreme for my WAN -> LAN connection (internet), because I am pleased with the performance and stability.
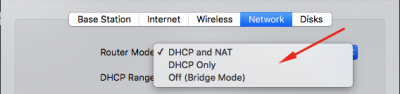
There are only three options to choose from:
DHCP and NAT (which I am using currently)
DHCP only
Off (Bridge Mode)
See the screenshot below:
None of the options suited my needs, so what I found out is that I can keep the DHCP and NAT option enabled, but deplete the DHCP servers IP address scope. So basically I am going to setup my DHCP server on the Airport Extreme with a scope of two IP addresses and then immediately reserve those ip’s with fake MAC addresses. This way the Airport Extreme will not be able to serve IP addresses in my network, and I can now setup another DHCP server to fit my needs. In another post I will explain why I need another DHCP server.
Let me walk you trough the procedure using the screenshots below.
First let’s start by opening the Airport Utility, select your Airport Extreme Base Station and click on Edit:
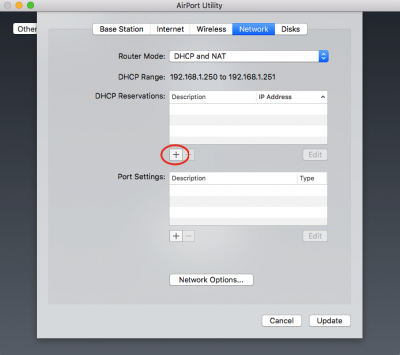
Then go to the Networking Tab and click on Network Options…:
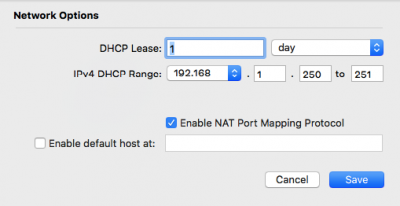
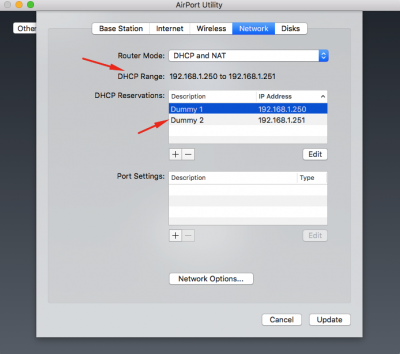
Setup the DHCP scope according to the settings in the screenshot below. The IP address space on my LAN is 192.168.1.x. You can have another range, adjust it to your needs. So I basically setup a DHCP scope consisting of two IP addresses. When you’re done, click on Save.
Now we have to add the fake IP reservations. In the DHCP Reservations section click on the + sign.
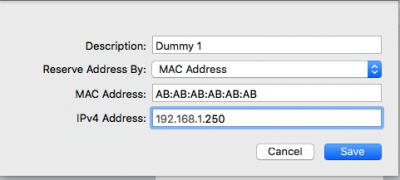
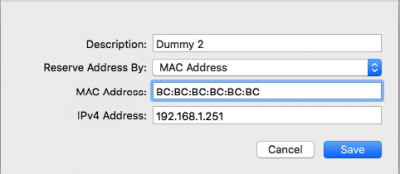
I then add Dummy 1 and Dummy 2 clients using a fake MAC address. Click on Save
Now your Network tab should look something like this:
Click on Update and that’s it! DHCP is now “turned off” on the Airport Extreme, and you are free to use another DHCP server for more flexibility in your LAN.
This website uses cookies to improve your experience. We'll assume you're ok with this, but you can opt-out if you wish.AcceptRejectRead More
Privacy & Cookies Policy
Privacy Overview
This website uses cookies to improve your experience while you navigate through the website. Out of these, the cookies that are categorized as necessary are stored on your browser as they are essential for the working of basic functionalities of the website. We also use third-party cookies that help us analyze and understand how you use this website. These cookies will be stored in your browser only with your consent. You also have the option to opt-out of these cookies. But opting out of some of these cookies may affect your browsing experience.
Necessary cookies are absolutely essential for the website to function properly. This category only includes cookies that ensures basic functionalities and security features of the website. These cookies do not store any personal information.
Any cookies that may not be particularly necessary for the website to function and is used specifically to collect user personal data via analytics, ads, other embedded contents are termed as non-necessary cookies. It is mandatory to procure user consent prior to running these cookies on your website.