Upgrading Citrix StoreFront 3.15 to Citrix StoreFront 3.16

Reading Time: 4 minutes

In this blog post I will show you how to upgrade StoreFront 3.15 to version 3.16. There a few things you need to do before upgrading Citrix StoreFront 3.15 to Citrix StoreFront 3.16:

  • Make a backup of you existing StoreFront before starting the upgrade.
  • Check the issues Citrix fixed in this new release here.
  • Check the known issues here and make sure you or your end-users will not be affected by them.
  • Do this upgrade in a test environment. This enables you to test your complete configuration and specific customizations you might have.

My 3.15 version of StoreFront is empty because I just started to rebuild my test-lab and then decided to upgrade to version 3.16. You of course may have a complete production environment running on version 3.15 so you have to make sure to test your upgrade before deploying it in production. Please note that StoreFront 3.16 is only supported on Windows Server 2012 R2 and Windows Server 2016. My StoreFront 3.15 is running on Windows Server 2016.

Citrix StoreFront 3.16 is now part of the new brand new Citrix is using: Citrix Virtual Apps and Desktops 7. The new name is part of their cloud strategy branding. You can download Citrix StoreFront version 3.16 as a separate component or download the full ISO of Citrix Virtual Apps and Desktops 7. Check the download section of their website here. Let’s get to it then.

Upgrading Citrix StoreFront 3.15 to Citrix StoreFront 3.16

If you have downloaded the ISO then start by mounting it using Windows Explorer. Right-click the ISO and then click on Mount.

Browse to the mounted ISO (the DVD drive in Windows Explorer) and double-click on AutoSelect.exe.

The installer will start and automatically detect that there are Citrix components running on the server. It will present you with the option to upgrade them. Click on Upgrade.

Accept the license agreement and click on Next.

Next you will be presented with a checklist for a successful upgrade. After upgrading StoreFront you have to upgrade other components in this list as well. If you are ready check the box I’m ready to continue. Click then on Next.

The setup wizard will automatically configure the Windows Firewall. Leave the option on Automatically. Click then on Next.

The summary window will be displayed. Click on Upgrade.

When the upgrade starts you cannot cancel it. If you do this you might end up with a broken StoreFront server. Only if you are sure you are ready to continue with the upgrade click OK.

The upgrade will now start. All you have to do now is wait.

After the upgrade is finished you will be presented with the upgrade results. Check the box Open the StoreFront Management Console to continue. Click on Finish.

You can now continue to check your configuration. Mine is empty. In upcoming posts I will show how to configure StoreFront to present desktops and applications to end-users.

This concludes this blog post. In following posts I will show you how to configure StoreFront to deliver desktops and applications. I will also show you how to connect it to Citrix NetScaler so stay tuned. Feel free to contact me of you have any questions or comments.

You can follow me on twitter or add the RSS feed from my blog and you will be notified when I add new posts.


Upgrading Citrix StoreFront 3.15 to Citrix StoreFront 3.16 Read More

Install Citrix StoreFront 3.15

Reading Time: 4 minutes

In this blog post I will show the basic setup of Citrix StoreFront 3.15. StoreFront is the component for making your published desktops and published applications available for your end-users and devices. Citrix StoreFront is part of Citrix XenDesktop 7.18.

My environment for this basic setup:

  • Windows 2016 (stf01.vikash.nl)
  • Citrix StoreFront 3.15 setup (www.citrix.com)

In this post I only focus on a basic installation of Citrix StoreFront. Let’s start.

Install Citrix StoreFront 3.15

At this point you have downloaded the Citrix XenDesktop 7.18 installation ISO from the Citrix website. Mount the ISO using Explorer.

Double-click on AutoSelect.exe.

Click on Start button on the end of XenDesktop Delivery applications and desktops.

Select the option Citrix StoreFront.

Agree with the License Agreement and click on Next.

You will see the components which will be installed. In this case only StoreFront should be displayed here. Click on Next.

You will see the default ports for StoreFront and leave the option Automatically selected. The setup automatically configured the Windows Firewall to open the ports listed here. Click on Next.

You will see a summary of the installation. Click on Install.

The server has to be restarted before the installation can continue. Click on Close.

Windows will tell you that you will be signed out. Click on Close and wait for the server to reboot.

After the reboot login with the same account you were using when you started the installation. In my case this was the Administrator account. You will now be prompted to locate the XenDesktop installation media. Don’t close this window!

Open a new Windows explorer window and browse to the XenDesktop 7.18 installation ISO and mount in using explorer.

Go back to the XenDesktop installation media window. In the left column the virtual DVD will contain the mounted ISO. Select the DVD drive and click on Select Folder.

The installation will continue automatically.

After everything is installed you will see a summary of the installed components. Click here on Finish.

Citrix StoreFront administration console will be automatically launched. The installation is now complete and our StoreFront server is ready to be configured to deliver desktops and apps to the end user. I will show you how to do this in further blog posts.

This concludes this blog post. In following posts I will show you how to configure StoreFront to deliver desktops and applications. I will also show you how to connect it to Citrix NetScaler so stay tuned. Feel free to contact me of you have any questions or comments.

You can follow me on twitter or add the RSS feed from my blog and you will be notified when I add new posts.

Install Citrix StoreFront 3.15 Read More

Creating a site with Citrix XenDesktop 7.18

Reading Time: 3 minutes

In my previous post here I showed how to install Citrix XenDesktop 7.18 Delivery Controller. Creating a site with Citrix XenDesktop 7.18 is the next step. This process can be complicated because there is SQL database connectivity involved. The requirement for SQL is version 2008 SP3 or higher. For a complete set of requirements check this link here.

Deliverables of this post:

  • Configure a XenDesktop Site and connect it to SQL Server.

Requirements for the configuration:

  • Microsoft SQL Server.
  • Active Directory Domain.
  • Citrix XenDesktop 7.18 Delivery Controller.

Create a site using Citrix Studio

Creating a site with Citrix XenDesktop 7.18 is done using Citrix Studio. This management tool is automatically installed if you followed my post here.

Start Citrix Studio from the start menu.

Click on the first option in the middle of the console: Deliver applications and desktops to your users.

Select the option An empty, unconfigured Site. Enter the site name you want and click on Next.

Now this is the part where you have to pay attention. Check the names of the databases that are created. Three databases are created. Enter the correct SQL connection information in the Location field. Click then on Next.

Enter the name (or ip address) of your license server. Then click on Connect.

The setup wizard will connect to your license server. Because the Citrix License Server is installed with a self-signed certificate you will get a popup windows asking you if you trust the server. Select Connect me and click on Confirm.

You will now be presented with a list of available licenses on the license server. Select the appropriate one and click on Next.

Finally you will be presented with a summary screen. Double check that all the options and names are correct and then click on Finish.

After the configuration is finished you will be presented with an overview in Citrix Studio. From here you can take following steps. In upcoming posts I will show you where to take from here.

Check the database connections in Citrix Studio. Click on Configuration in the left column.

Using SQL Management Studio you can check the databases on your SQL server.

This concludes this blog post. In following posts I will show you what to do next to get your XenDesktop farm online. Feel free to contact me of you have any questions or comments.

You can follow me on twitter or add the RSS feed from my blog and you will be notified when I add new posts.


Creating a site with Citrix XenDesktop 7.18 Read More

Citrix XenDesktop 7.18 Delivery Controller installation

Reading Time: 4 minutes

In my last post here I showed how to setup Citrix Licensing Server. This is one of the main components for any Citrix environment. In this post I will cover Citrix XenDesktop 7.18 Delivery Controller installation. I will be needing this to publish my desktops and applications. I will show you in future posts how to integrate with Citrix NetScaler, Azure and also implement MDM and MAM solutions in my environment. So for now let’s start the setup.

My lab setup:

  • Active Directory on Server 2016.
  • Citrix XenDesktop 7.18 ISO downloaded from the Citrix website.
  • Microsoft SQL server.

Install Delivery Controller

Download the installation ISO from the Citrix site and mount it using Windows Explorer. Double click on AutoSelect.exe to start.

Click on Start the XenDesktop line.

Select the Delivery Controller option. As you can see here there are options to install the other components. I will show these in upcoming posts. For now let’s click in Delivery Controller.

Agree with the Software License Agreement here. Click then on Next.

Select the components you wish to install and click on Next.

Again select the options you wish. I have a dedicated SQL server so I will not install SQL Express. Click on Next.

Leave the options default and the wizard will configure the firewall on the server. Click on Next.

You will get a overview of the components that will be installed. Click on Install.

You will see a popup about rebooting your server. Click on Close.

You will be signed out from the server and it will reboot. You can click on Close or wait for the server to sign you out.

After you logging in you will be asked for the XenDesktop setup files. Do NOT close this window.

Open up Windows explorer and re-mount the ISO.

Now go back to the window that opened up after the reboot labeled Locate XenDesktop installation media and browse to the XenDesktop ISO you just mounted. Select the DVD drive in the left column. Then click on Select Folder.

The setup will now continue.

At the Smart Tools window you can select the option I want to connect to Smart Tools and Call Home. Click on the Connect button to sign in with your Citrix account. Of course you can select another option according to your needs.

If you choose I want to connect to Smart Tools and Call Home you will have to supply your Citrix credentials. Then click on Sign In.

You will be prompted for a verification code. This code will be send to the email address associated with the Citrix account you entered. Fill in all the info and click on Continue.

The installer will not continue. I choose to deselect the Launch Studio option. Click on Finish.

This concludes this blog post. Next up will be creating a XenDesktop site. Feel free to contact me of you have any questions or comments.

You can follow me on twitter or add the RSS feed from my blog and you will be notified when I add new posts.

Citrix XenDesktop 7.18 Delivery Controller installation Read More

How to setup and configure Citrix Licensing Server 11.15

Reading Time: 4 minutes

I already did an installation and configuration of previous versions of Citrix License Server. Now that I am active again on my blog it is time to set up my homelab. In the past I had my homelab running on Hyper-V 2016 and to be honest I was not a fan ot it. Constantly having to updating the operating system, performance issues and lack of flexibility were driving me mad. But I had no choice as the hardware I was running my homelab on only supported Windows. Now I have new hardware for my homelab and I made sure it was compatible with VMware ESXi!

So I have to start from the basics and one of the basics is Citrix License Server. Let’s start.

My environment:

  • Citrix Licensing Server 11.15 (Build 24100) for Windows (www.citrix.com);
  • Windows 2016;
  • Domain name: vikash.nl;
  • Account for setup: Administrator (VIKASH\Administrator).

Installing License Server 11.15

Unpack the zip file and double click CitrixLicensing.exe.

You will be presented with the screen below. Accept the license agreement and click on Next.

Select the directory to install Citrix License Server. Click then on Next.

Make sure the box to configure the firewall is checked. You can change the ports if you need to. Also not in this screen the wizard is telling you what account will be automatically added to manage the server. Take notes. After you made your changes click on Next.

Select the option that matches your contract. Click on Install to start the installation.

The wizard completes the installation. Click on Finish.

Add licenses to Citrix License Server

Now that we have the license server running it is time to add some licenses. Go to the Start menu and click on Citrix License Administration Console.

Internet Explorer will now open and prompt you with a certificate warning. This is because the default certificate for Citrix License Server is a self-singed certificate. You can click on Continue to this website. Note the URL to access this console.

You will be presented with the dashboard of the administration console. As you can see there are no licenses yet for Citrix products.

Login on the Citrix website and go to licenses. Click on Allocate to allocate a license and download it to your desktop.

Return to the Citrix License Administration Console and click on Administration to login. Use the account you used to install the license server. Click then on Submit.

Now we have to upload the license file we downloaded from the Citrix license portal. Click on Vendor Deamon Configuration and then on Import License.

Select the license file and click on Import.

Click on OK.

For the license to be active you have to restart the server or the Citrix Licensing service.

Now return to the dashboard of the Citrix License Administration Console and the licenses you just added should be visible.

So that’s it. Thanks for reading.

This concludes this tutorial. Feel free to contact me of you have any questions or comments. You can also follow me on twitter or add the rss feed from the blog and you will be notified when I add new posts.

How to setup and configure Citrix Licensing Server 11.15 Read More

Copy NetScaler configuration and change all the IPs

Reading Time: 6 minutes

Copy NetScaler configuration and change all the IPs is something you will have to do eventually when Citrix NetScaler is your playing field. Some customer will ask you to copy a running configuration to a new NetScaler, because they are redesigning the network or they need an exact replica of the production NetScaler for testing purposes. So you will have to move the configuration to a new NetScaler and change the IP addresses to match the new network situation. This can be done in a several ways, but in this post I will show you how I do it. Because when you have have little time and is has to be done in a fast and reliable way, I believe this is the way to go. Let me show you how in this post.

Deliverables of this post:

  • Copy a running (production) NetScaler config to another NetScaler.
  • Change the NetScaler IP (NSIP), Subnet IP (SNIP) and Virtual IP (VIP).

Requirements for the configuration:

  • Same version and build on every NetScaler (www.citrix.com).
  • NetScaler License (same license type on both appliances).
  • Ip addresses for the new NetScaler (NSIP, SNIP and VIP).

The steps in this post require you having extended knowledge of NetScaler command prompt (SSH). It is very important you understand what is going on in the ns.conf file. This is the file where all the configuration of the NetScaler is stored. If you mess up this file, you will have to restore it from a backup. Furthermore make sure that your old and new NetScaler is running the same version and build.

Below is an overview of the old and the new IP addresses I am using in my network.

DescriptionNS01 (old NetScaler)NS02 (new NetScaler)
NetScaler IP192.168.1.30192.168.1.40
Subnet IP192.168.1.31192.168.1.41
Virtual IP192.168.1.32192.168.1.42
Virtual IP192.168.1.33192.168.1.43
Virtual IP192.168.1.34192.168.1.44
Virtual IP192.168.1.35192.168.1.45

In my homelab setup I don’t have a High Availability (HA) NetScaler configured. If you need an HA pair in your new setup, just follow the steps in this post for only one new NetScaler. When everything is copied and running on the new NetScaler, just add the second NetScaler, create your HA pair, and everything should sync fine.

Setup and configure your new NetScaler

We will start with the setup and configuration of the new NetScaler. The following things need to be setup on the new NetScaler:

  • NSIP
  • SNIP
  • DNS / TimeZone
  • License

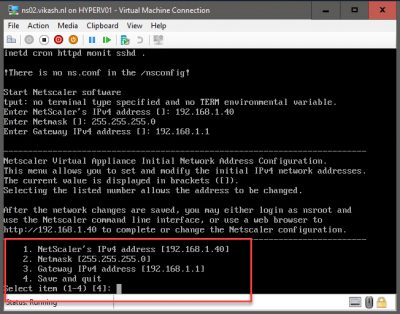
Start you new NetScaler virtual machine and enter the initial setup information.

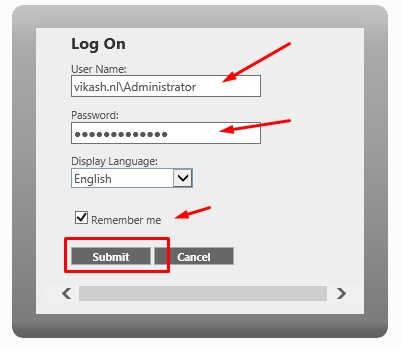
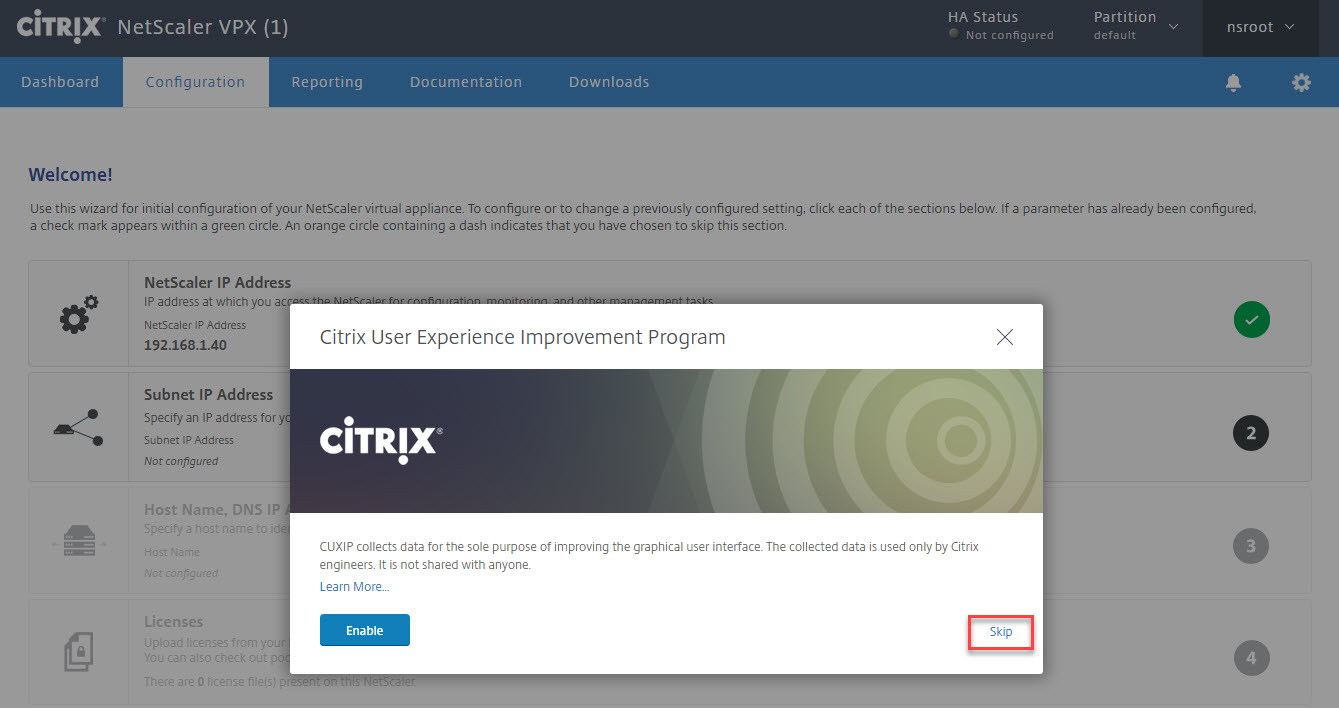
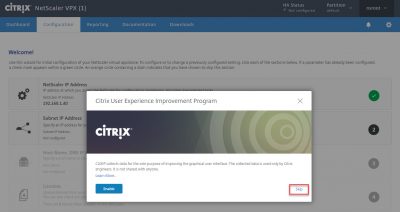
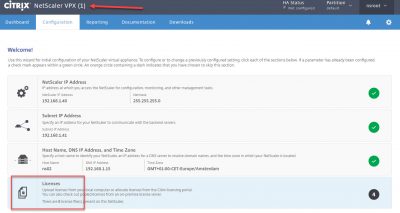
Log into your NetScaler to start the setup wizard. Choose your option on the Citrix User Experience Improvement Program.

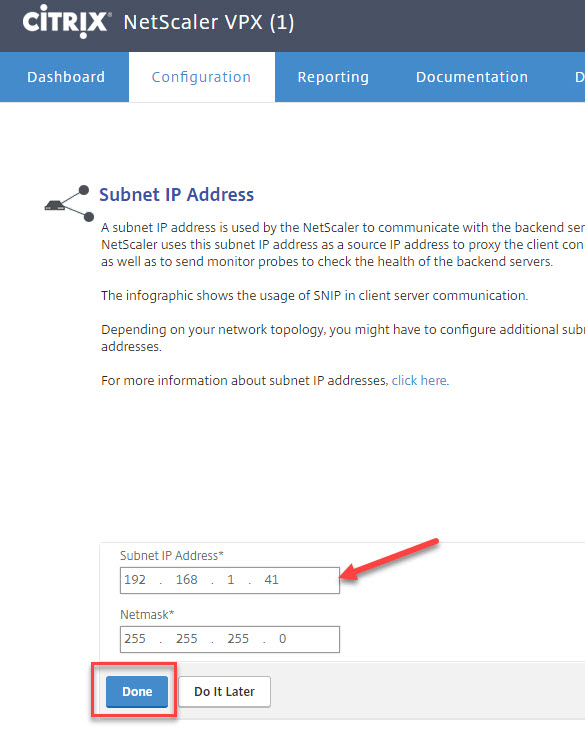
Click on Subnet IP Address. Enter the IP and click on Done.

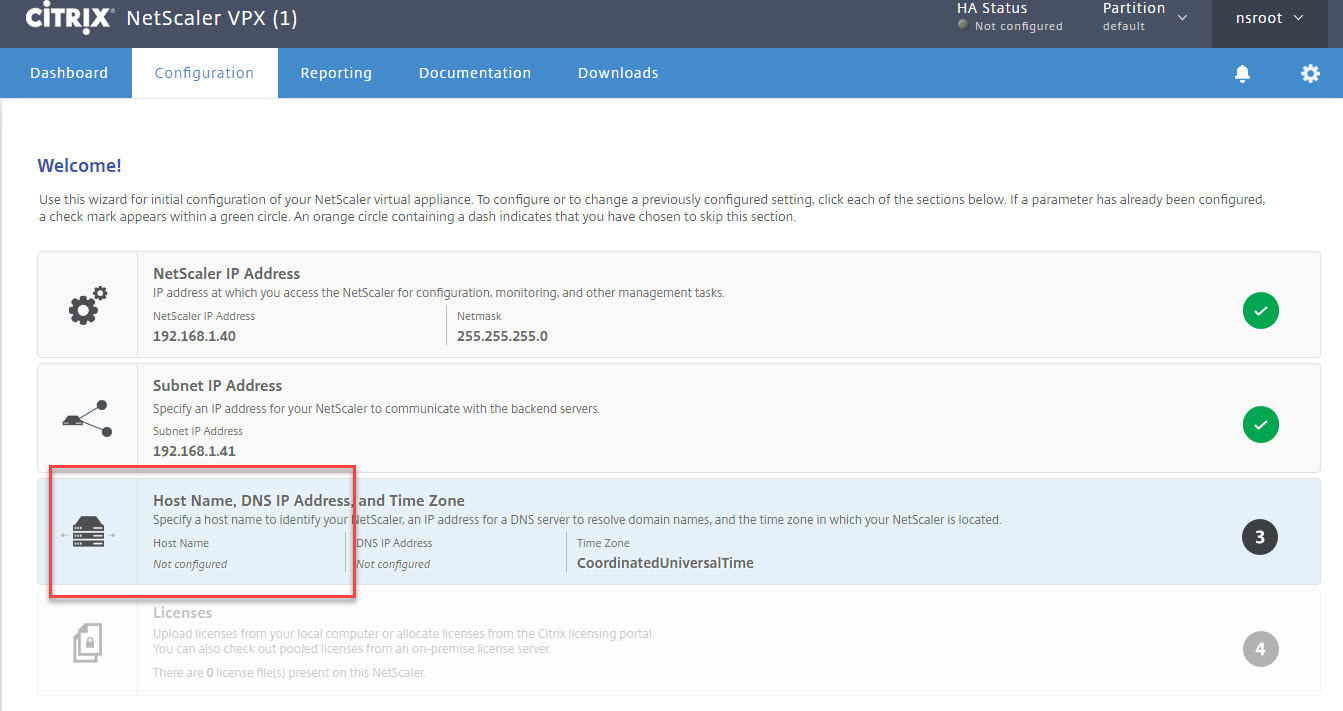
Click on Host Name, DNS IP Address and Time Zone.

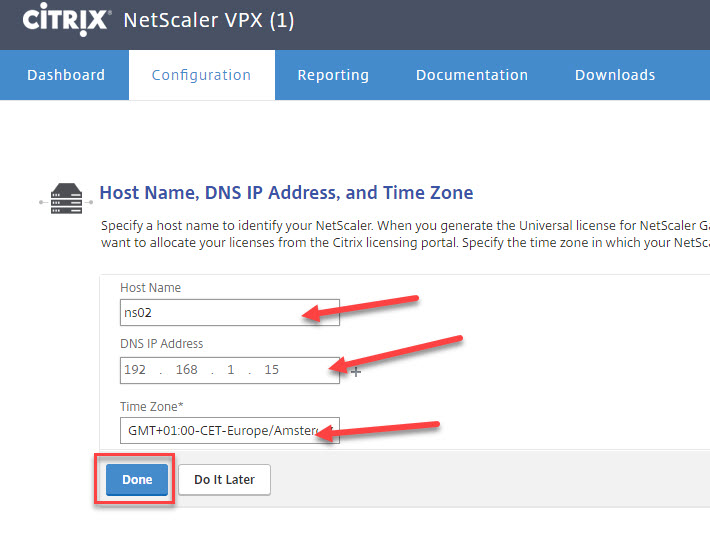
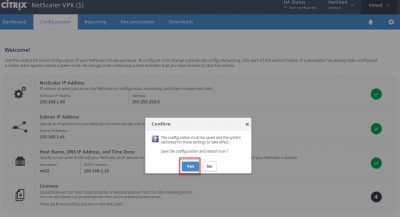
Enter the information, select the time zone and click on Done.

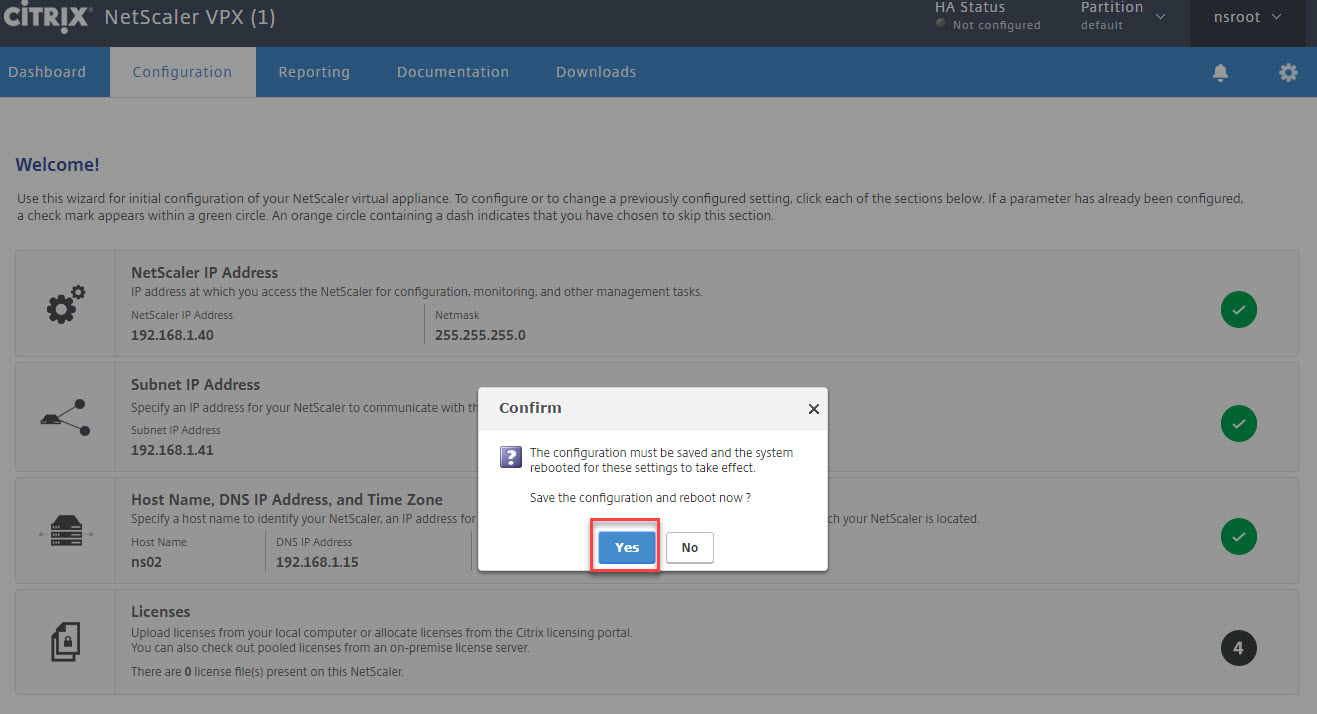
The NetScaler will reboot now to apply the changes. Click on Yes.

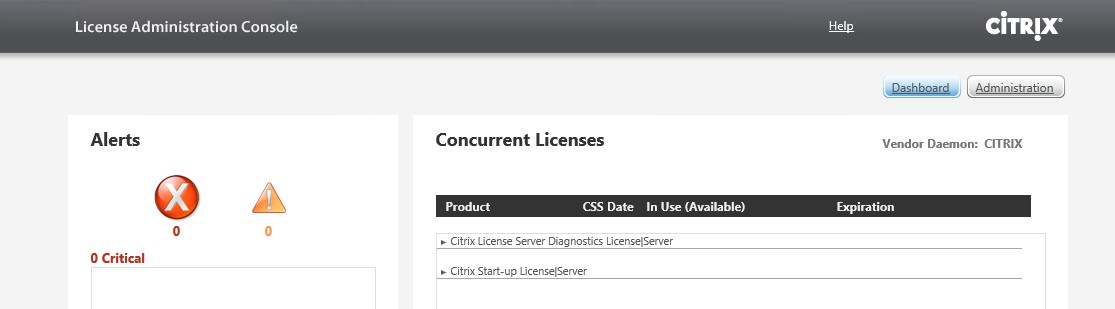
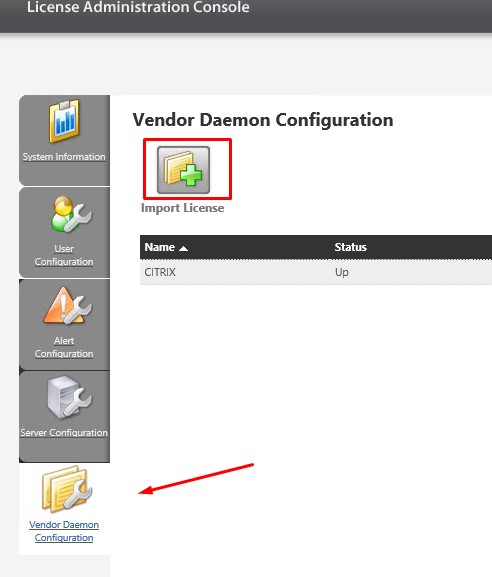
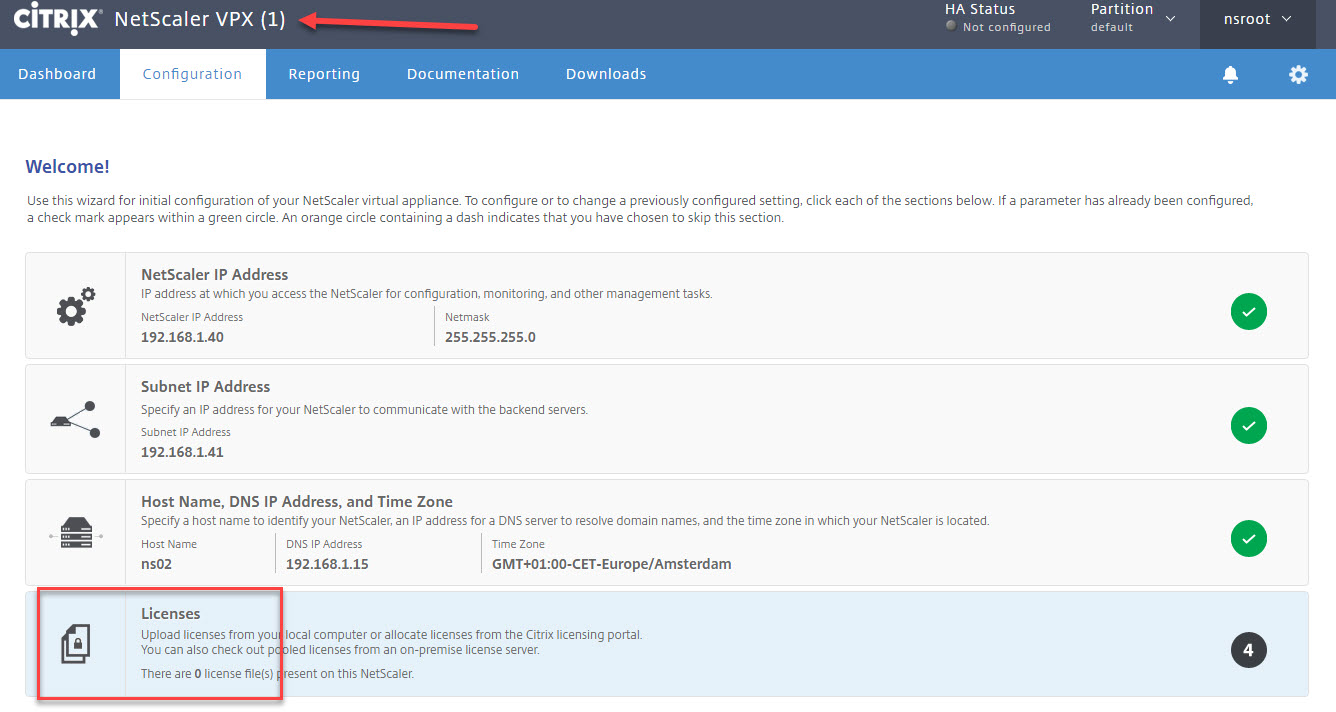
After the reboot log into the NetScaler management and click on Licenses.

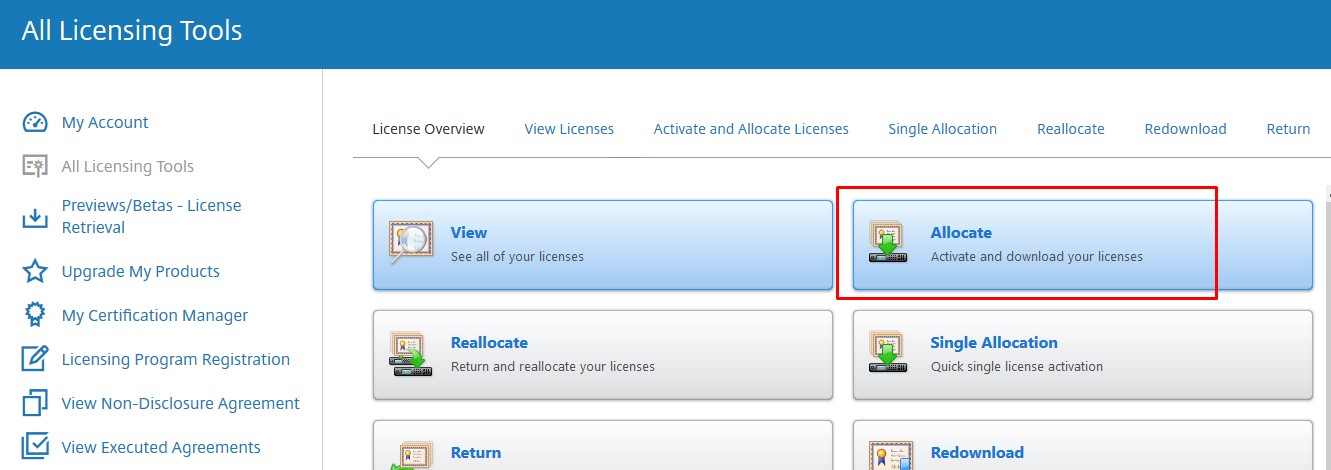
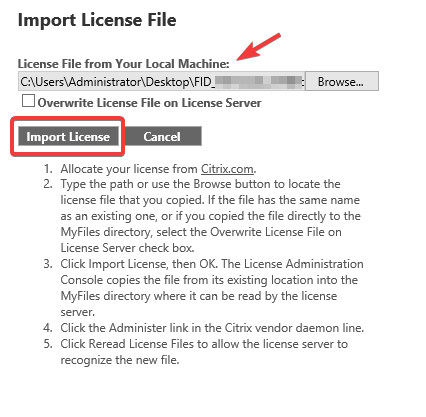
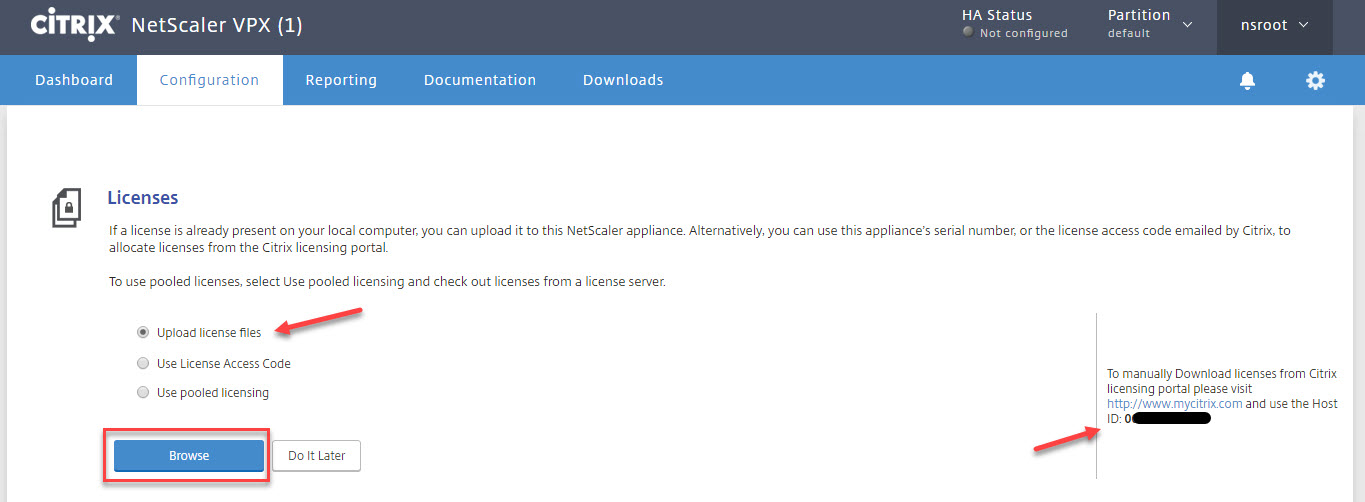
Allocate your NetScaler license using you Citrix account. The license needs to be allocated using the system ID, displayed on the right side. Select Upload license files and click on Browse to select the license file you have allocated.

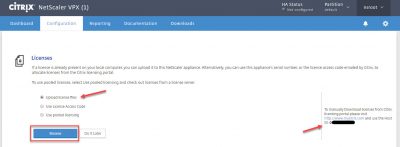
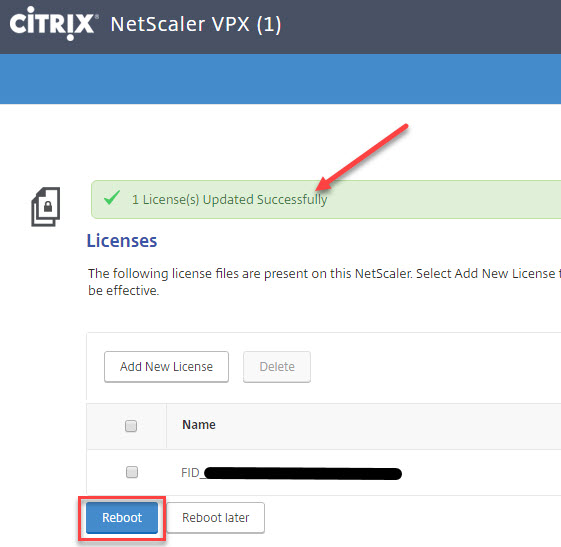
After the license file is imported successfully, click on Reboot.

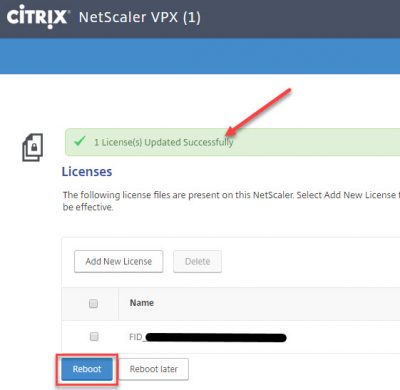
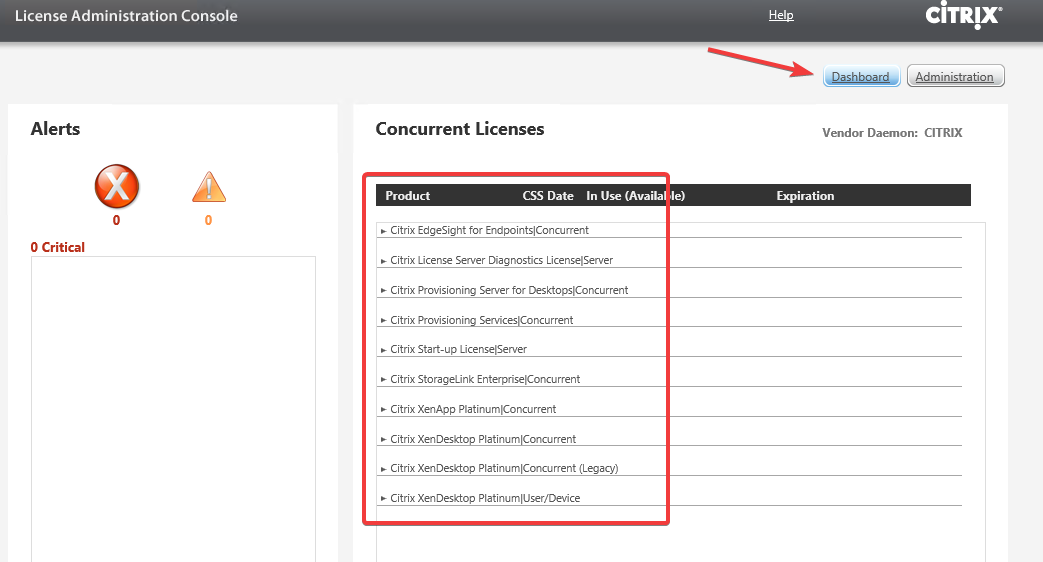
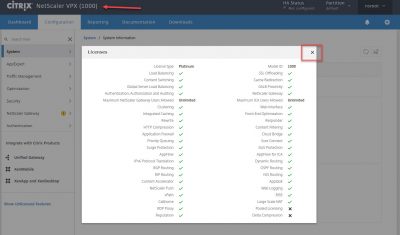
After the reboot log into the NetScaler management. You will be presented with an overview of the features activated by your license. Now you can see the model number according to your license. Close the License overview window.

Copy certificate files to the new NetScaler

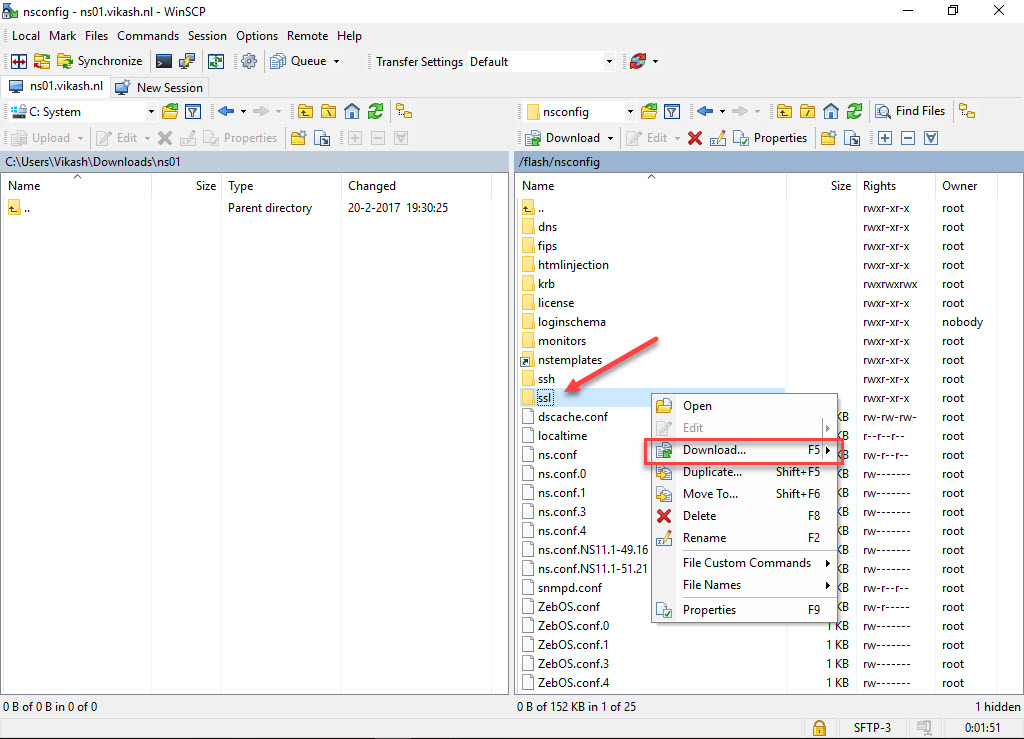
The next step is to make sure all your certificates are available on the new NetScaler. For this I will be using WinSCP. Using the Secure File Transport Protocol (SFTP) option in WinSCP I can easily copy files from the NetScaler. Feel free to use your favorite editor or tool to connect to the NetScaler to get the files.

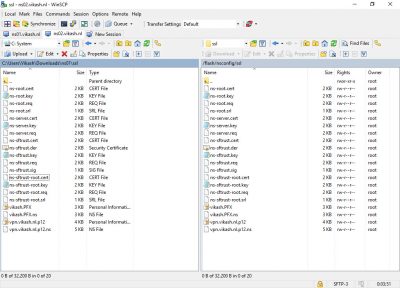
Get the certificates from your old NetScaler. Log into the NetScaler using WinSCP and browse to /flash/nsconfig. Select the ssl directory and download it to your computer.

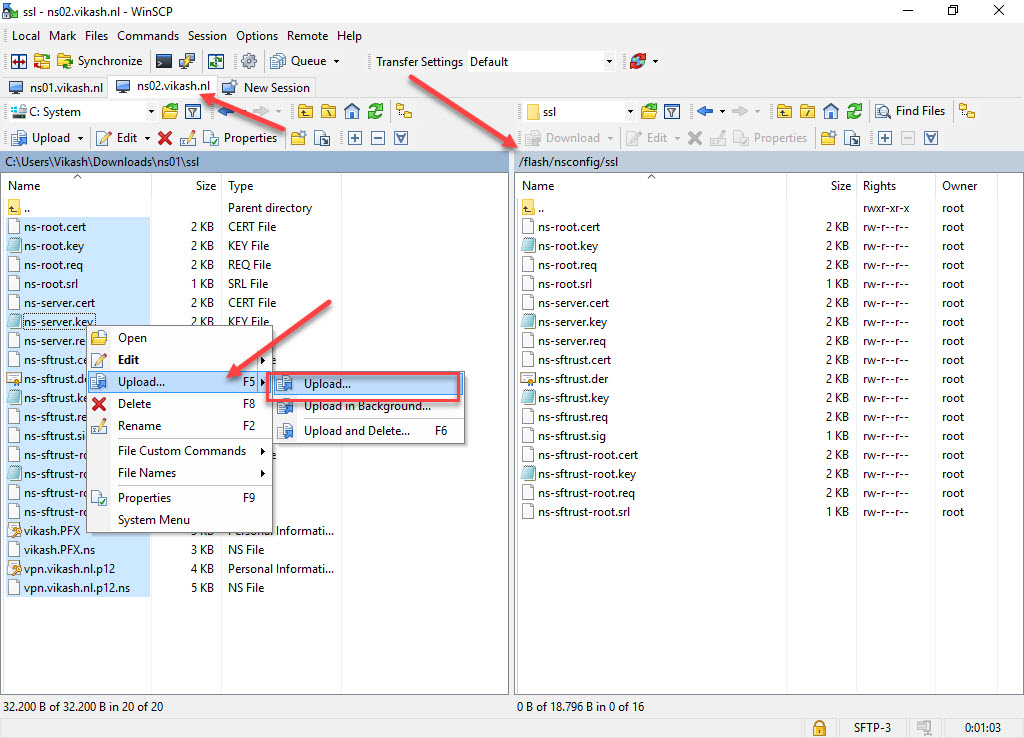
Upload the certificates in the ssl directory to your new NetScaler. Log into the new NetScaler and browse to /flash/nsconfig/ssl. Select the certificates you downloaded in the previous step and upload them to this directory.

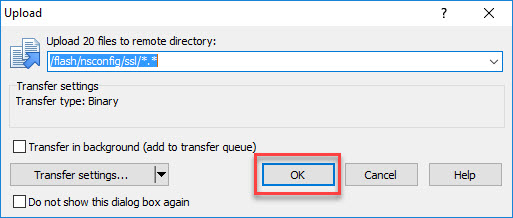
Check the directory and click OK.

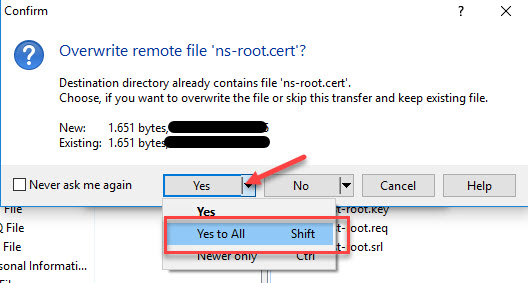
Select Yes to All to confirm overwriting existing certificates on your new NetScaler.

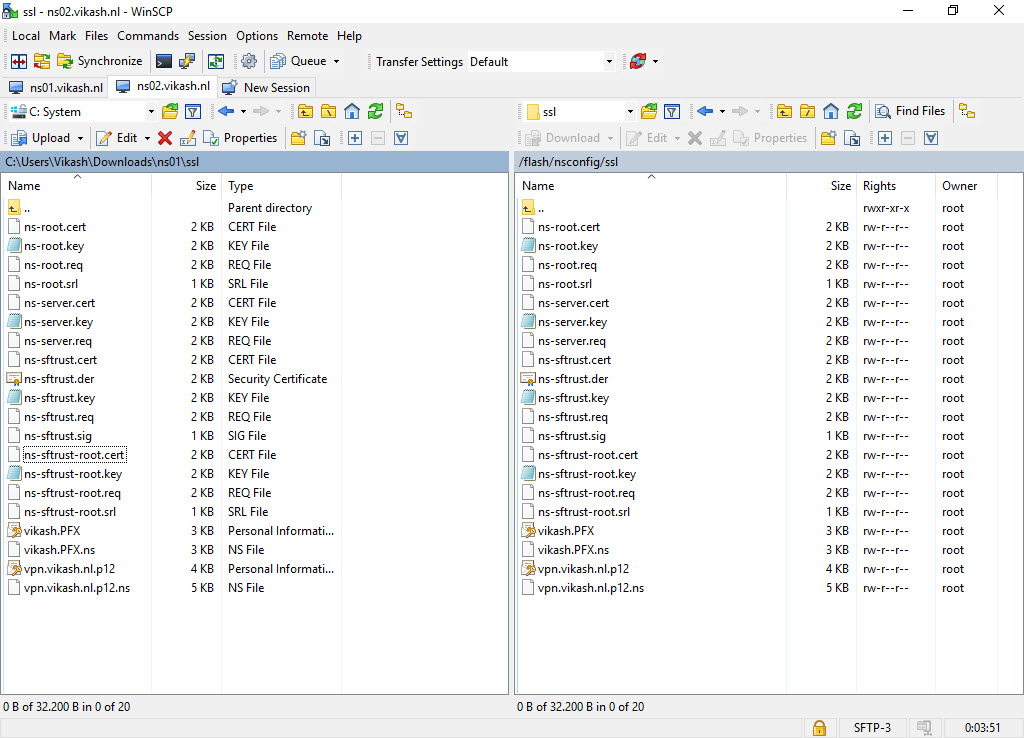
So now the certificates from your old NetScaler should be available on the new one.

Download NetScaler configuration file from old NetScaler

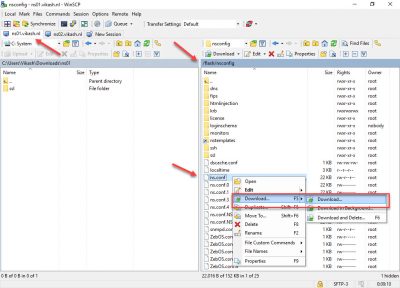
Using WinSCP go back to your old NetScaler and get the ns.conf file. This is the file where all the configuration is stored and we will modify and import this on the new NetScaler.

Start by saving your configuration to make sure that everything is written to the ns.conf. Browse to /flash/nsconfig and select the ns.conf. Then click on Download.

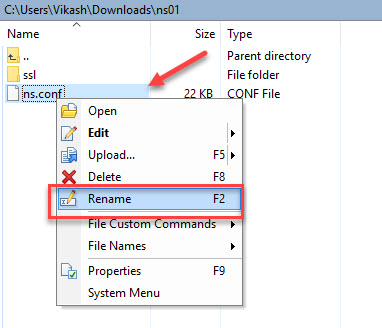
Prepare NetScaler configuration file

We have to modify the ns.conf file before we can import it on the new NetScaler. Rename the file in WinSCP.

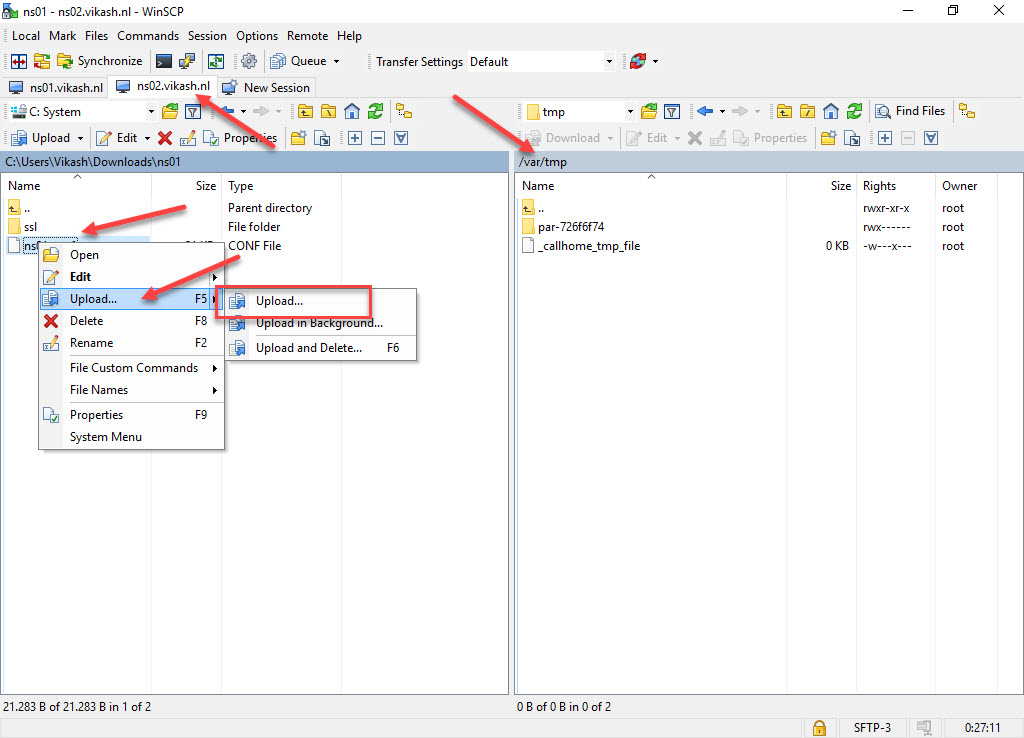
Upload the renamed file to your new NetScaler in the directory /var/tmp. This is the directory we will use to import the file later.

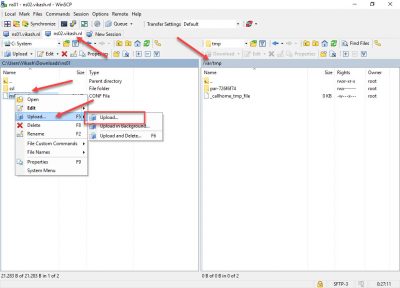
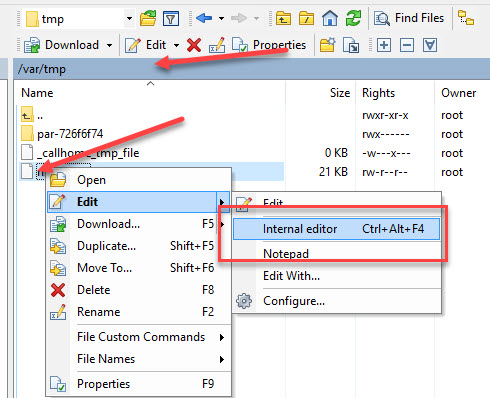
With the renamed ns.conf uploaded to the new NetScaler, it is time to edit it. Right-click the file and click on Edit -> Internal Editor in WinSCP.

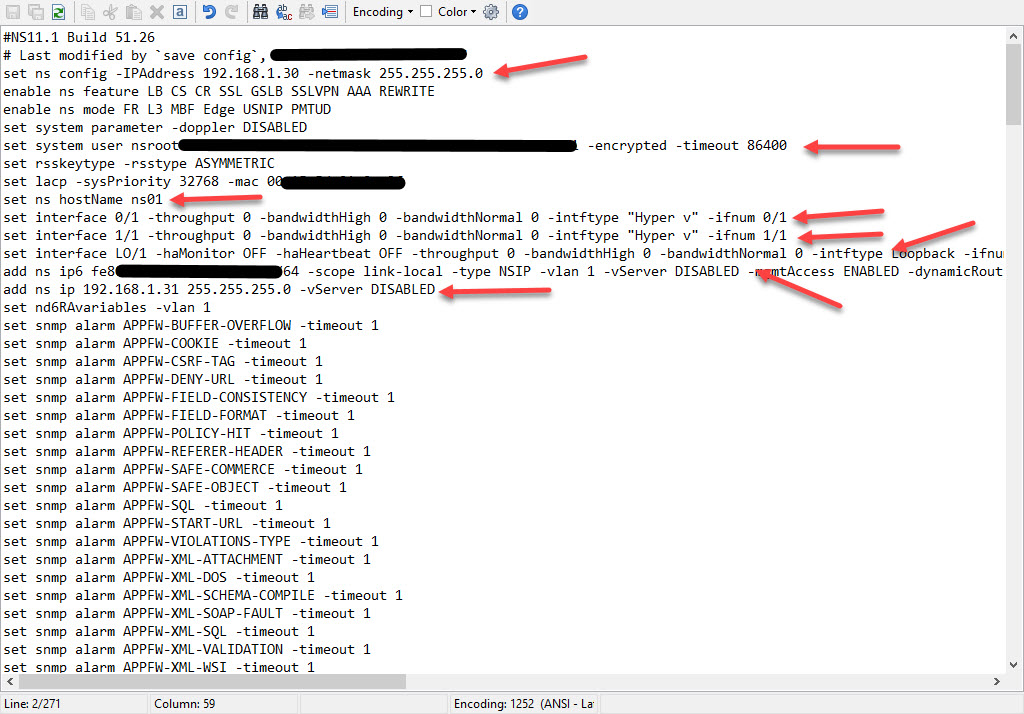
We have to anonymize this file for the new NetScaler, so every object here which is bound to the old NetScaler we have to delete. Let’s remove at least the following lines in this file:

  • set ns config -IPAddress
  • set lacp
  • set ns hostname
  • add route (all of the routes)
  • set system user nsroot
  • set interface (all of them)
  • add ns ip6

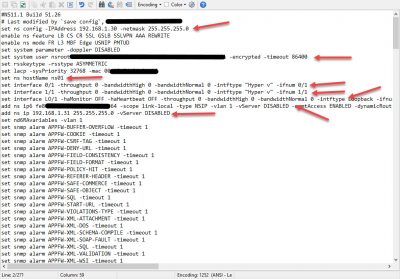
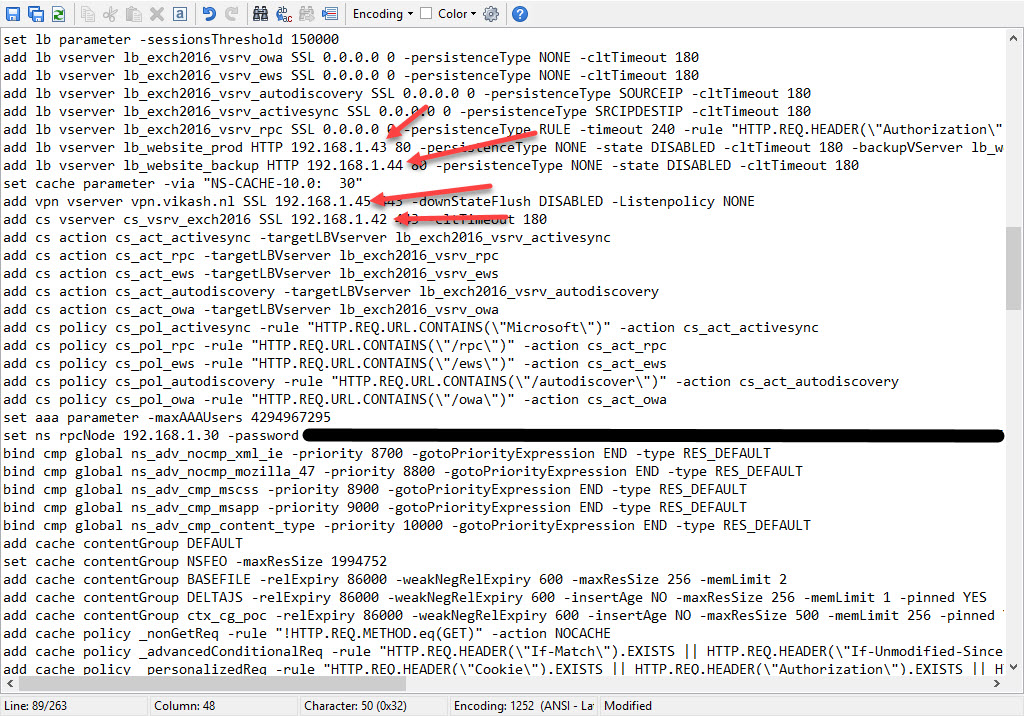
The next step is to replace the IP addresses for the SNIP and the VIP with the new ones. Just scroll do the file and change them, or use find and replace in your editor. Then save the file.

Import the configuration on your new NetScaler

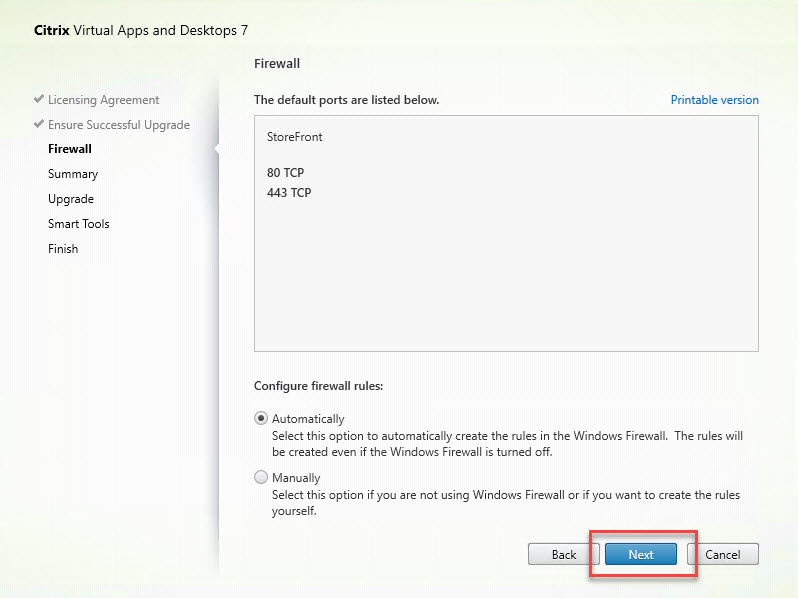
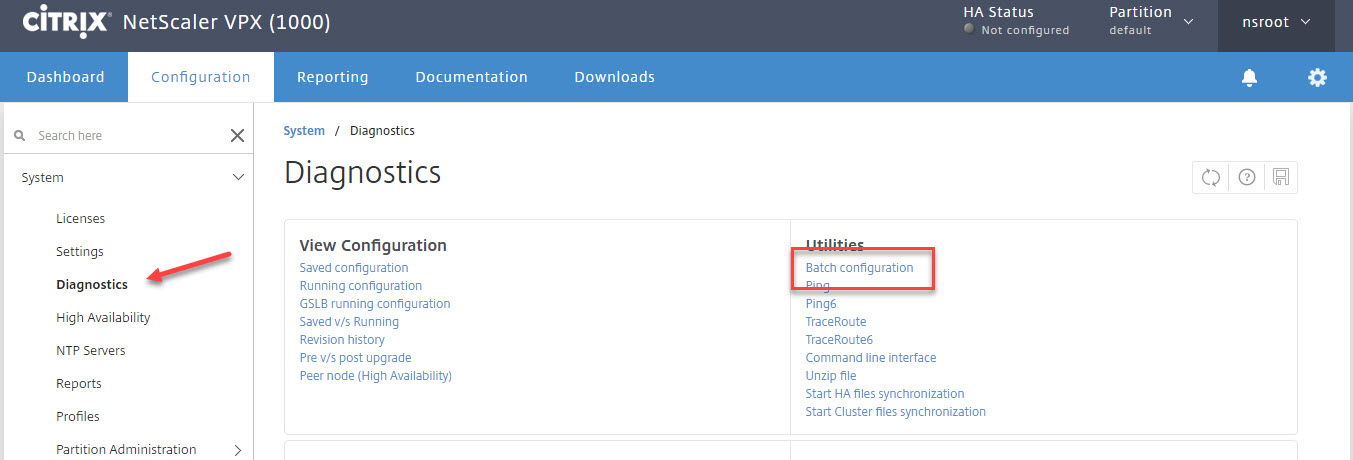
Now we can import the file in the new NetScaler. Log into your new NetScaler (web) and navigate to System -> Diagnostics. Then click on Batch configuration.

Click on Choose File and then on Appliance.

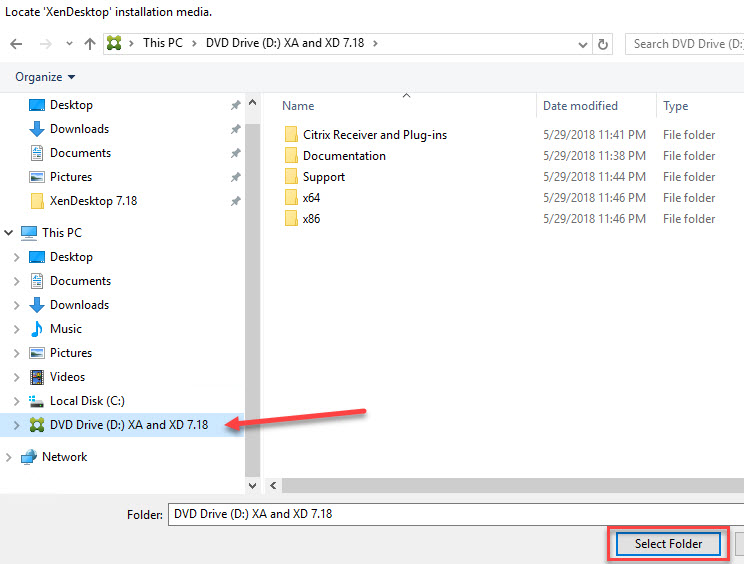
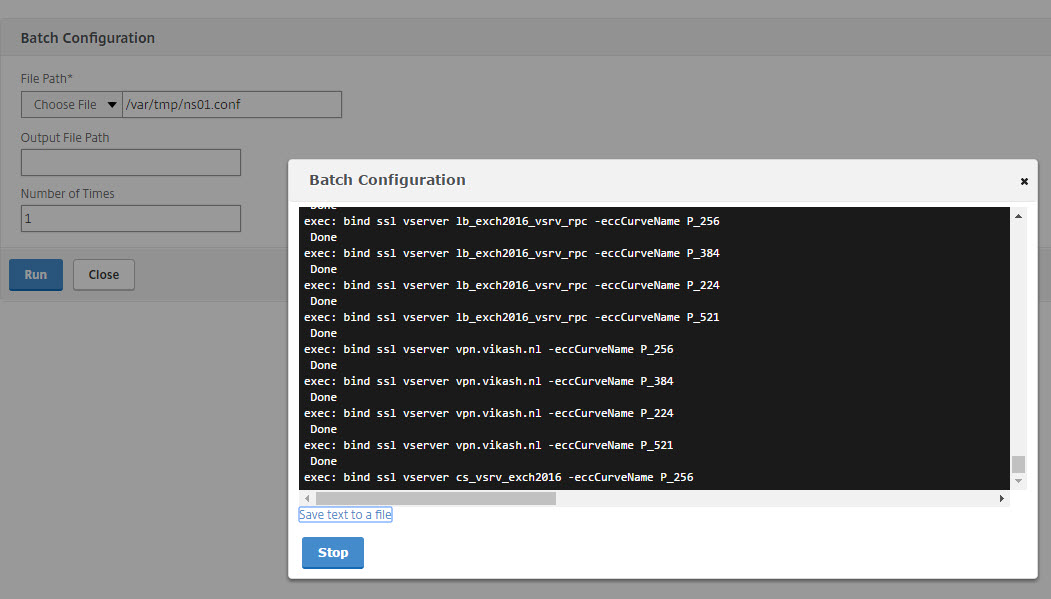
Select the file we edited and prepared for import in the steps above. Click on Open.

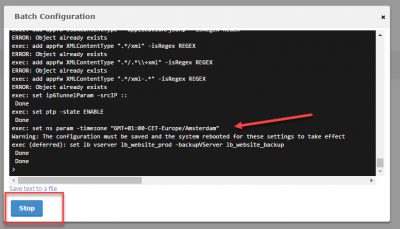
Click then on Run to start the import.

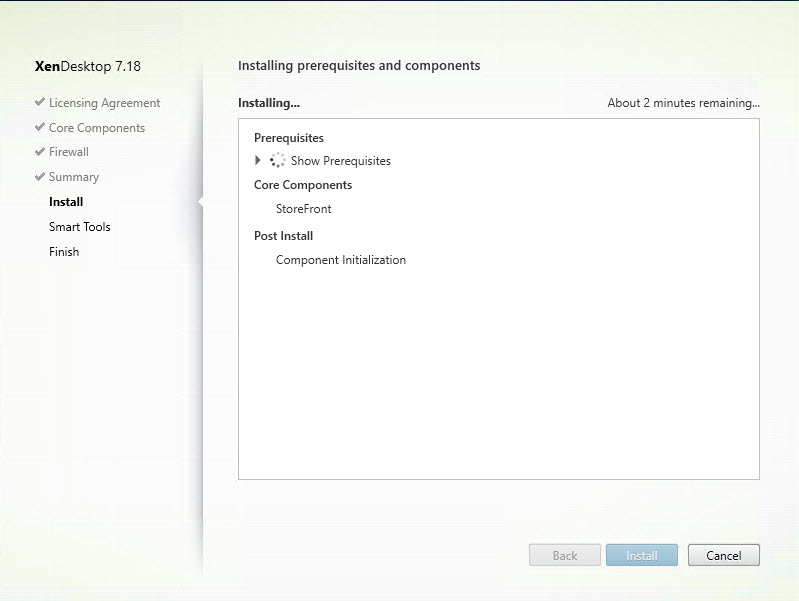
The import will start.

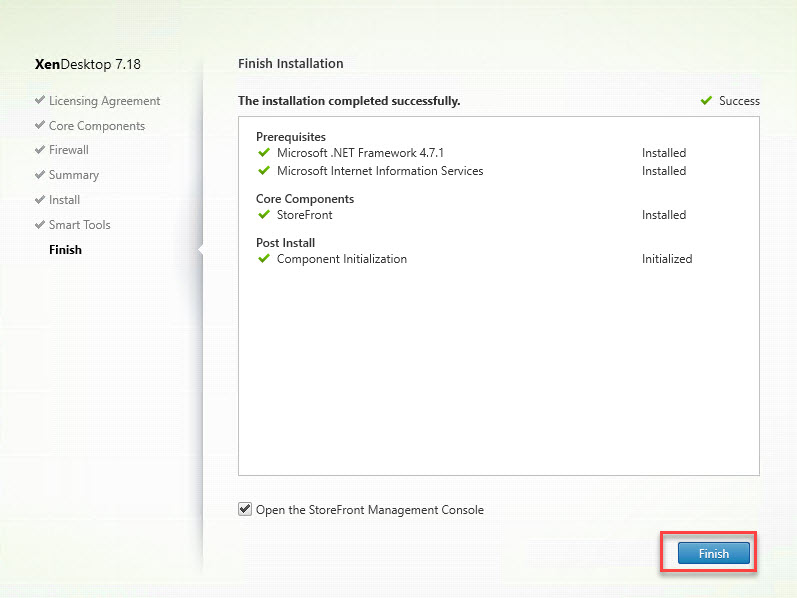
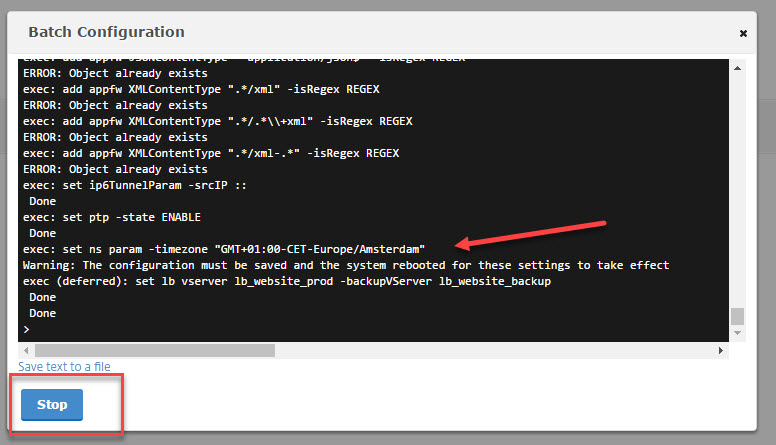
When the import is finished you will see a message that a system reboot is needed. Click on Stop.

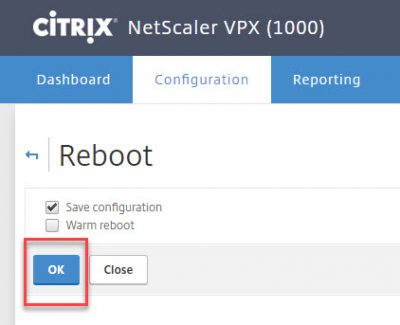
Go to System and click on Reboot.

Make sure Save configuration is checked and click on OK.

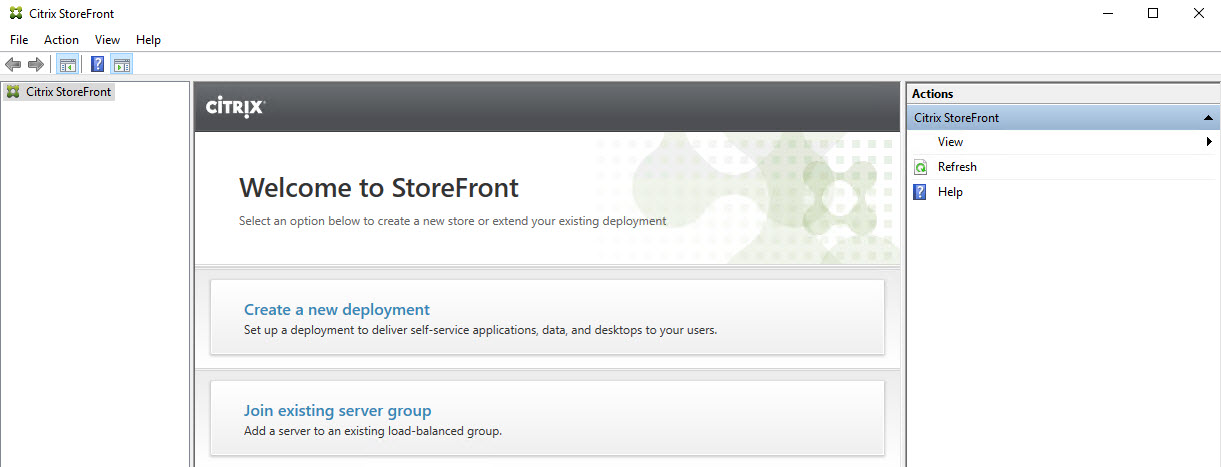
After the reboot login to your NetScaler.

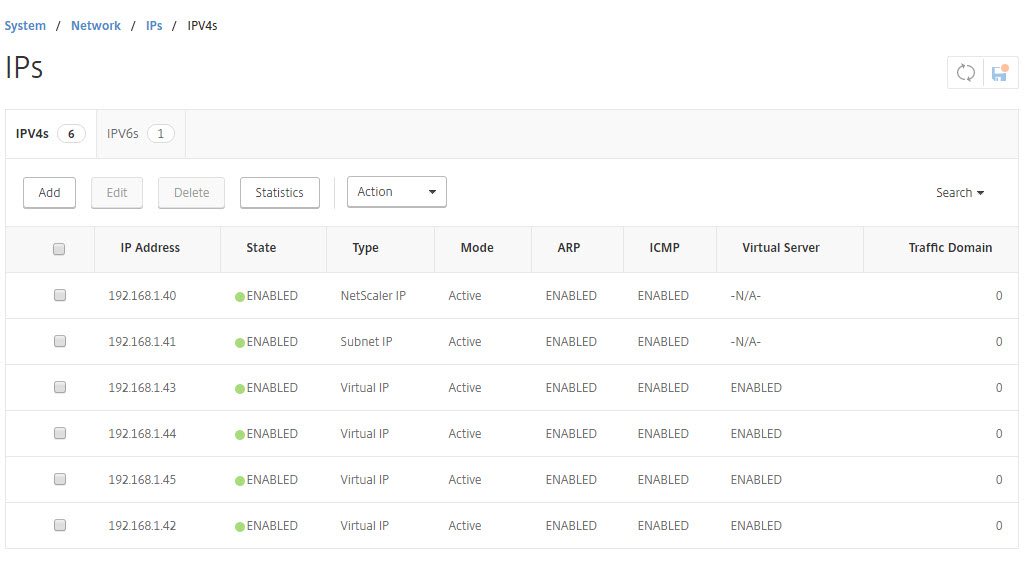
Check the IP addresses. Go to System -> Network -> IPs -> IPV4s. The list should show you only the new IP addresses.

This concludes this blog post. Feel free to contact me of you have any questions or comments.

You can follow me on twitter or add the RSS feed from my blog and you will be notified when I add new posts.

Copy NetScaler configuration and change all the IPs Read More