Azure Multi-Factor Authentication Server with Citrix NetScaler
Azure Multi-Factor Authentication Server with Citrix NetScaler can be very powerful in protecting your infrastructure. NetScaler can use LDAP (or Active Directory) to authenticate users, but to add an extra layer of security we can use Multi-Factor Authentication (MFA). The user will receive a notification in the Microsoft Authenticator app, or a phone call from Azure, when trying to log into for example NetScaler Gateway, after entering their username and password. NetScaler will authenticate the user using Azure and MFA Server.
In this blog I will show you how this can be done. On my NetScaler I have setup full SSL VPN, and will configure the virtual server to authenticate using Azure MFA. I have setup a dedicated Windows 2016 Server on-premise to run MFA Server. On premise MFA Server is the choice if you want to secure VPN’s, IIS based web applications or other on premise applications using LDAP or RADIUS authentication.
Deliverables of this post:
- Citrix NetScaler SSL VPN using MFA authentication.
- Setup MFA Server on premise.
Requirements for the configuration:
- Citrix NetScaler 11.1 (www.citrix.com).
- Windows 2016 Server.
- Azure subscription.
- SSL VPN already configured on NetScaler (see this post).
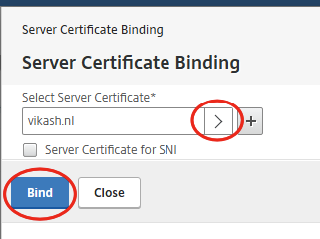
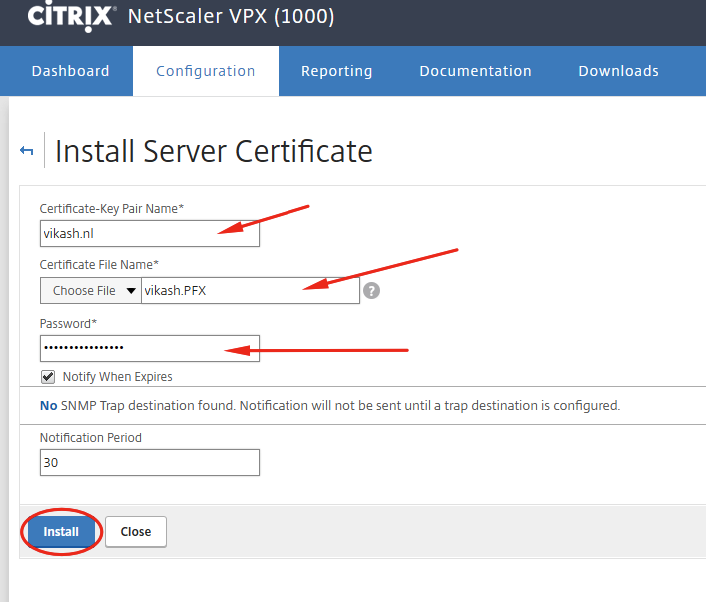
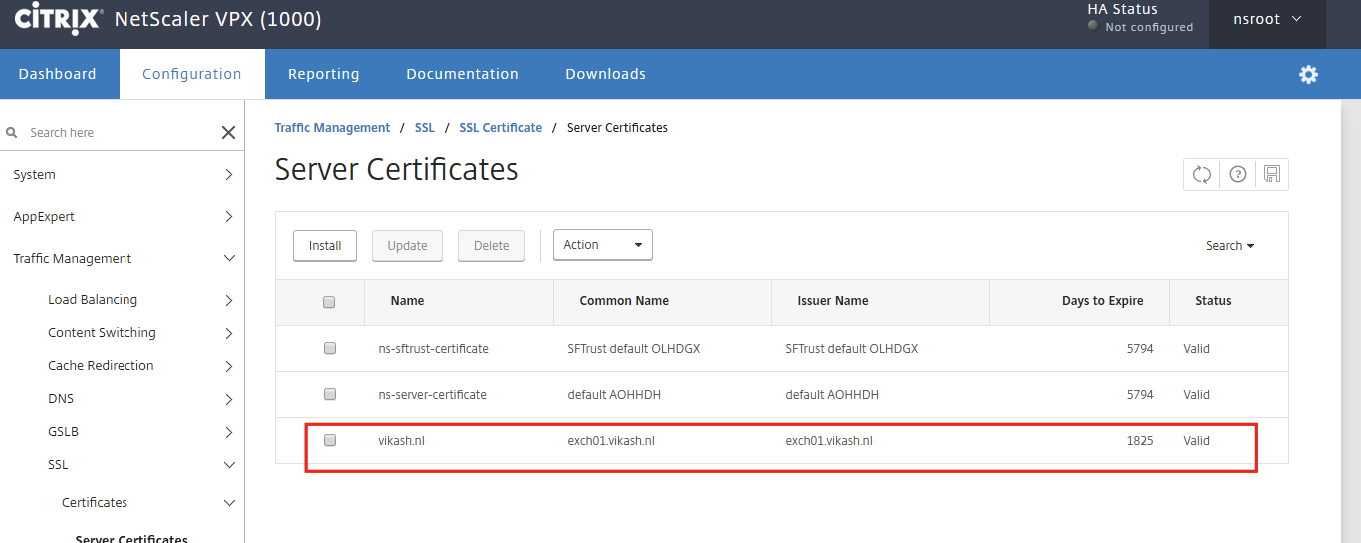
- Valid SSL certificate.
- Active Directory for user authentication.
- A hostname for the MFA Server, in my case https://mfa.vikash.nl. This must match your SSL certificate.
Setup Azure Active Directory
We have to link our on premise active directory to Azure AD, and sync the users to Azure. So we start by setting up Azure Active Directory. Log into Azure Classic Portal: https://manage.windowsazure.com.
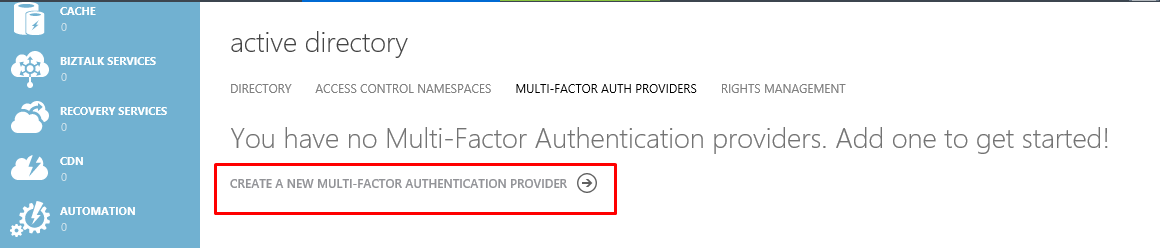
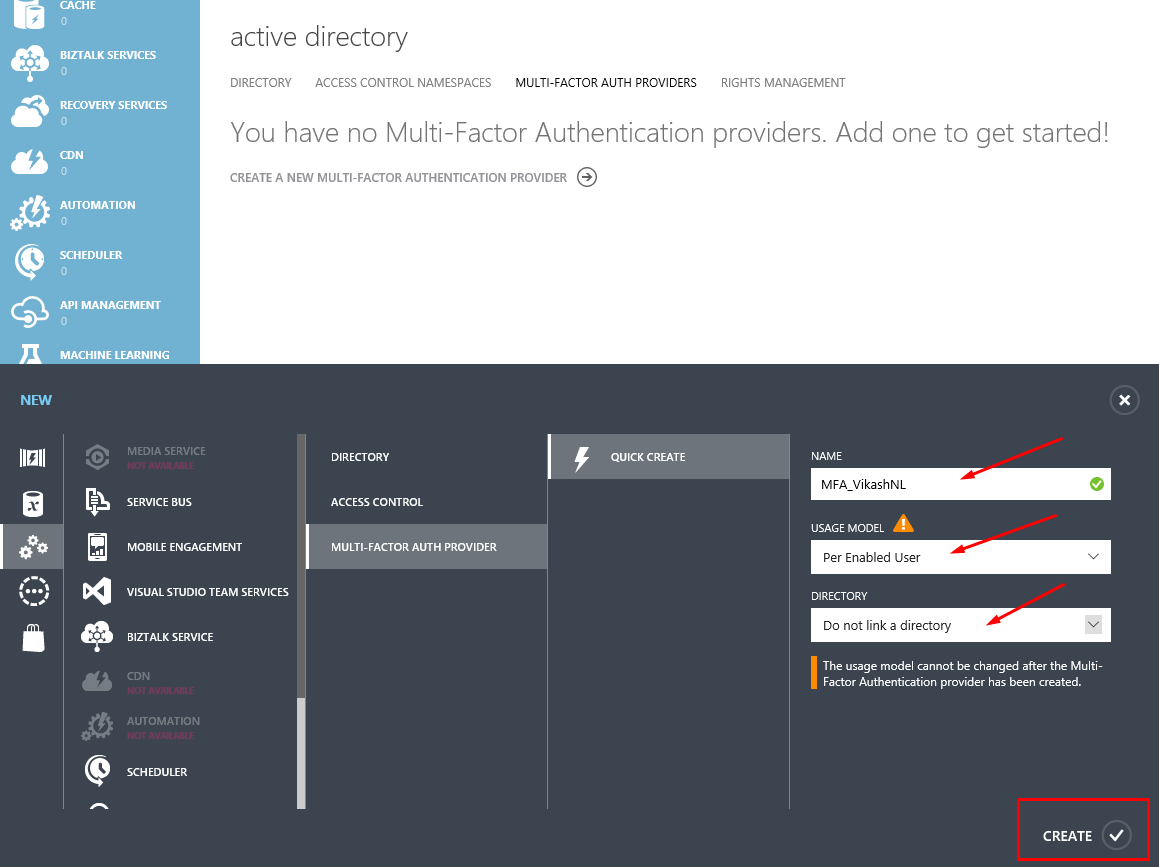
Log into Azure classic portal and navigate to Active Directory in the left column. Click on MULTI-FACTOR AUTH PROVIDERS and then click on CREATE A NEW MULTI-FACTOR AUTHENTICATION PROVIDER.
Give it a name, select the usage model and click CREATE.
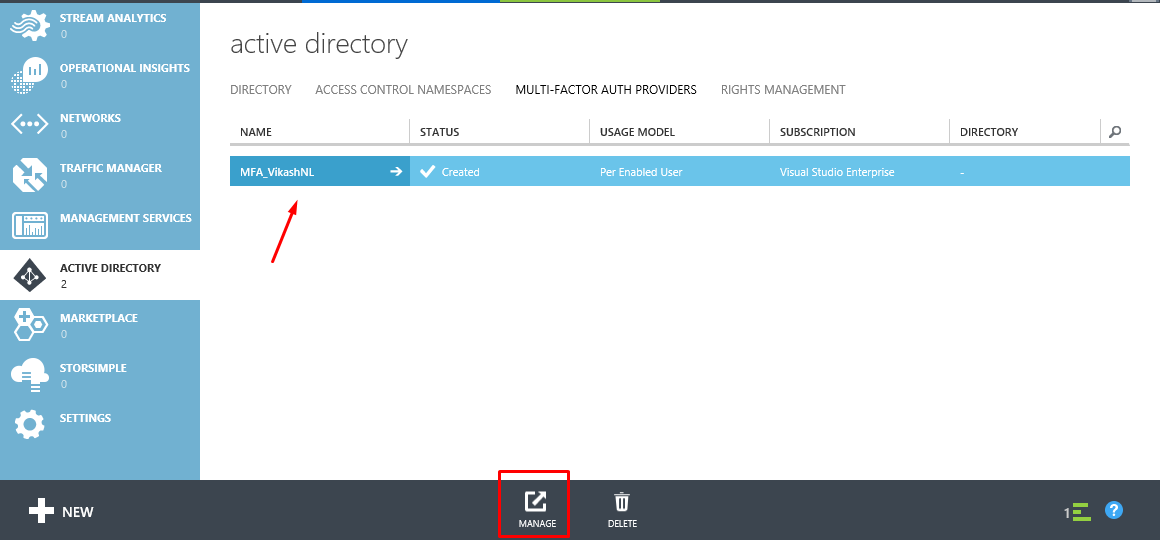
Select the provider you just created, and click on MANAGE on the bottom of the page.
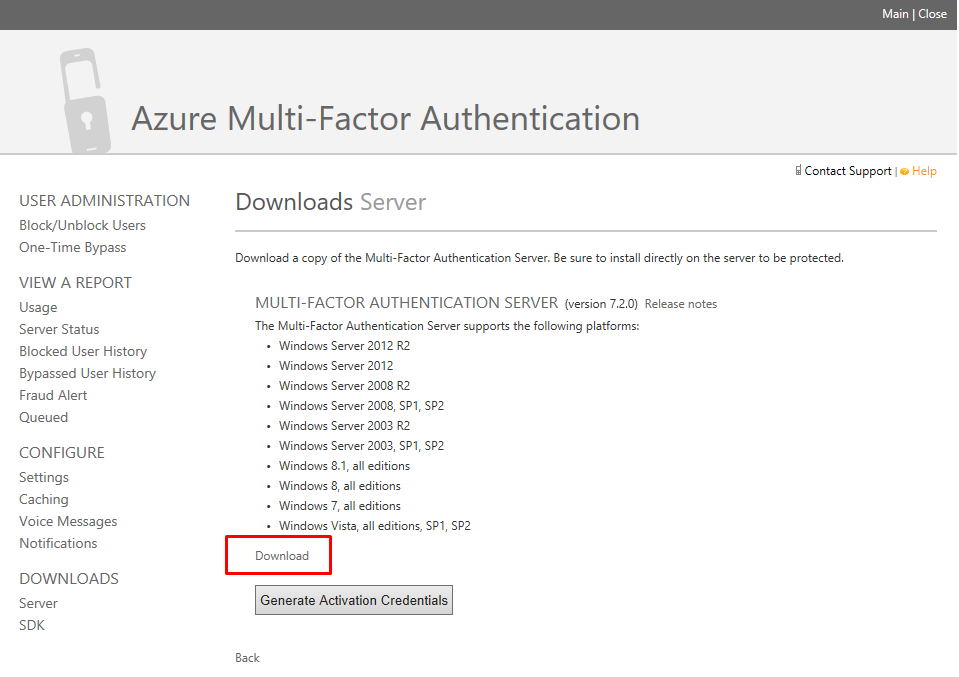
A new browser window will open, and you will be redirected to the Azure Multi-Factor Authentication website to download the MFA Server software. Click on DOWNLOADS.
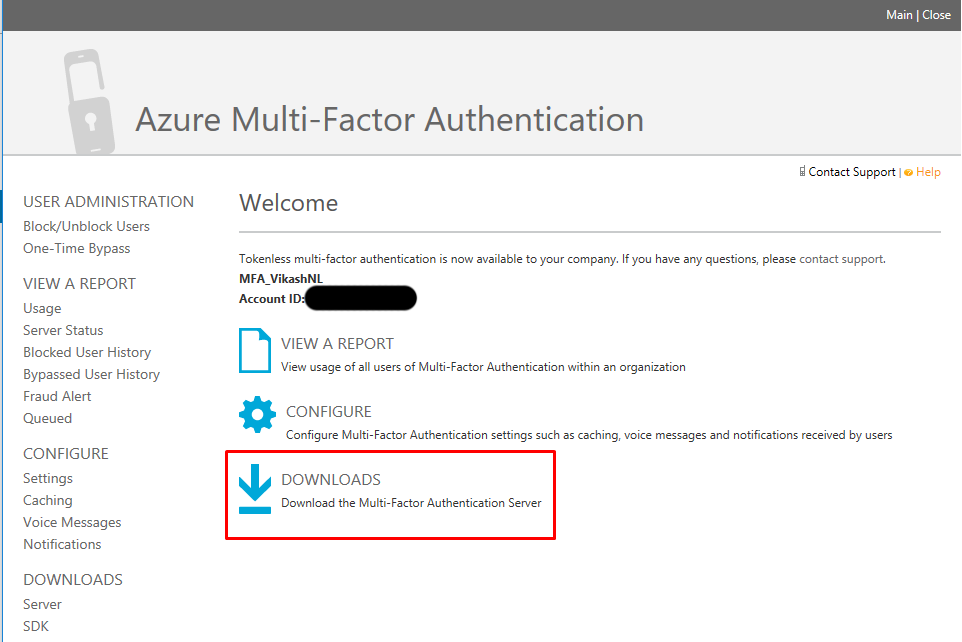
Then click on Download to start the download. Save the setup file on your Windows Server where you want to install the MFA Server software. Leave this page open.
Setup MFA Server
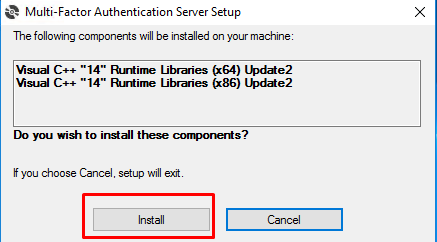
Switch to your Windows Server and start the installation of MFA Server. It will install some runtime libraries, click on Install.
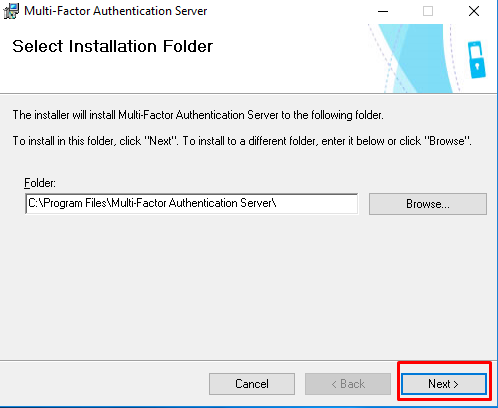
Click on Next.
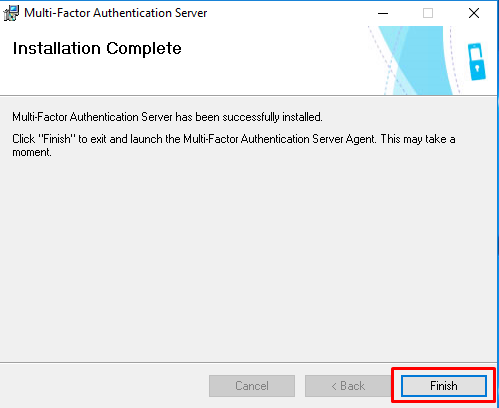
Click on Finish after the installation is complete.
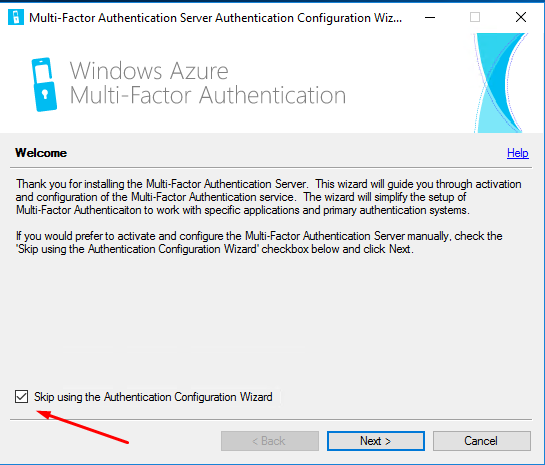
The Configuration Wizard starts. Select the checkbox Skip using the Authentication Configuration Wizard. We will configure MFA manually. Click then on Next.
Activate MFA Server
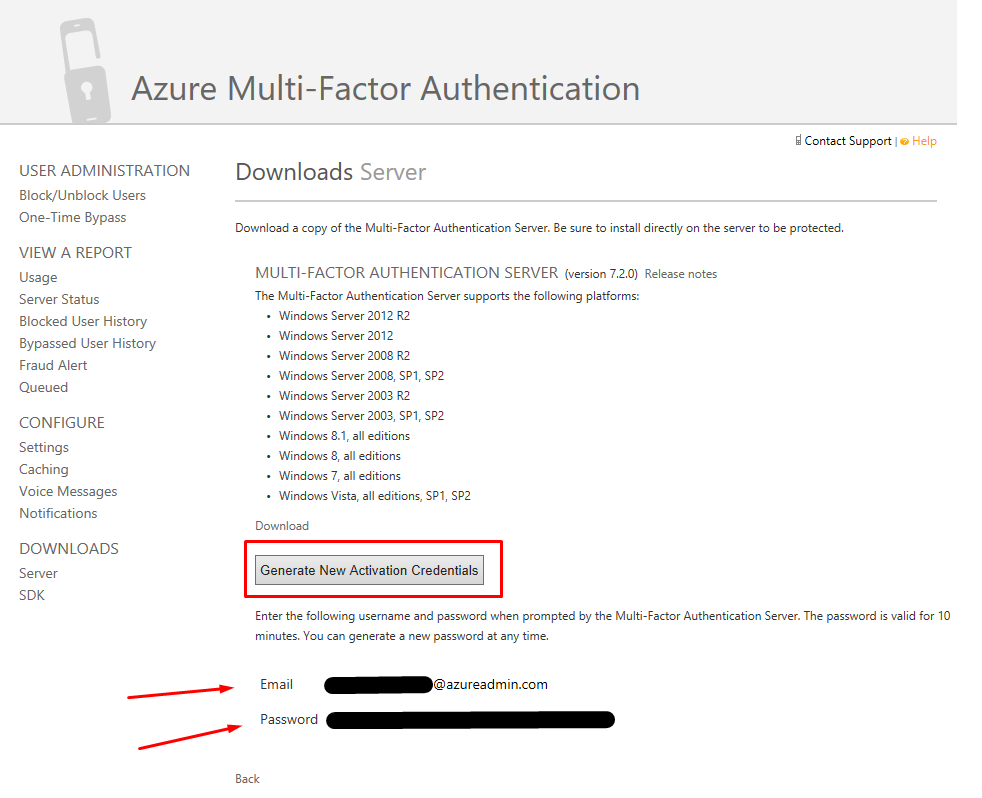
Now we have to link and authenticate our new MFA Server to Azure MFA. Go back to the Downloads Server page, and click on Generate New Activation Credentials. They are only valid for 10 minutes.
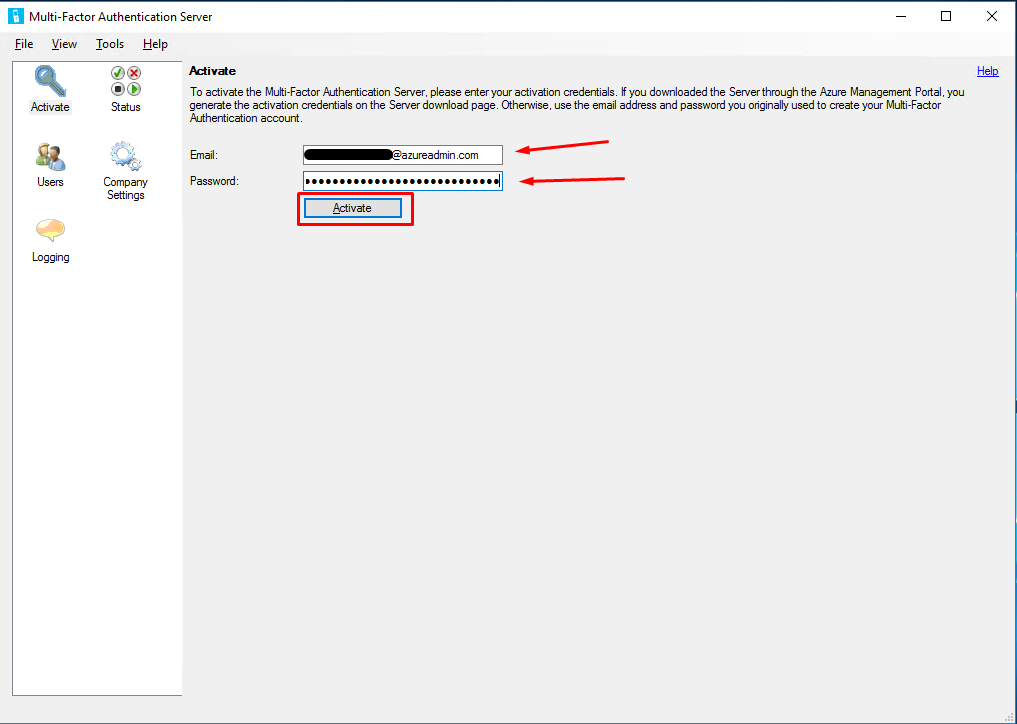
Go back to your MFA Server, where you will be prompted to activate the MFA Server. Enter the Email and Password you got in the step above, and click on Activate.
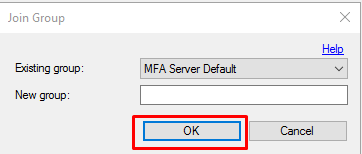
Click on OK on the Join Group window.
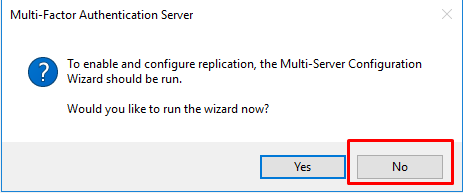
Click on No when asked of you want to run the wizard.
You will see the status of your MFA Server. It should say Online.

Import users to Azure
We have to import the on premise users to Azure. I will connect MFA Server to my Active Directory using a specific account (service account). This is the same service account I am using to connect my NetScaler to my Active Directory.
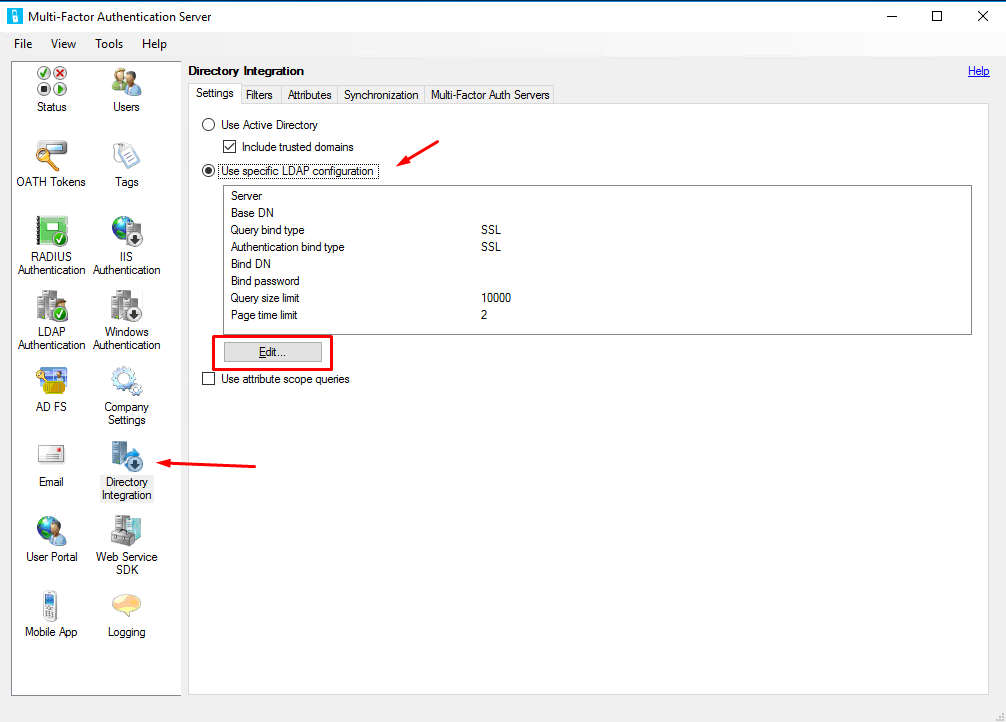
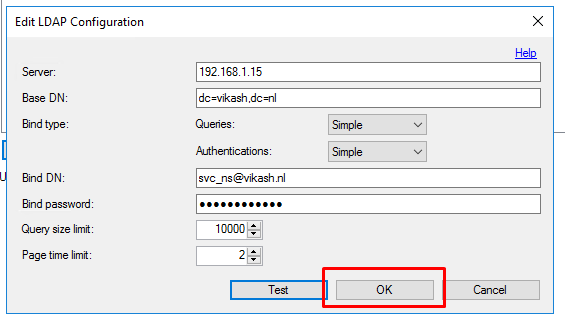
Go to Directory Integration and select Use specific LDAP configuration. Then click on Edit.
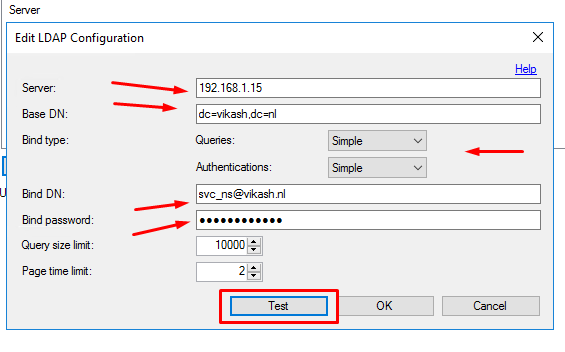
Enter the service account details. Set the Queries and Authentications to Simple and click on Test.
Click on OK on the connection successful dialogue.
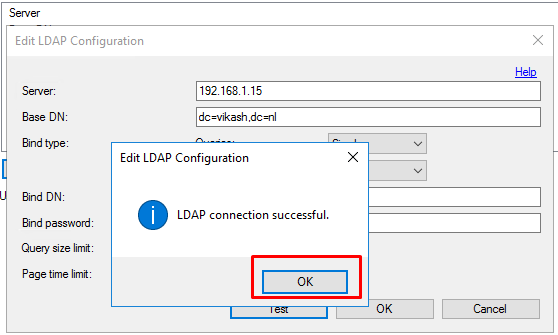
Then click on OK to close the Edit LDAP Configuration window.
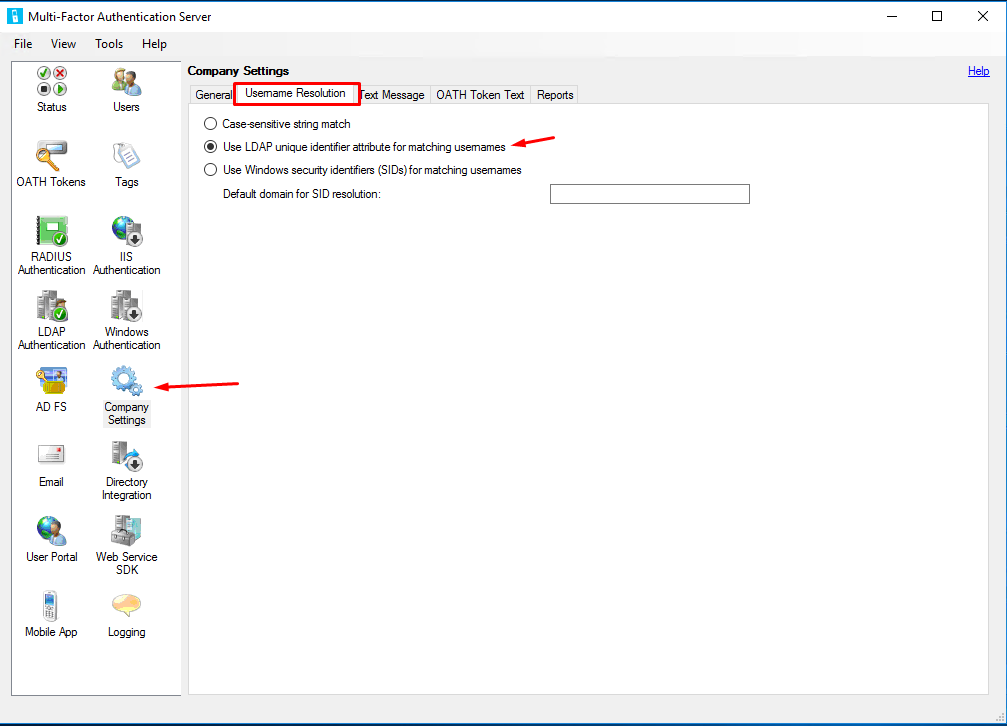
Go to Company Settings and enable Use LDAP unique identifier attribute for matching usernames.
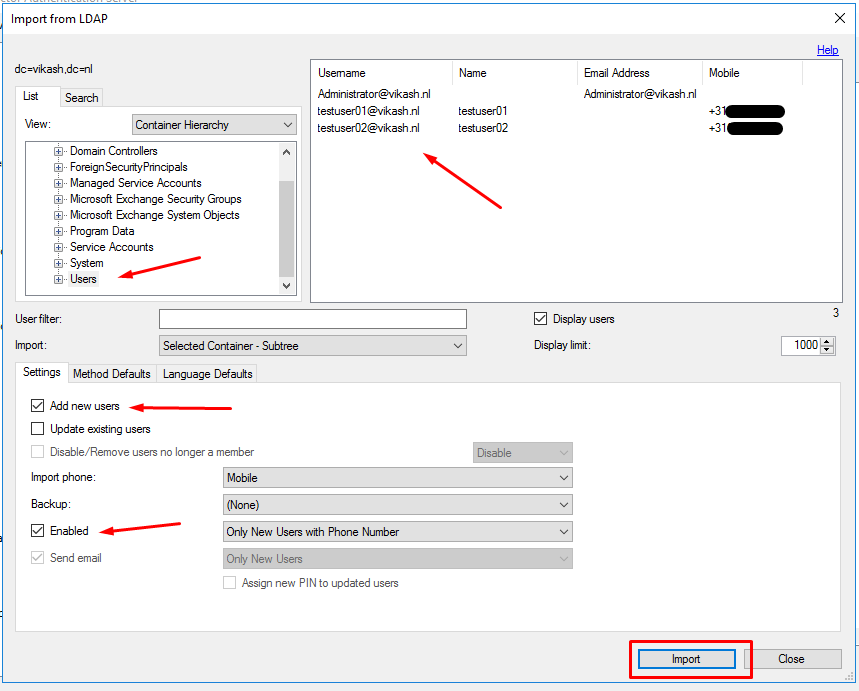
Now MFA Server is setup to read the Active Directory users. Let’s import them. Go to Users and click on Import from LDAP.
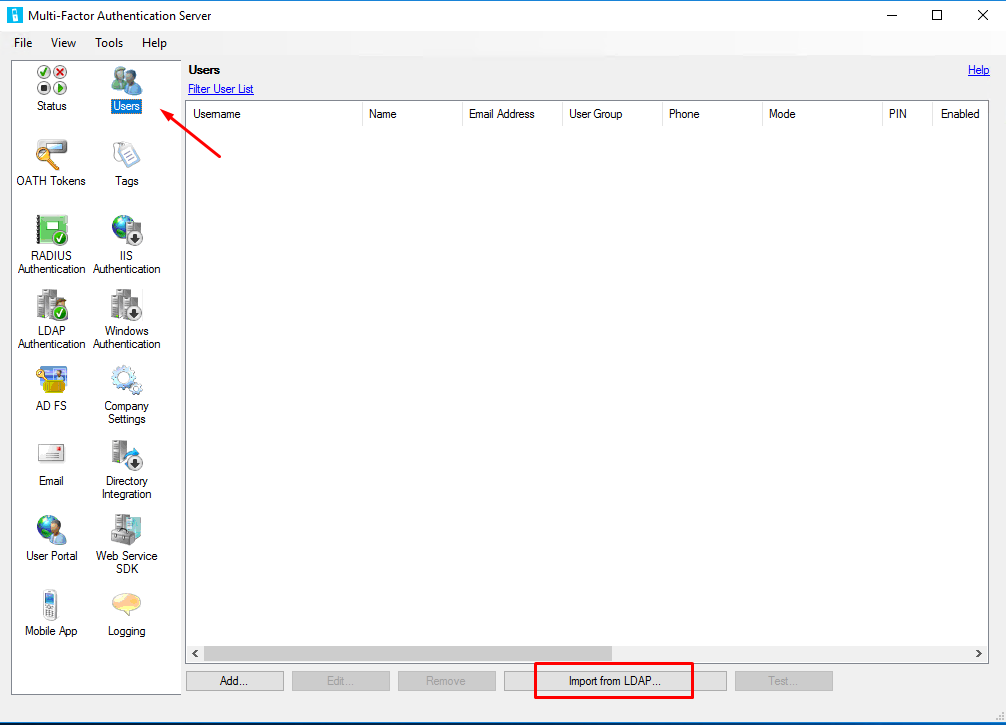
Navigate to the container where your users are. You can then select specific users, or just select the container and then import. Check the box Add new users and also Enabled to enable users where the Phone Number is already in Active Directory. Click on Import.
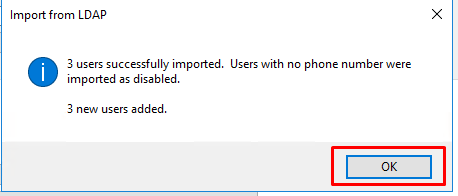
It will tell you how many users were imported. Click on OK.
Test Azure user connection
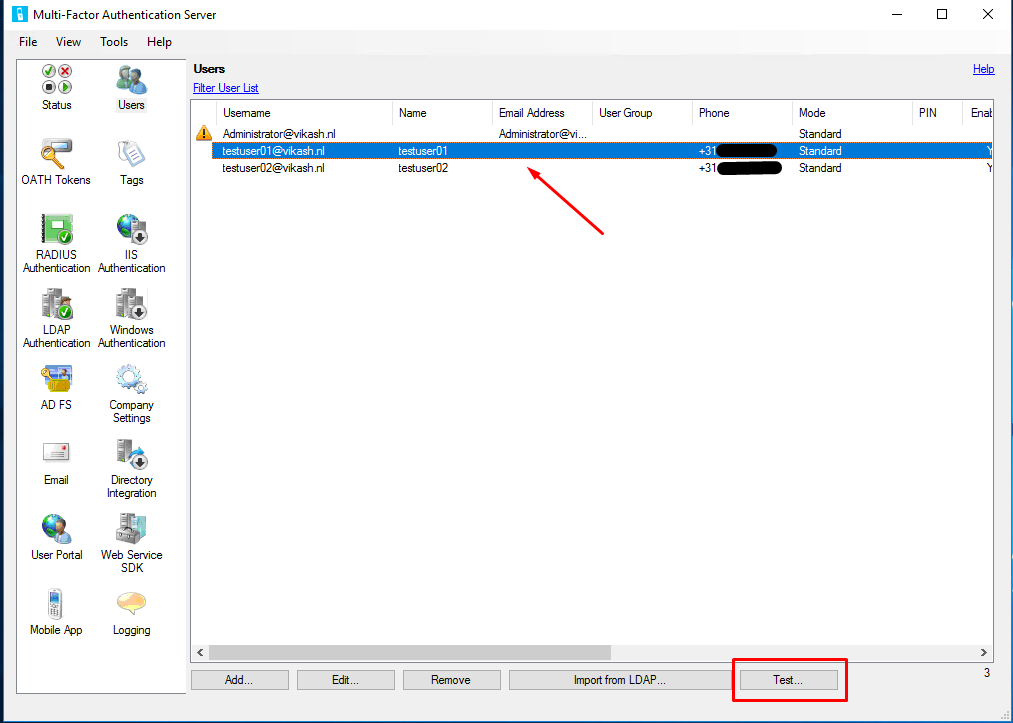
Now that we have the users in Azure, it is time to test! Let’s see if the MFA Server can communicate with Azure for a specific user we imported.
Go to Users and select a user. Click on Test.
You will get a popup asking you for password. Enter the password, and select LDAP Bind. Click on Test.
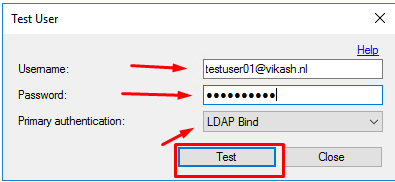
MFA Server will now connect and authenticate the user on Azure.

The user will get a phone call from Azure. Tap on Accept.
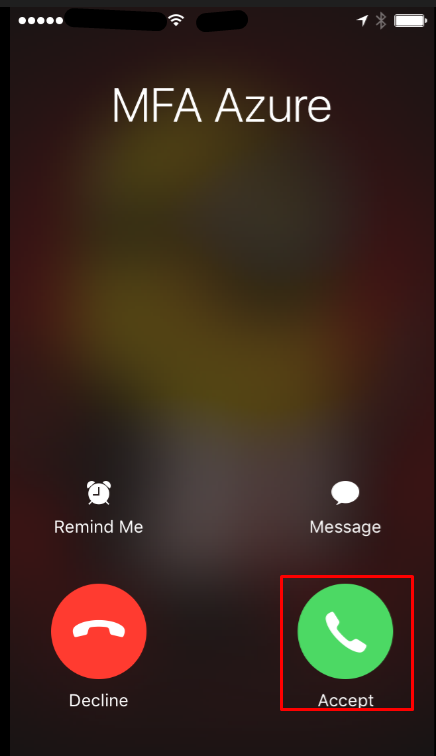
To accept the authentication you have to tap the # key.

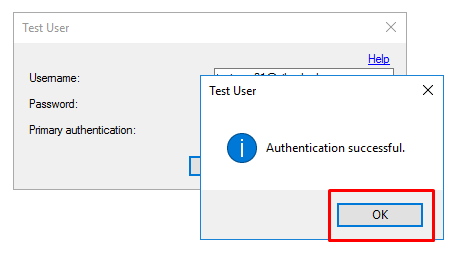
Back on the MFA Server you will now get an Authentication successful message. Click on OK.
Configure NetScaler to use MFA
Before we can configure NetScaler, we have to setup a few things on the MFA Server to allow communications from the NetScaler.
Allow LDAP communication from NetScaler
We have to allow LDAP communication for NetScaler on the MFA Server. Go go LDAP Authentication and enable Enable LDAP Authentication. Click on Add.

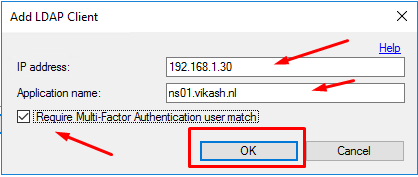
Enter the NSIP of the NetScaler and give it a name. Check the box Require Multi-Factor Authentication user match. Click on OK.
Import LDAP service account
Now go to Users and import the service account you will be using to communicate from the NetScaler to the MFA Server when doing LDAP searches. This user has to be disabled, so make sure the phone number field is empty. Otherwise each time NetScaler queries the MFA Server for LDAP searches, MFA will also call the service account user.

Automatic user synchronization
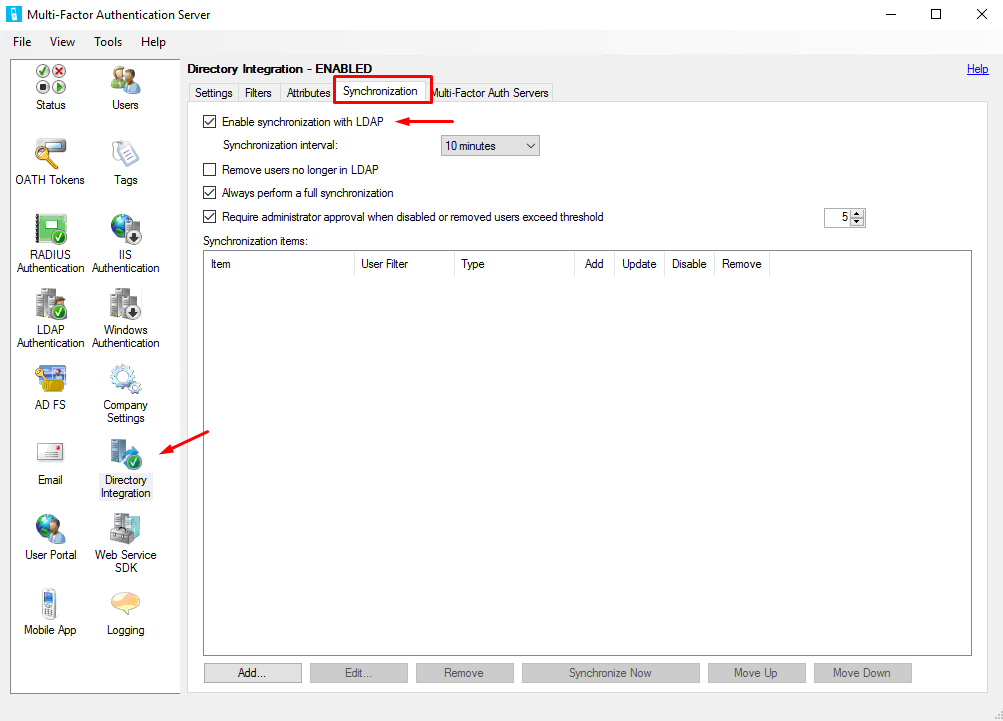
Enable automatic synchronization between Active Directory users and Azure. This way you won’t have to manually add or remove users to Azure (as long as they are in the correct container).  Go to Directory Integration, click on the tab Synchronization and select Enable synchronization with LDAP. Configure the interval as you like.
Add MFA as LDAP Server on NetScaler
Log into you NetScaler management interface. Navigate to System -> Authentication -> LDAP -> Servers. Click on Add.
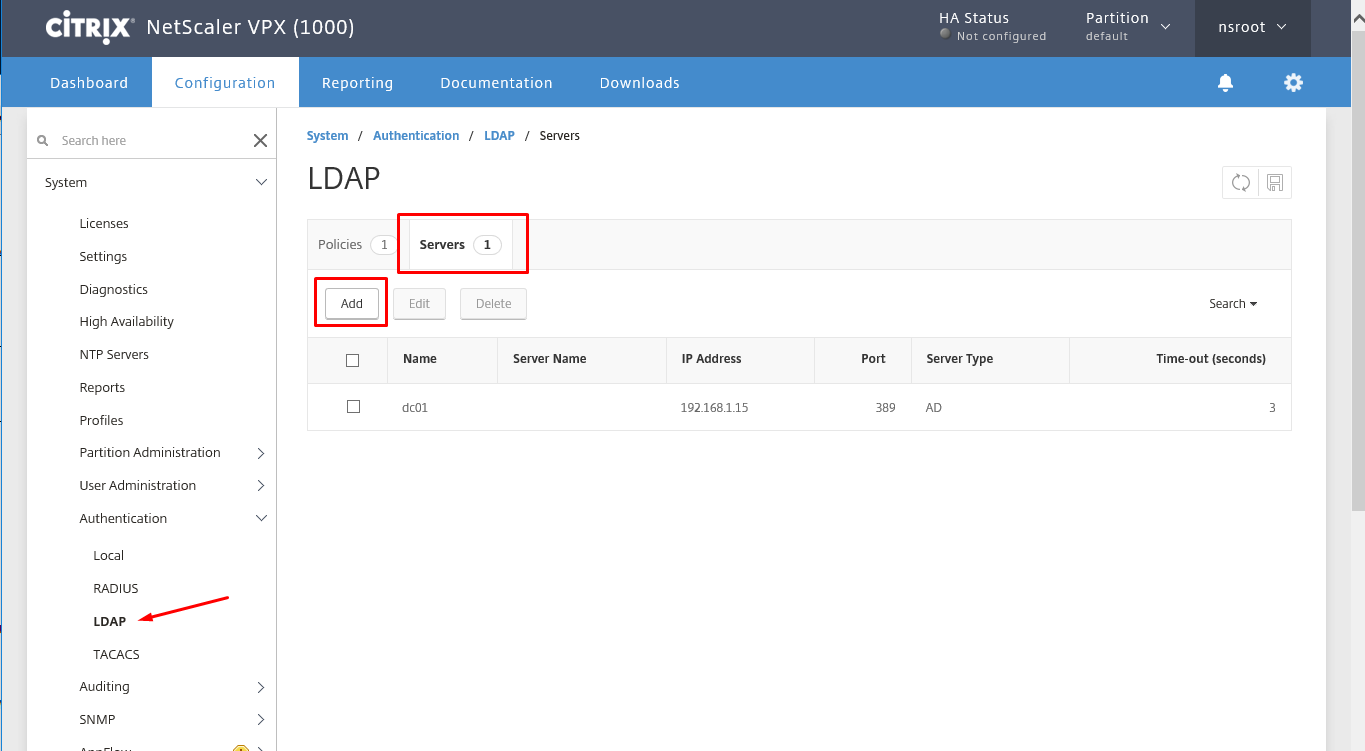
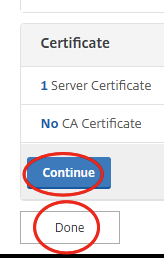
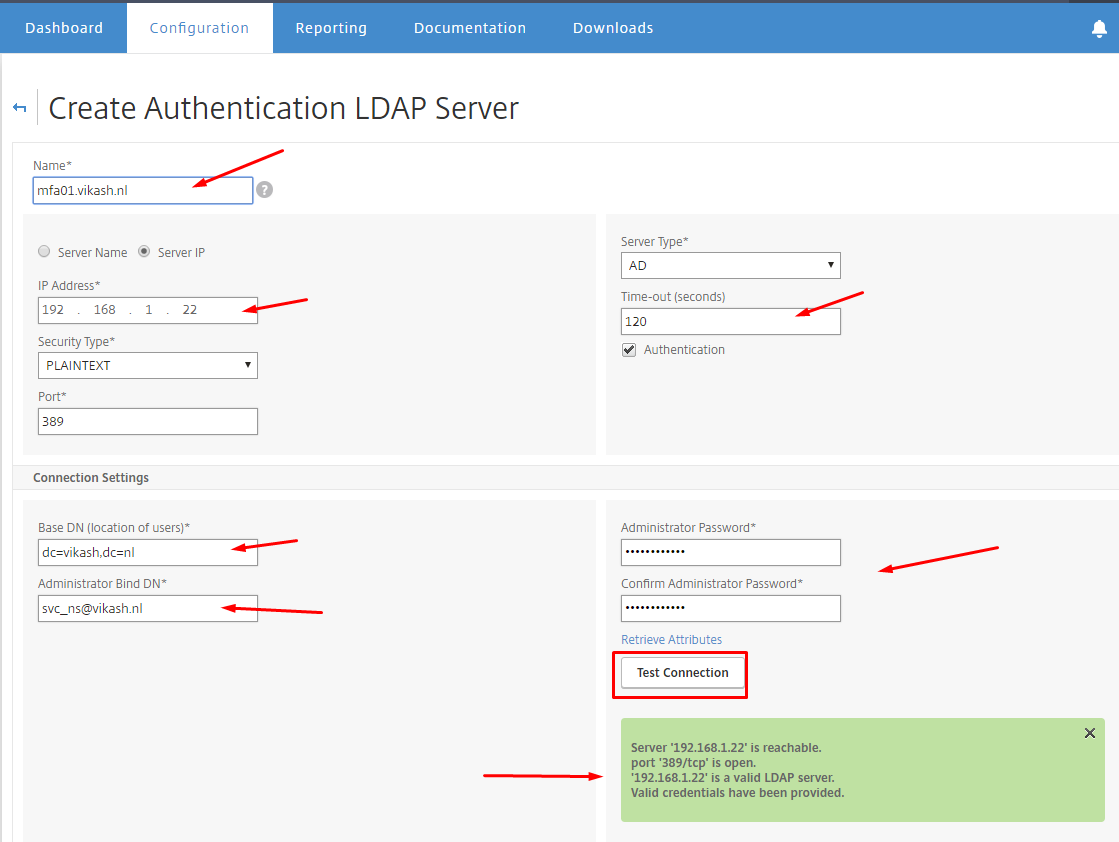
Enter a name, and specify the IP address of you MFA Server as LDAP server. Then enter the information of the service account we will use to authenticate NetScaler to the MFA Server. Make sure to set the Time-out to a time in which the user has to accept the MFA request, either using phone call or the authenticator mobile app. In my case the user has 3 minutes to complete the authentication. Then click on Test Connection. If everything went fine, the green box will appear.
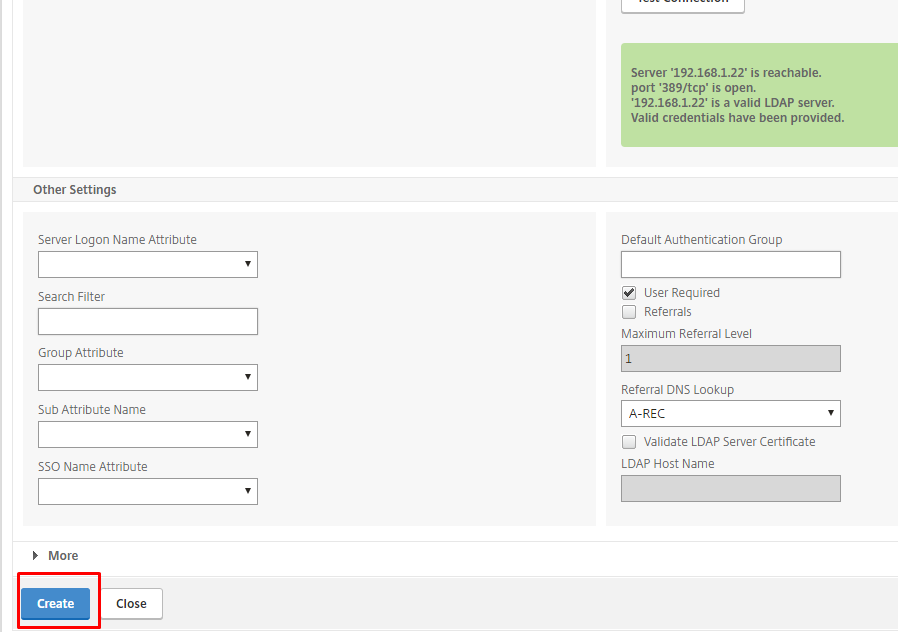
Scroll to the bottom of the page and click on Create.
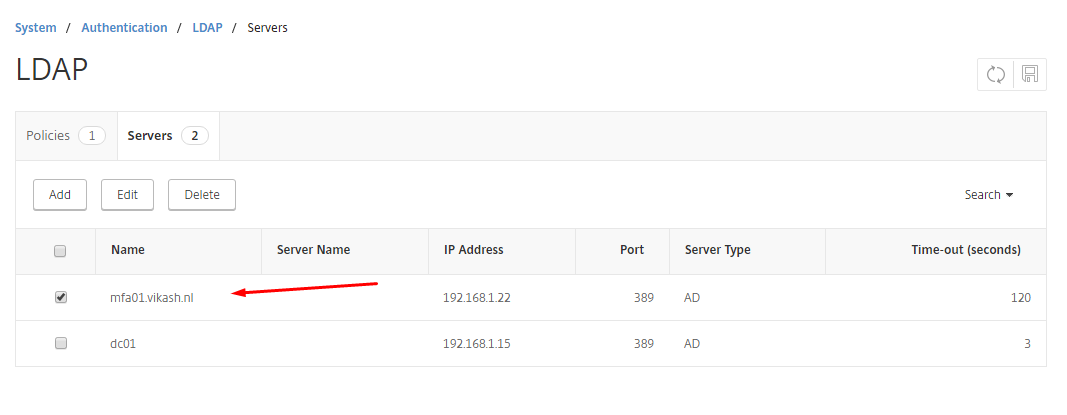
You should now see the MFA Server in your list of LDAP Servers on the NetScaler.
Add LDAP policy for MFA Server on NetScaler
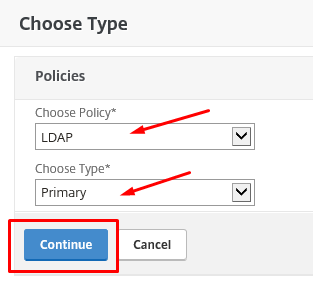
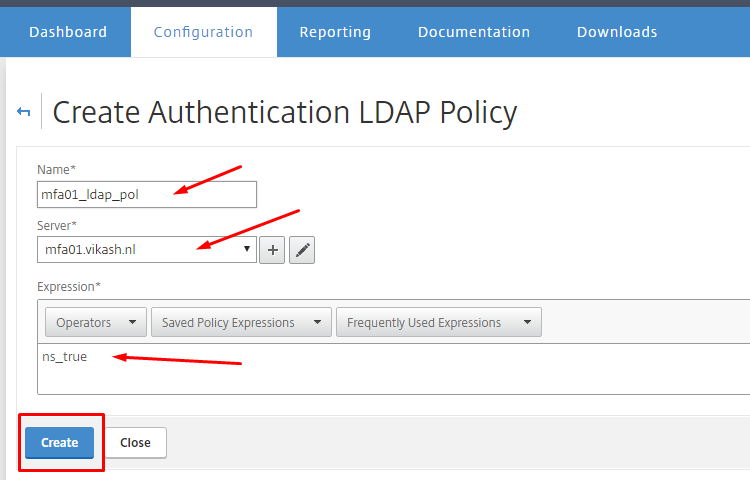
Navigate to System -> Authentication -> LDAP -> Polcies and click on Add.
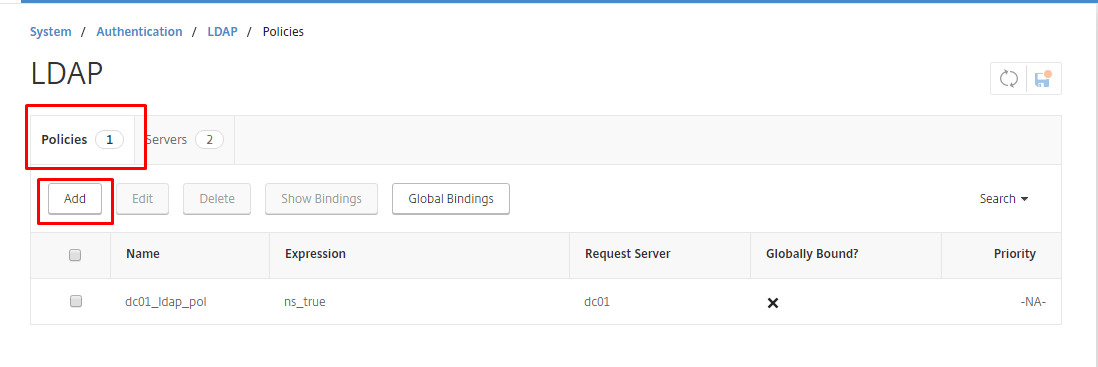
Give it a name, and make sure to select your MFA LDAP Server. Enter ns_true in the expression box and click Create.
Enable MFA Authentication for NetScaler Gateway
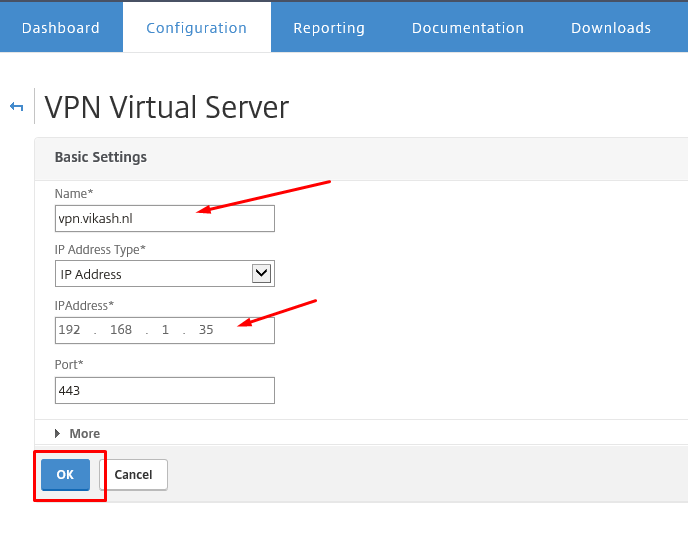
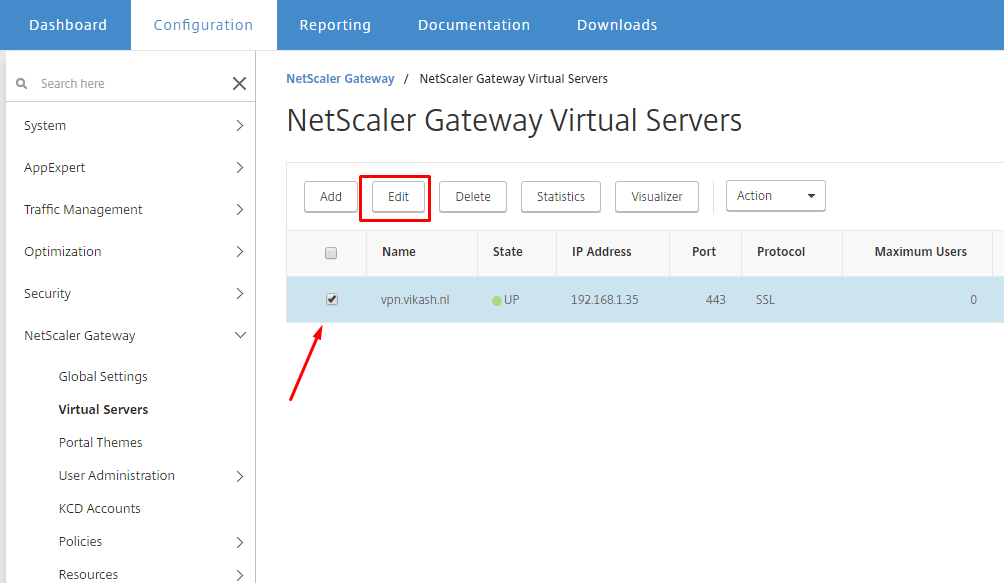
In a previous post I setup NetScaler Gateway for SSL VPN. I will modify that to use MFA for authentication. It is the same concept for other NetScaler Gateway Virtual Servers you have.
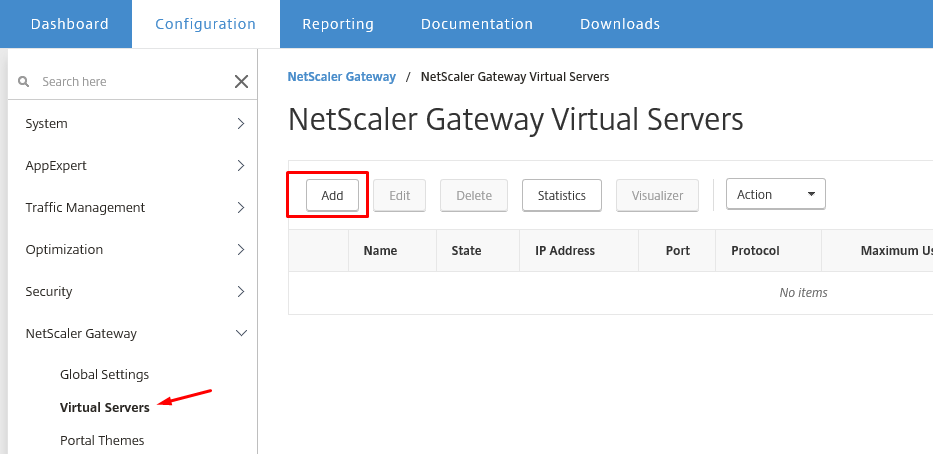
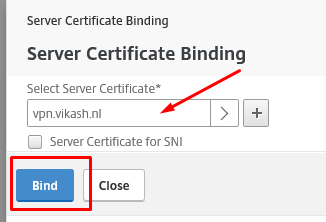
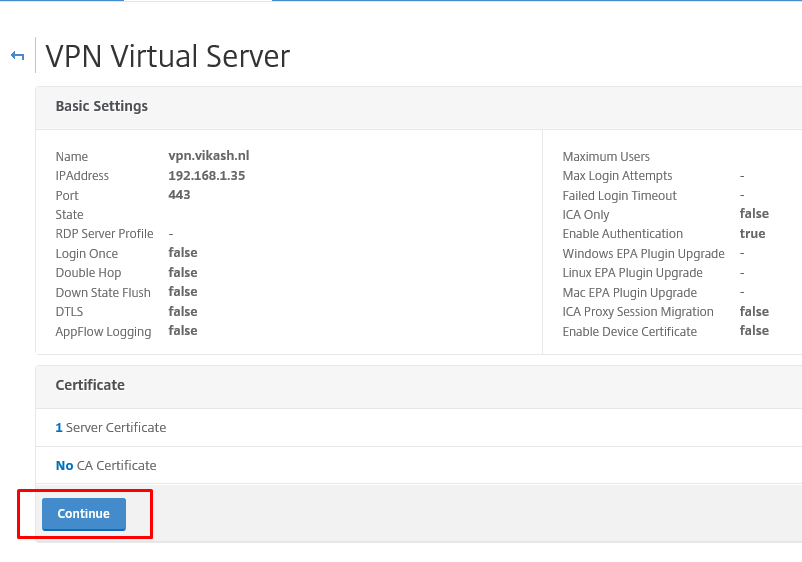
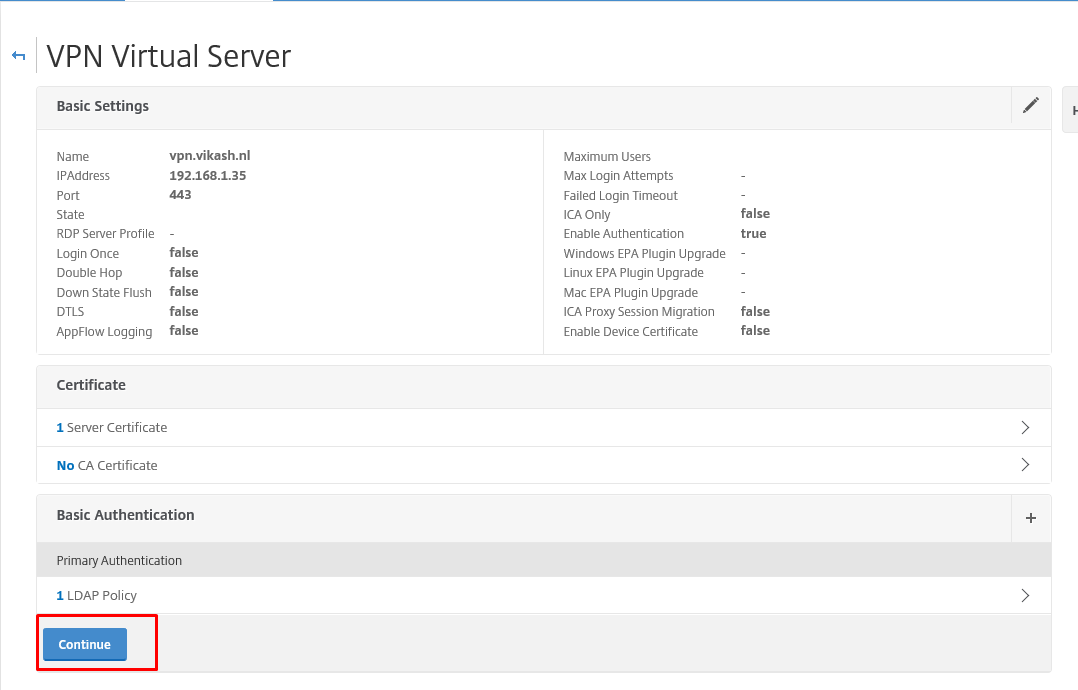
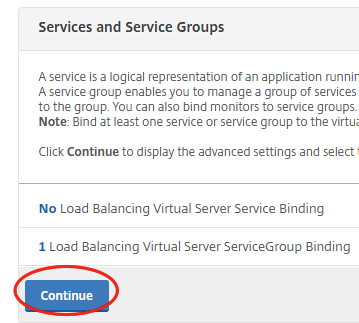
Navigate to NetScaler Gateway -> NetScaler Gateway Virtual Servers. Select your virtual server and click on Edit.
Scroll down to the Basic Authentication section and select your LDAP Policy.

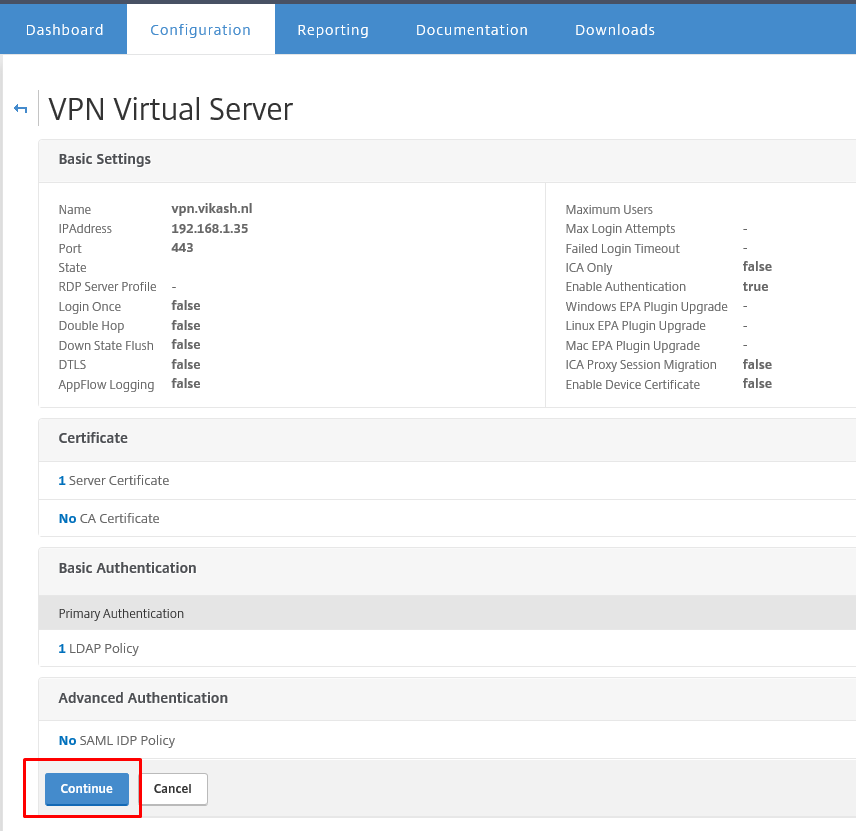
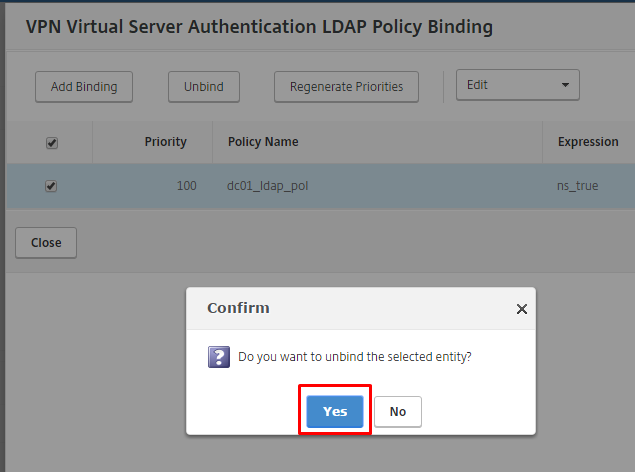
Select the already existing LDAP policy to unbind it. Click on Unbind.
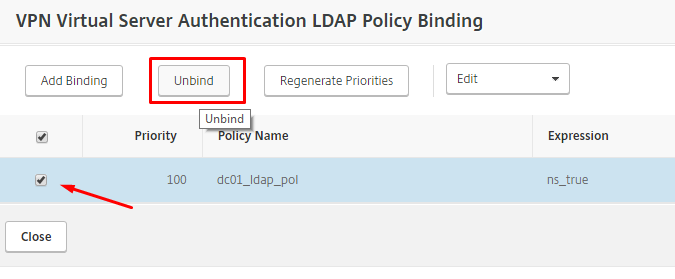
Click on Yes to confirm.
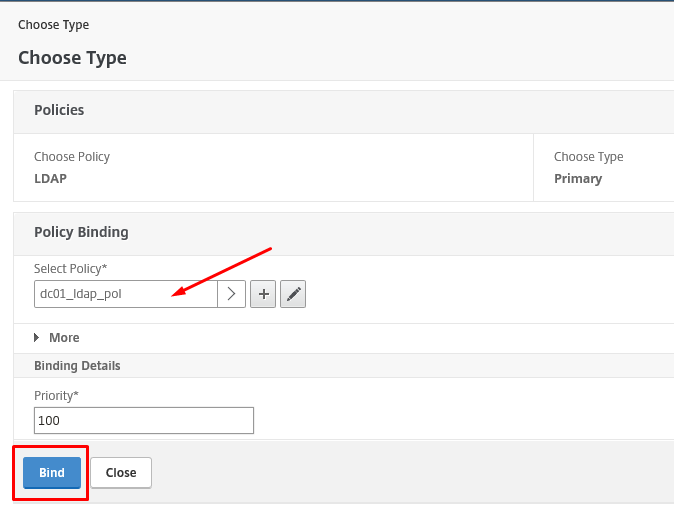
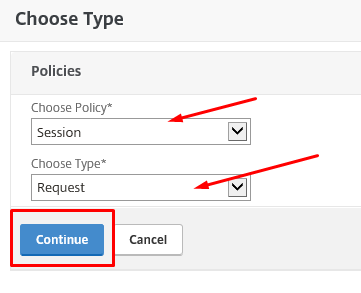
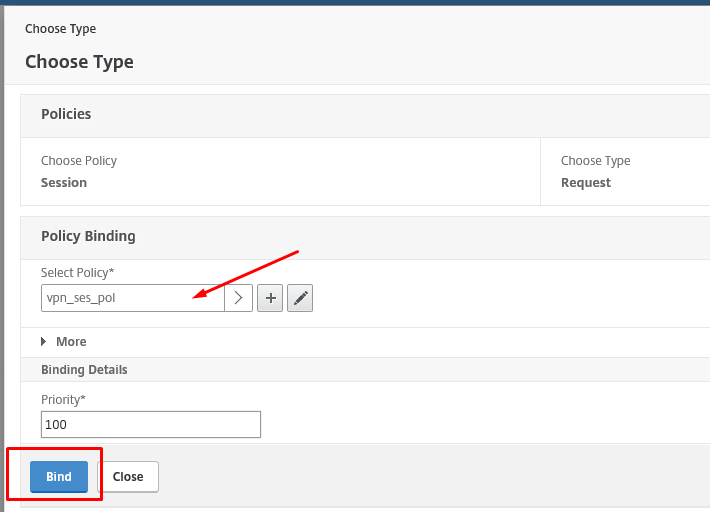
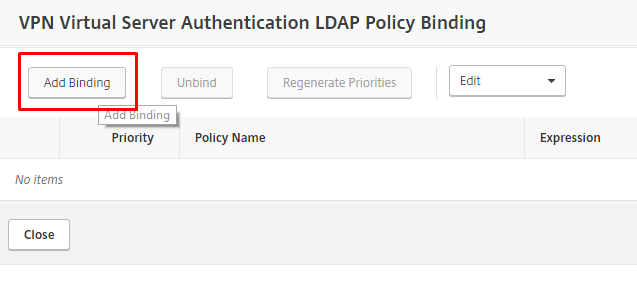
Now we can bind the MFA LDAP Policy we created earlier. Click on Add Binding.
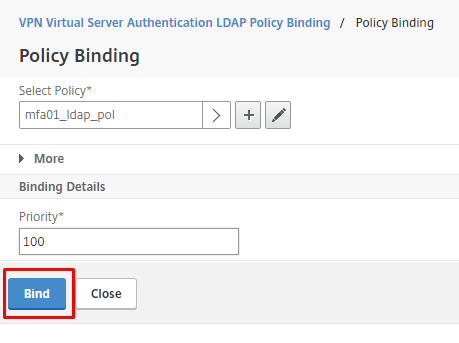
Make sure it the MFA LDAP policy is selected and then click on Bind.
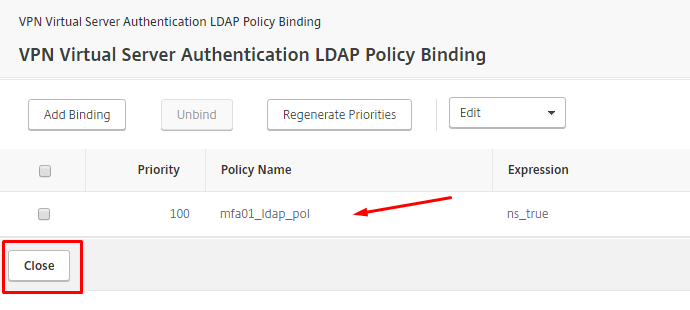
Then click on Close.
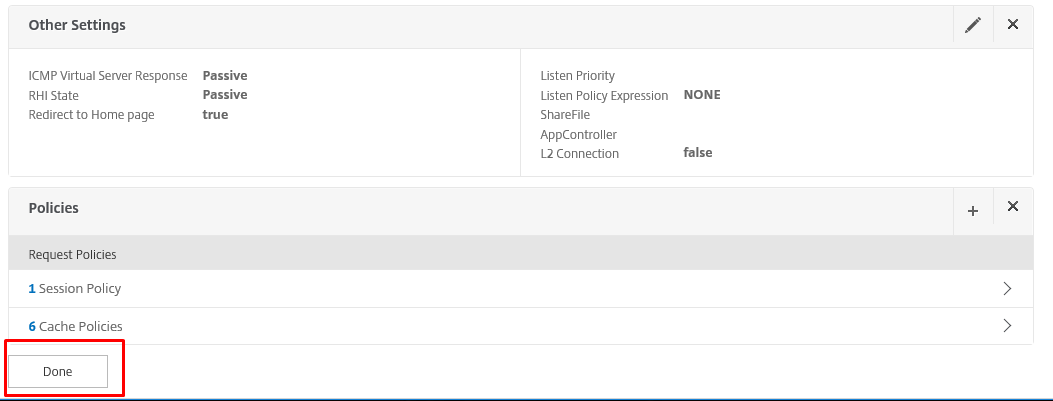
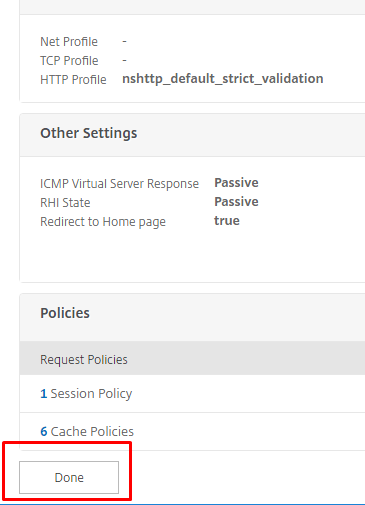
Scroll down to the page and click on Done.
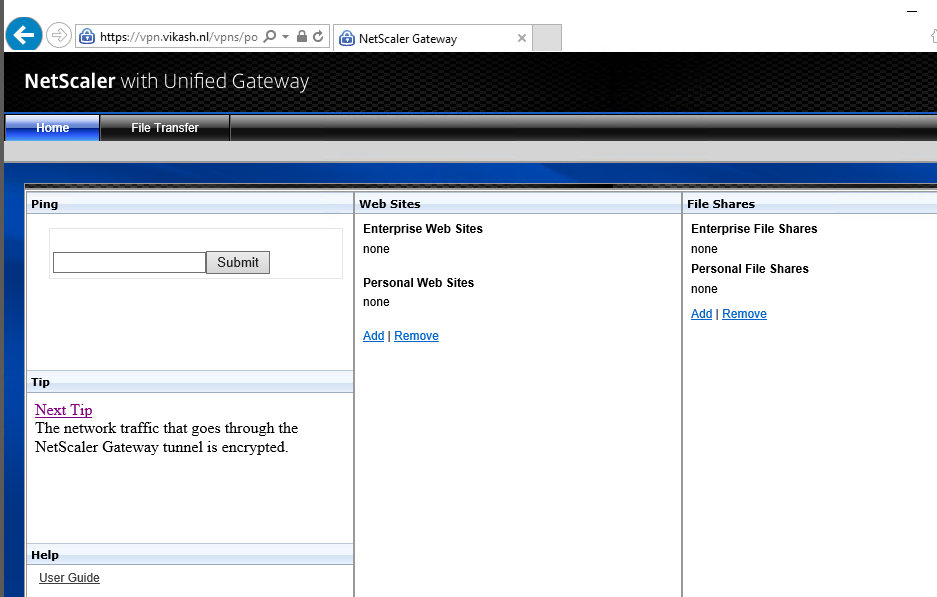
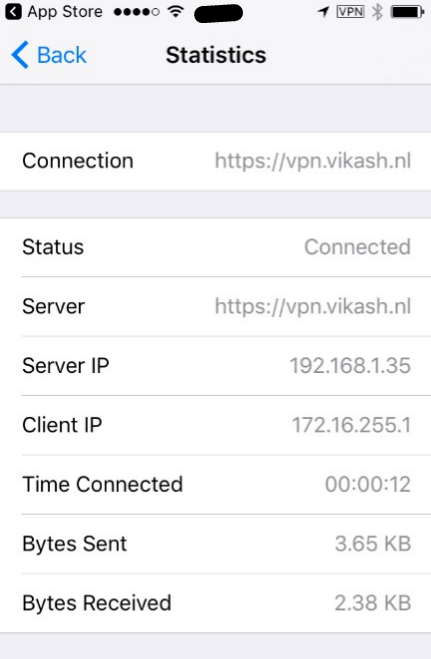
Time for testing
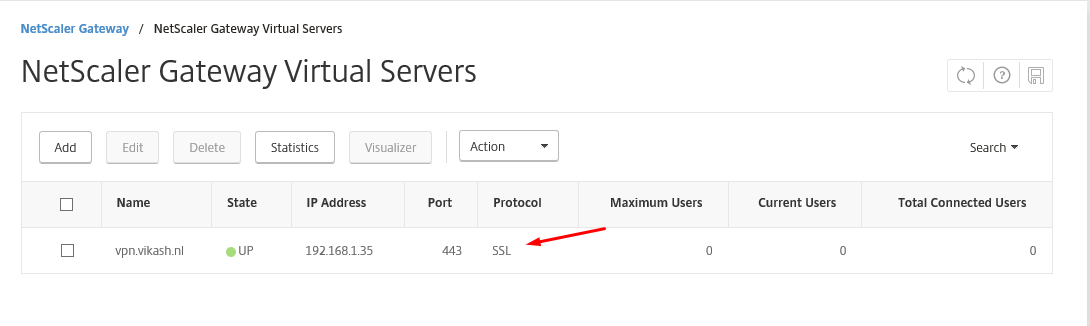
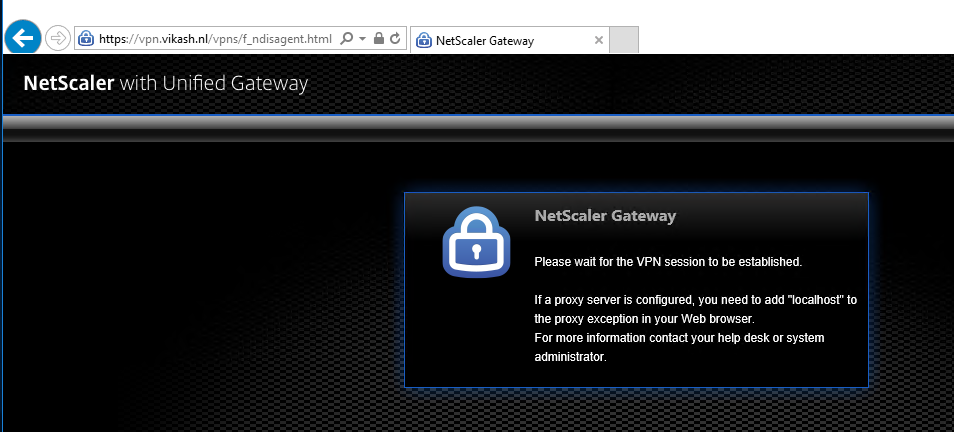
Browse to your NetScaler Gateway page. In my case that is: https://vpn.vikash.nl/. Log in using a user which is enabled for MFA. Click on Log On.
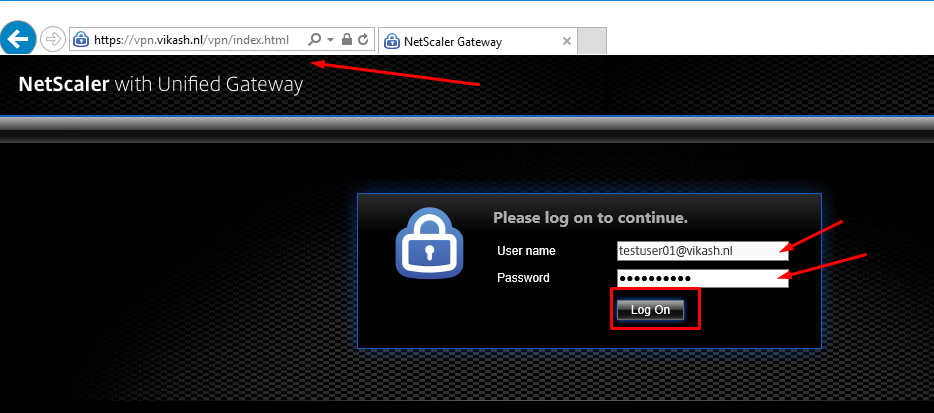
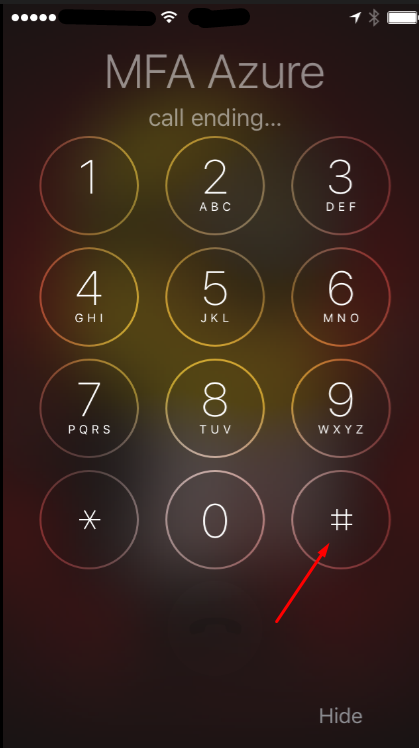
After clicking on Log On the page will not refresh. Remember the Time-Out value we adjusted earlier? This is the time this page will wait for you to authenticate. Azure will now call the user on the phone number supplied. Click on Accept.

Tap on the # key to accept the authentication request.
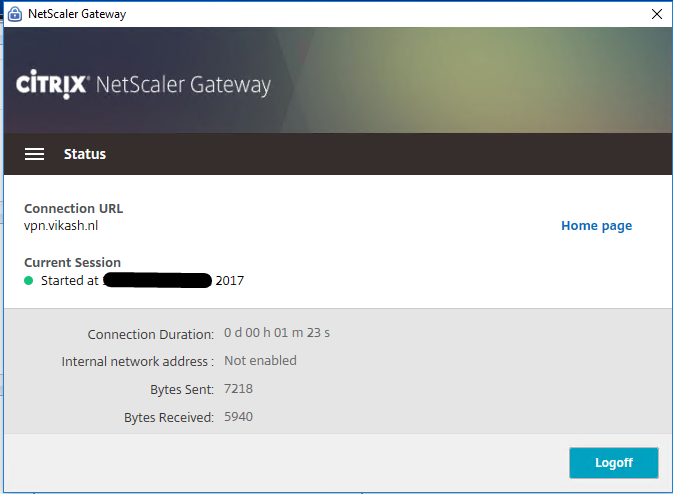
Then the browser page will refresh, because the NetScaler will receive a successful authentication message from the MFA Server.
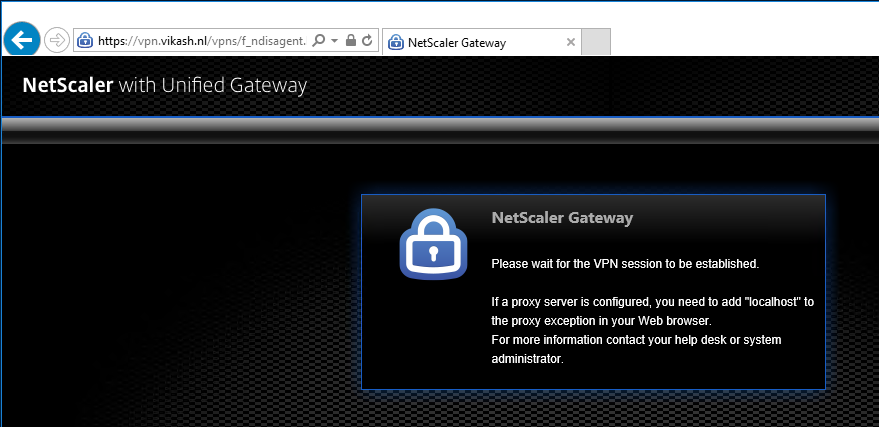
You can see this happening when you enable authentication debugging the NetScaler.

The next step is to Setup Azure MFA User Portal for Self Service.
Azure Multi-Factor Authentication Server with Citrix NetScaler Read More