

Create a backup Load Balancing Virtual Server using Citrix NetScaler
Citrix NetScaler is very powerful in Load Balancing. In fact Citrix is one of the market leaders in providing flexible and very robust Load Balancing features using NetScaler. To load balance your resources, you have to configure Load Balancing and then create load balancing virtual servers. So that will protect you against a single backend server failure.
But what if you don’t want to balance the load between several backend server, but you only want a certain backend server go active for your end users as a backup in case the primary goes down? And because we have a small setup, we only have one NetScaler running. So no clustering, of high availability whatsoever.
In this post I will show you how you can configure a backup virtual load balancing server for existing load balancing virtual server.
Requirements for the configuration:
- Citrix NetScaler 11.1 (www.citrix.com).
- Primary resource (in my case a website).
- Backup resource (in my case a website).
- Ip addresses for the virtual servers.
My homelab setup
I am running this whole setup from my Microsoft Hyper-V 2016 server. Also I have deployed two Linux webservers, all very basic.
So let’s start.
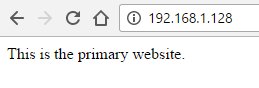
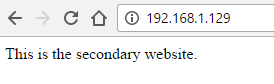
The screenshots below show the actual IP address of webservers running a simple .html page. One is the primary webserver, and the other one I want to become active when the primary goes down.
 ÂÂ
Set up the Primary Load Balancing Virtual Server
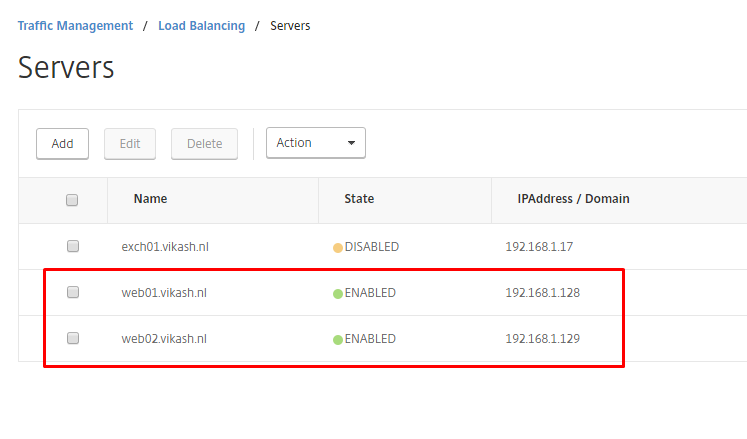
So each website will have it’s own load balancing virtual server. In this way I can define the backup virtual server. I already added both webservers as a Server object.
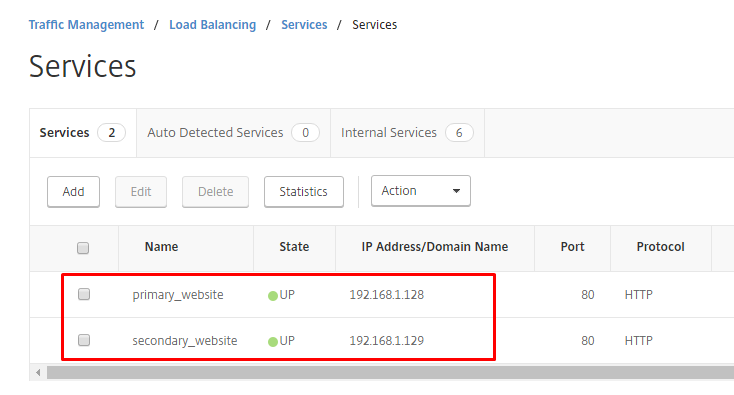
I also created the HTTP service I want to load balance.
Navigate to Traffic Management -> Load Balancing -> Virtual Servers and click on Add.
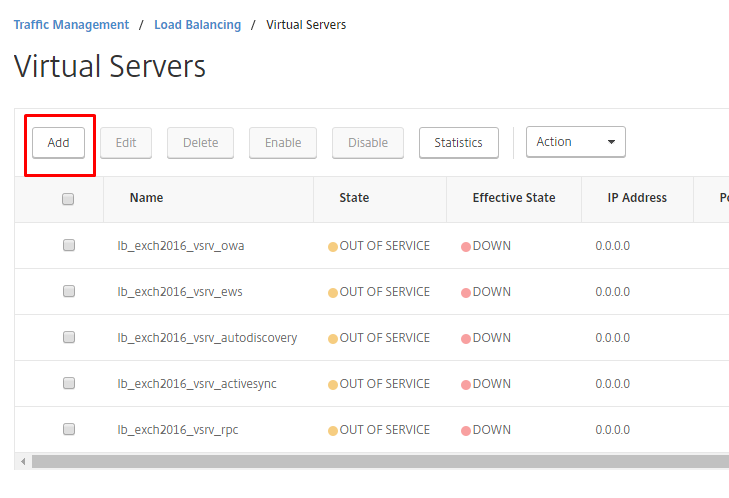
Enter the setting for your primary load balancing virtual server. This is the load balancing virtual server where everyone will connect too. This is the one we will configure with the backup load balancing virtual server later on. Enter the required information and click on OK.

Now add your backend resources to this load balancing virtual server. Remember that is load balancing virtual server is primary, so your primary backend servers will have to be added here. Click on No Load Balancing Virtual Server Service Binding.
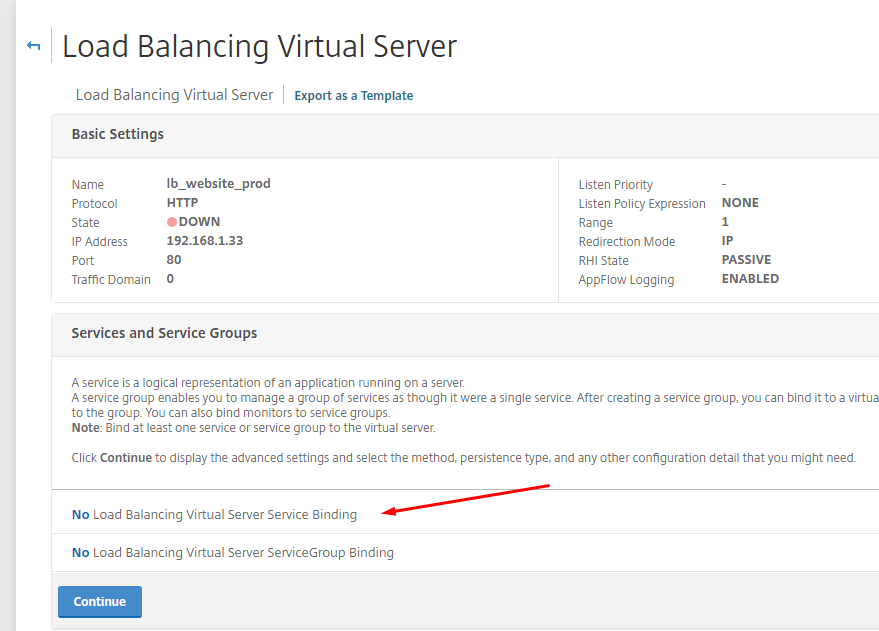
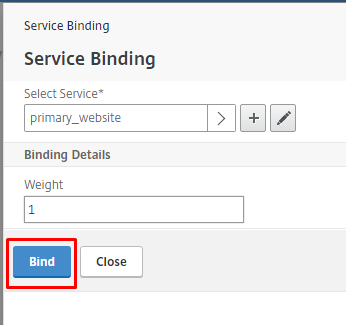
Click on the Select Service option to select the service we want to bind. Then click on Bind.
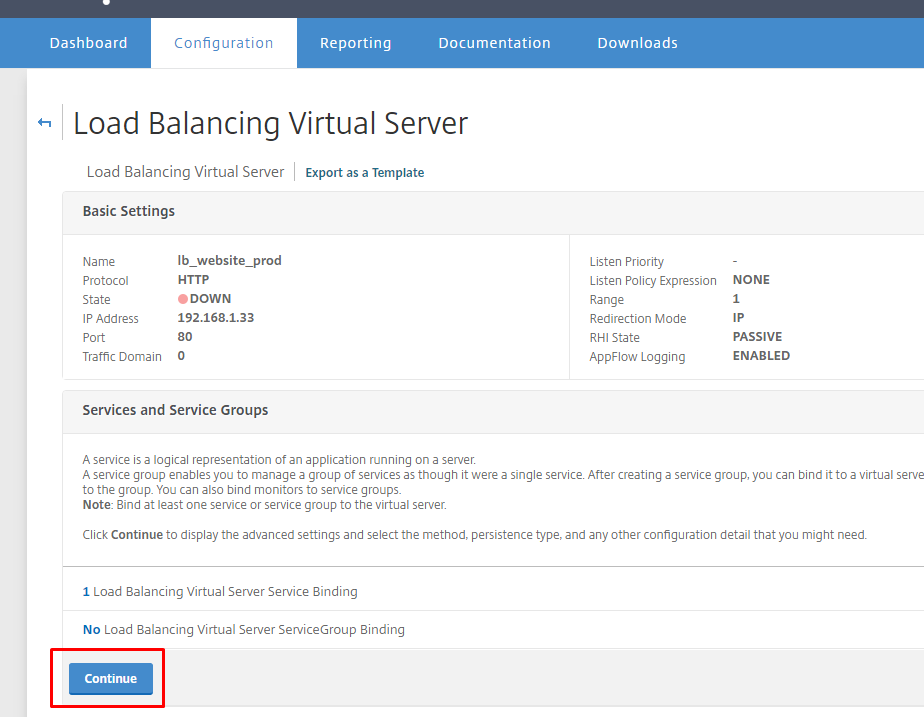
Click on Continue.
Click on Done.
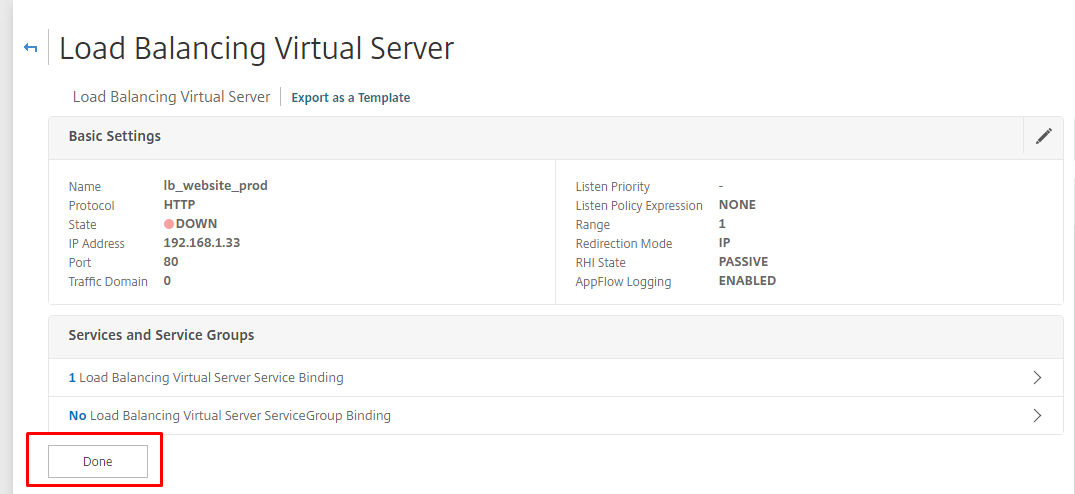
Check the status of the load balancing virtual server. It should say UP.

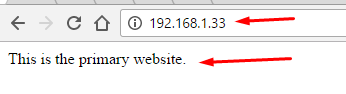
Now it is time to test. When we browse to the IP address of this load balancing virtual server (192.168.1.33), we should see the webserver I want to be primary.
Set up the Secondary Load Balancing Virtual Server
This second load balancing virtual server will be the backup of the primary one. We will set this one up to connect to my secondary webserver.
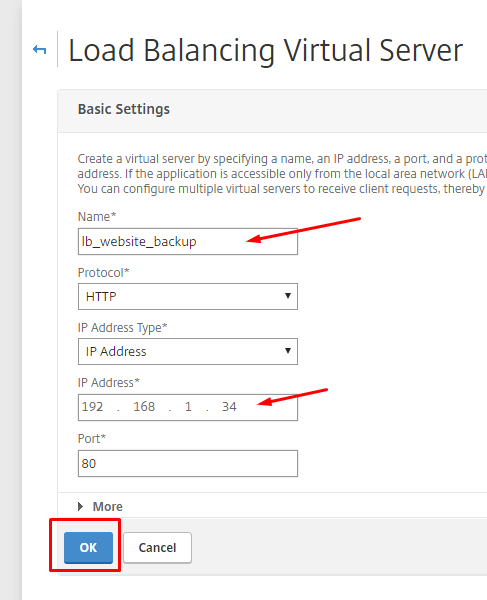
Navigate to Traffic Management -> Load Balancing -> Virtual Servers and click on Add to create a new load balancing virtual server. Then enter the correct settings and click on OK.
Click on No Load Balancing to add the second webserver as a resource for this load balancing virtual server.
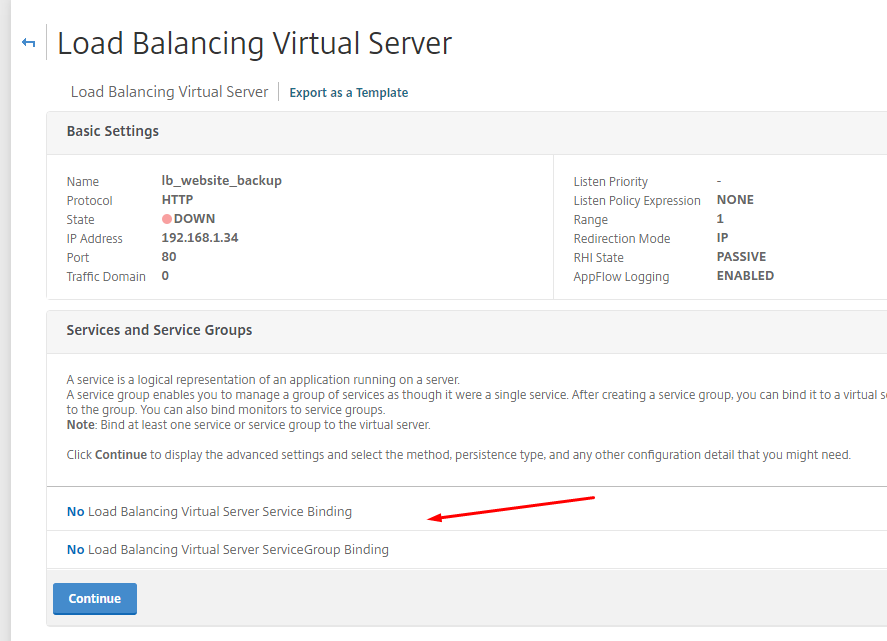
Make sure you select your backup resources here. I selected my secondary web server / website. Then click on Bind.
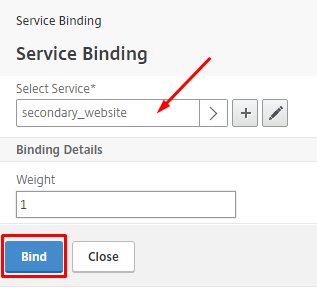
Click on Continue.

Click then on Done.
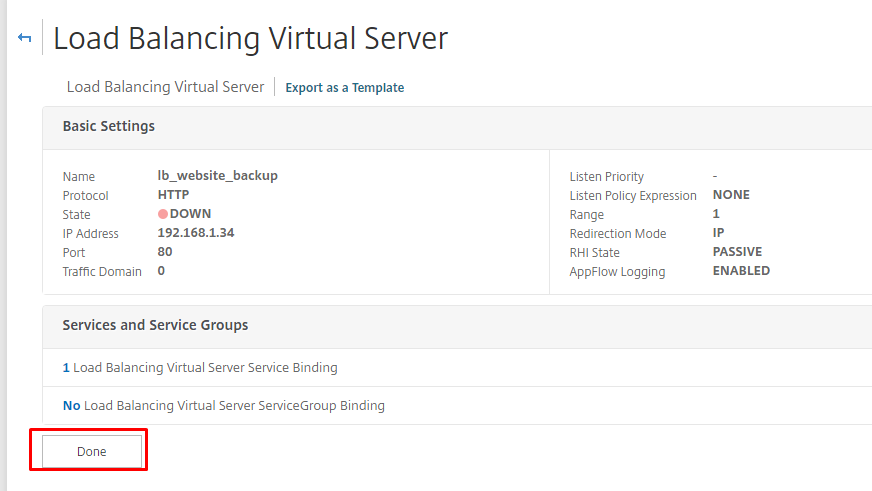
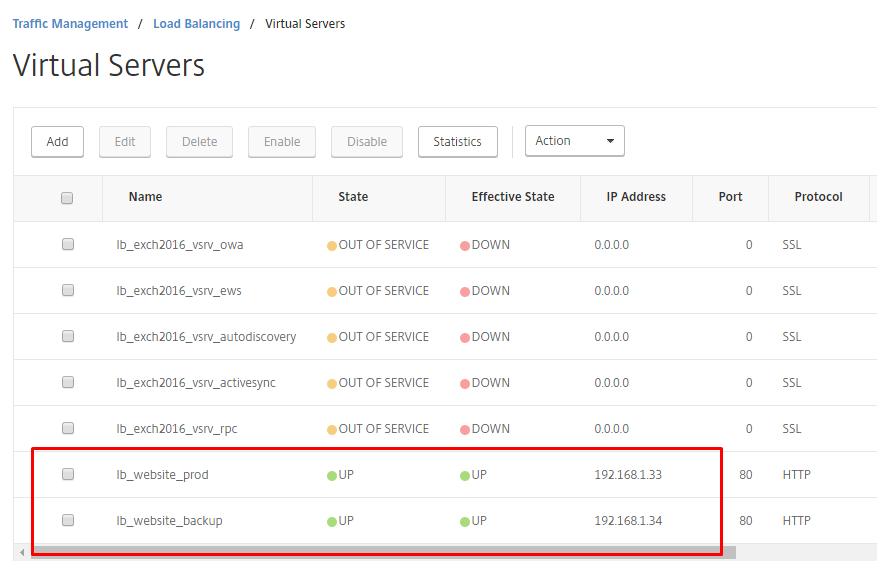
So now you should have two load balancing virtual server with status UP.
Check the secondary load balancing virtual server for connectivity to the second web server.

Set the backup Load Balancing Virtual Server
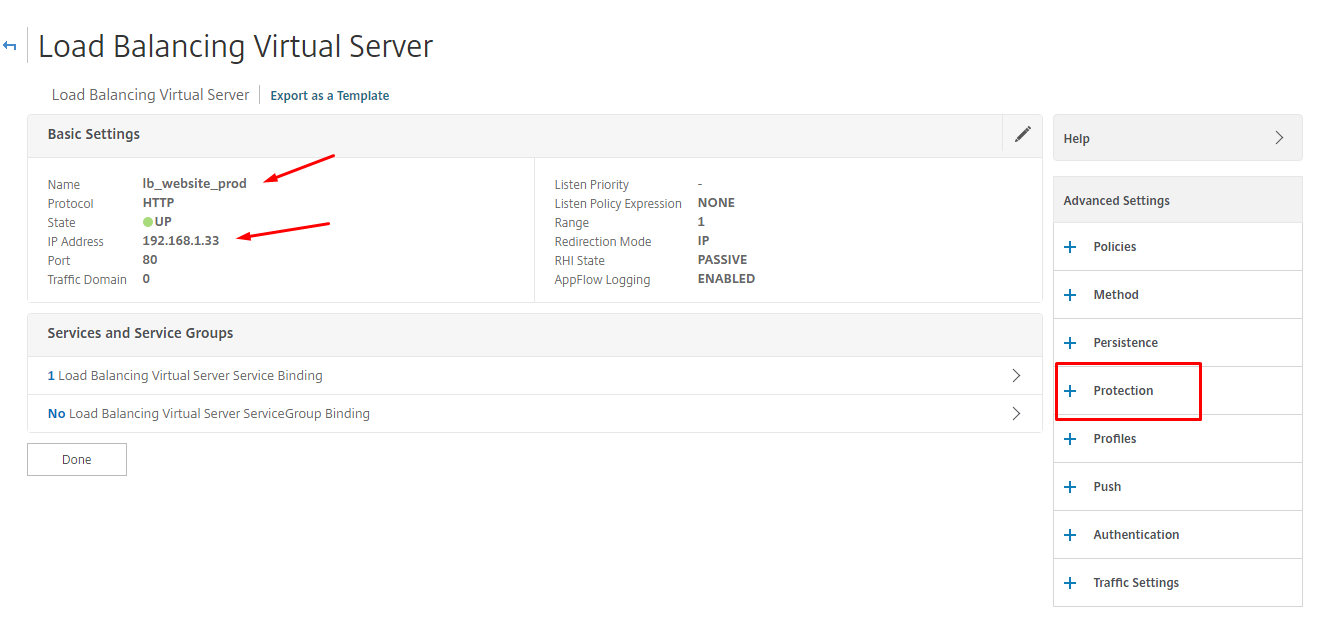
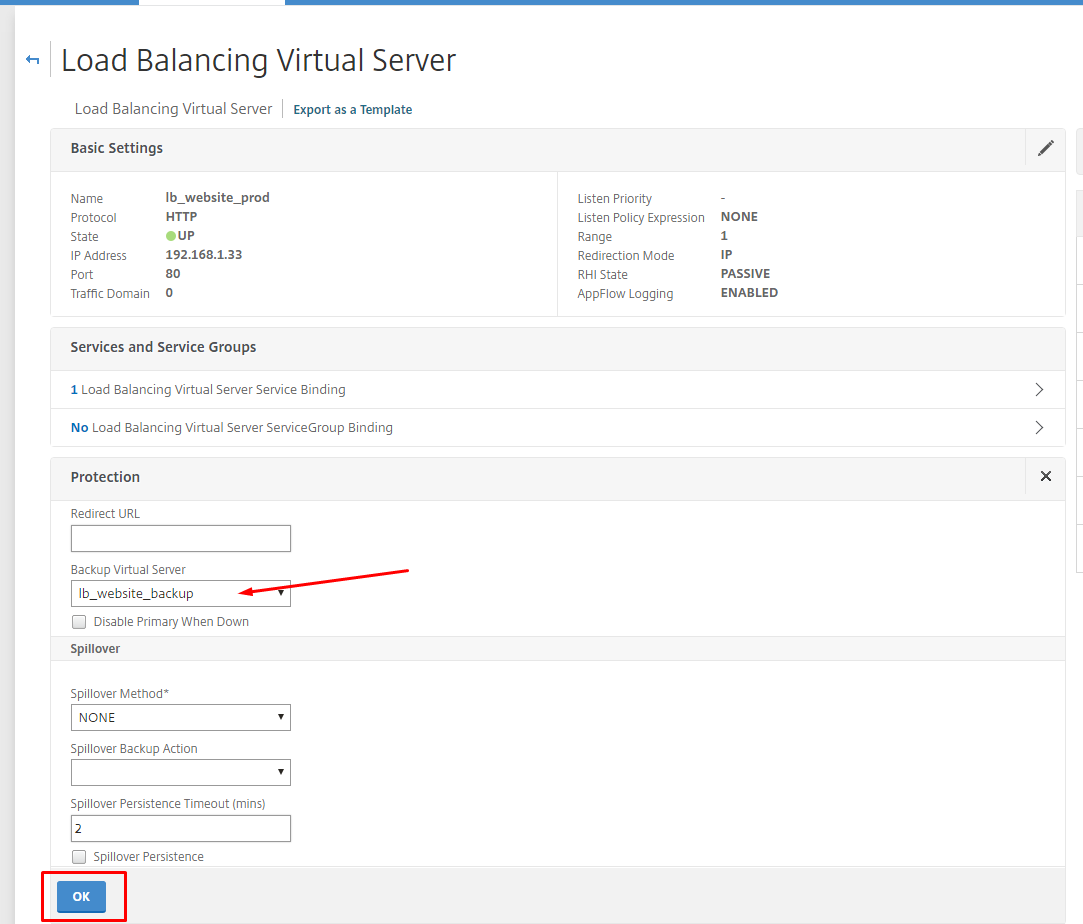
We have to edit the properties of the primary load balancing virtual server. Using the Protection option we are going to tell it to redirect traffic to the secondary load balancing virtual server, in case it’s own back end server goes down.
Open the properties of the primary load balancing virtual server and click on Protection.
Select the load balancing virtual server you want to use as a backup. In my case I select the load balance virtual server which is redirecting me to my second web server. Then click on OK.
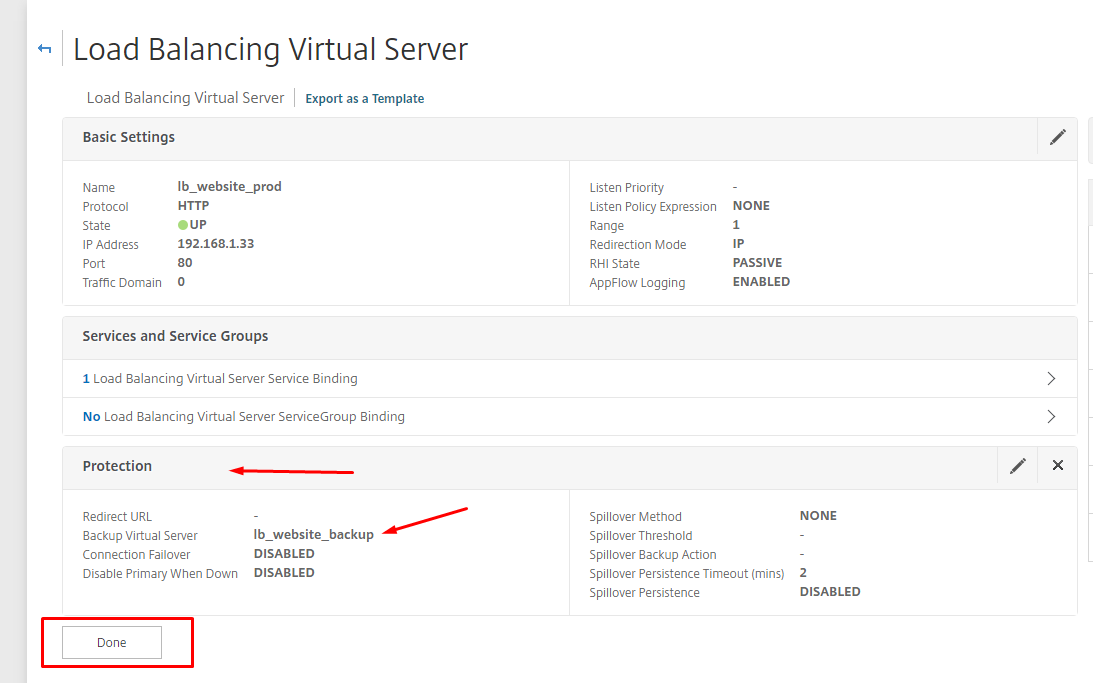
Check if everything is set up correctly and then click on Done.
Do some testing
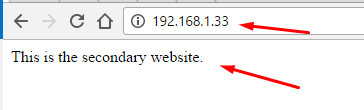
It’s time to test if the setup works like we want it. I am turning of the primary web server now.

And when I browse to my primary load balancing virtual server now, I am presented with the second web server! A job well-done.
We can see in the log of the NetScaler that it detected the primary web server is down.
![]()
This concludes this tutorial. Feel free to contact me of you have any questions or comments.
You can also follow me on twitter or add the rss feed from the blog and you will be notified when I add new posts.
Create a backup Load Balancing Virtual Server using Citrix NetScaler Read More