

In this blogpost I will show you how to upgrade XenServer 6.5 to XenServer 7.0. Recently Citrix released XenServer 7. As you can see on my blog, I am a big fan of Citrix solutions :). So now I was wondering: how can I upgrade my Citrix XenServer 6.5 setup without losing the configuration. First of all, let’s take a look at some new features in Citrix XenServer 7.
What’s new in Citrix XenServer 7:
- Intel Iris Pro Graphics GPU support
- NVIDIA GRID vGPU support for Linux Applications
- Up to 128 vm’s per host with the NVIDIA vGPU M6/M60 graphics card
- Windows Update integration for XenTools
These are a few things I like. There are far more new features, take a look at the Citrix XenServer site here.
Requirements for the upgrade:
- Citrix XenServer 6.5 with SP1 and all the latest hotfixes
- Citrix XenServer 7 ISO (www.citrix.com)
My homelab setup
Since I don’t have additional hardware to run XenServer, I installed it as a virtual machine on Hyper-V 2012 R2. This is fine for testing purposes. Just make sure you create the virtual machine als a Generation 1 vm and add the Legacy Network Adapter. Also make sure that you don’t have anything else running on the disk where XenServer is installed. The partition scheme on that disk will be altered during the upgrade process.
Let’s start.
Upgrade XenServer 6.5
Check the version of XenServer using the console.
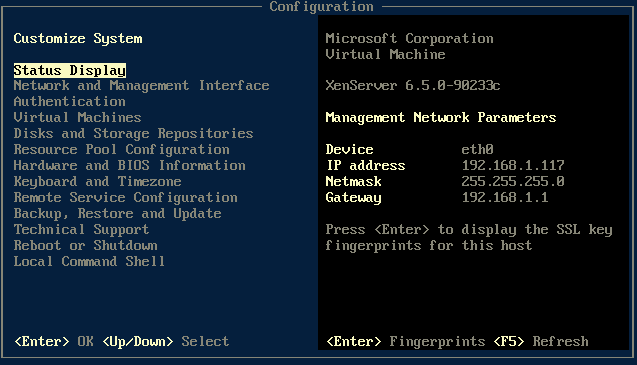
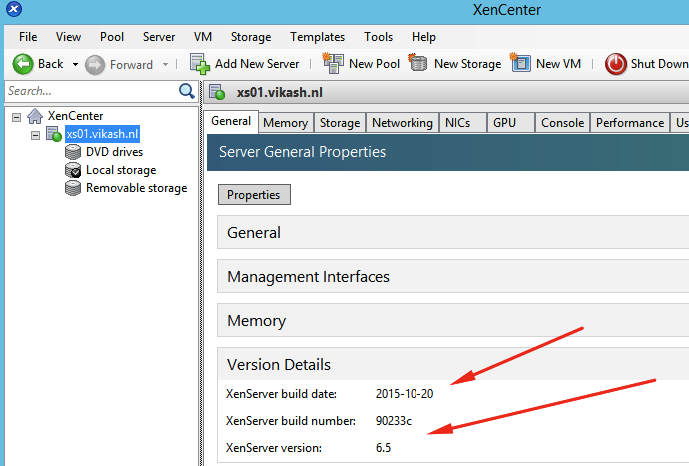
Check the version of XenServer using Citrix XenCenter. Note that I am still using XenCenter 6.5. When I’m done updating the XenServer host to version 7, I will install XenCenter 7. Keep reading for that.
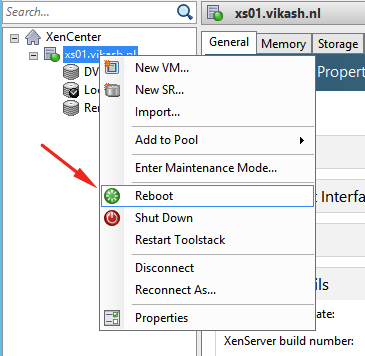
So everything is looking great. Let’s mount the Citrix XenServer 7 ISO using the properties of the virtual machine.

We can now reboot the host. Make sure it boots from the XenServer 7 ISO, so set it to boot from CD.
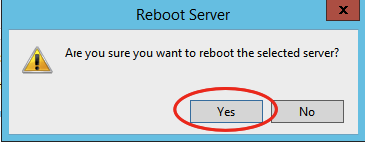
Click on Yes to reboot the server.
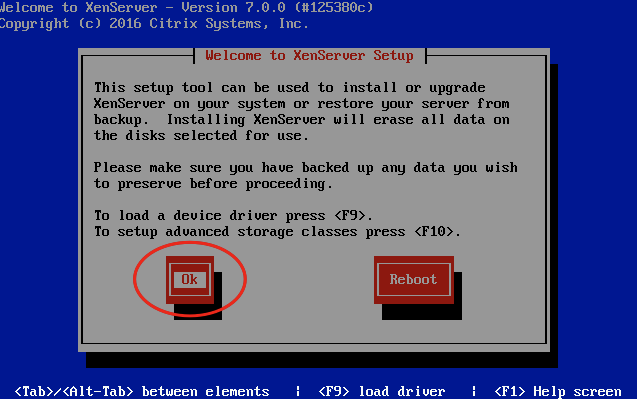
The host will now boot from the Citrix XenServer 7 ISO. Press Enter to start the upgrade proces.

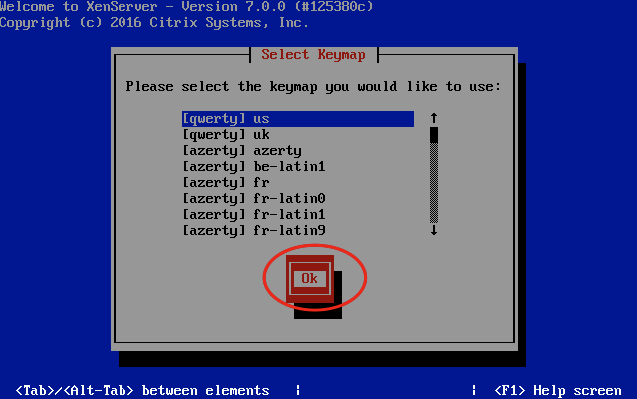
Choose your keyboard layout. Then choose OK.
You will be prompted to load additional drivers. I don’t have any so I choose OK.
Accept the EULA.

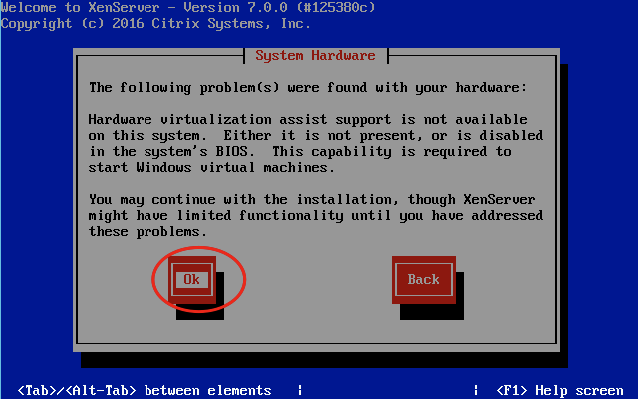
If you run XenServer as a virtual machine, you will get a warning that Hardware Virtualization Assist is not available. This is correct since it is a virtual machine and cannot provide virtualization support for vm’s on it. Choose OK.
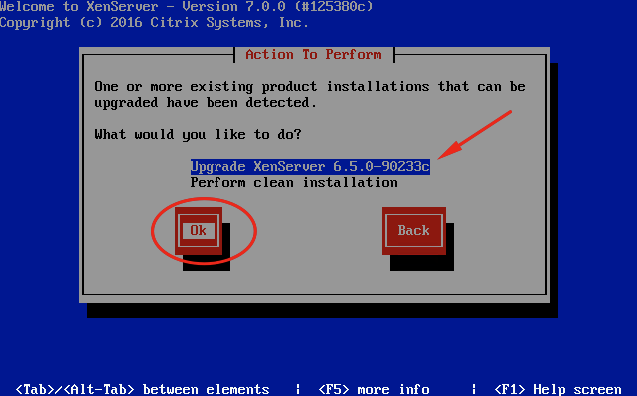
The installer will now detect your Citrix XenServer 6.5 installation, and will provide you with the upgrade option. How great is that! Choose Upgrade XenServer and then OK.
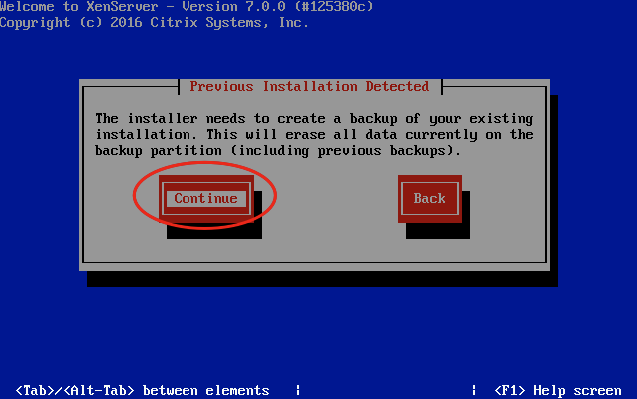
The installer will need to create a backup. Choose OK to continue.
Select the installation source. Because I am using a ISO I choose Local media. Choose OK to continue.

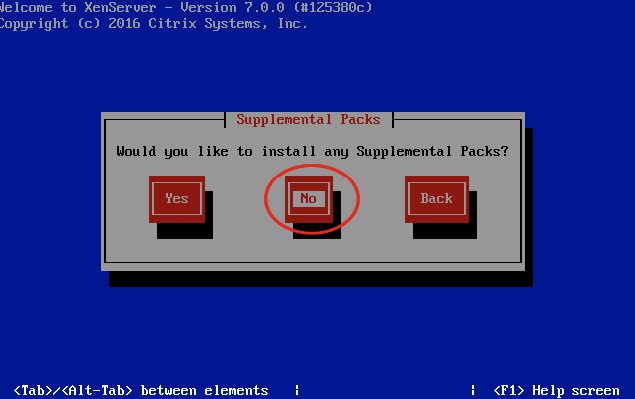
I will not be installing any supplemental packs. Choose NO to continue.
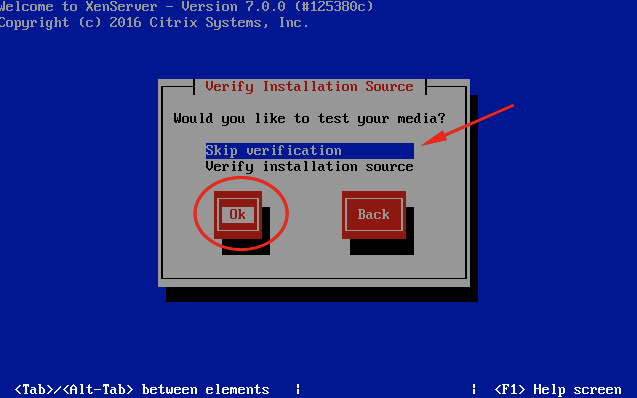
I choose not to verify the media, because I am sure it is ok since I just downloaded it successfully from the Citrix website. Choose OK to continue.
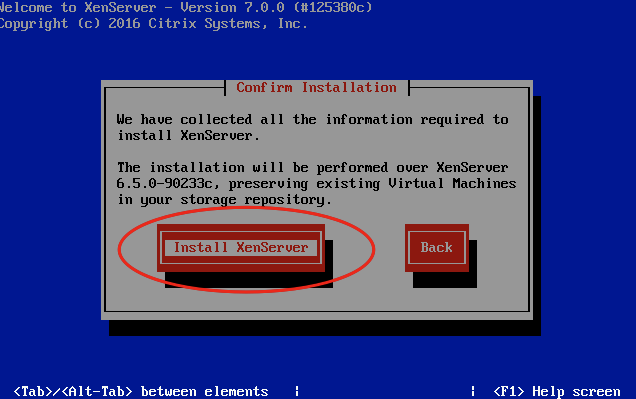
The installer has collected all the required information now to perform the upgrade. Choose Install XenServer to continue.
The installation will now start.

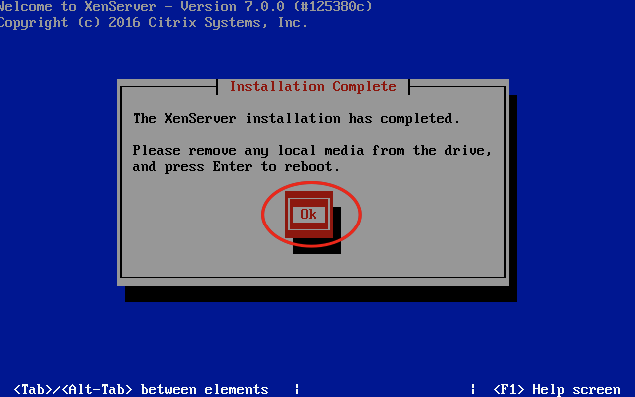
It will run trough a couple of screens, and then present you with the screen where it says Installation complete. At this point you can unmount the ISO from the virtual cd, and choose Enter to reboot.
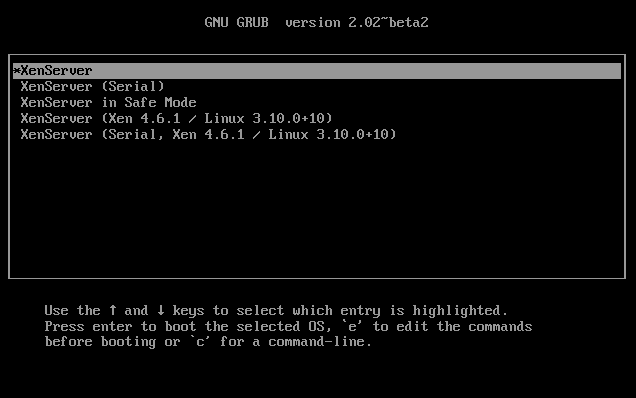
After reboot you will be presented with the GRUB bootloader. Select the first option and press Enter. If you do not press a key during the GRUB bootloader, it will automatically choose the first option and start XenServer.
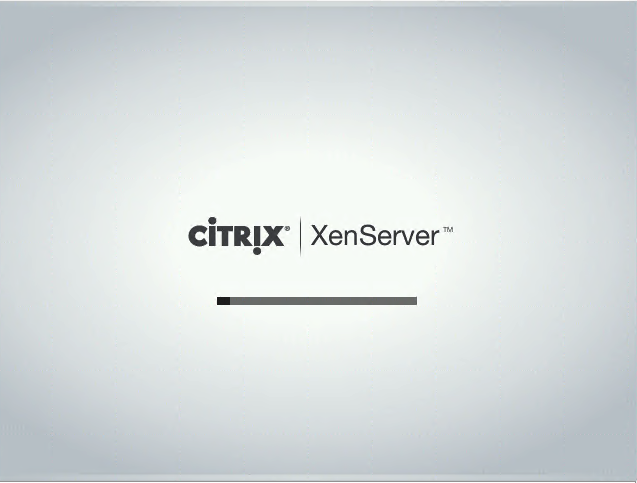
Wait for XenServer to load.
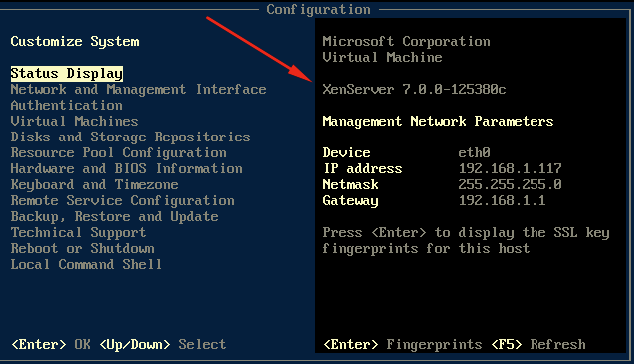
After it has booted completely you will be presented with the xsconsole. As we can see the upgrade went great and XenServer is running happily in my vm.
Setup XenCenter 7
To manage your new XenServer host you have to install XenCenter 7. Download the installer from Citrix (www.citrix.com) and start the setup. Click on Next.
The defaults work fine for me. Check that you set them according to your needs. Click Next to continue.
Click on Install to start the installation.
After the installation has finished, click on Finish.

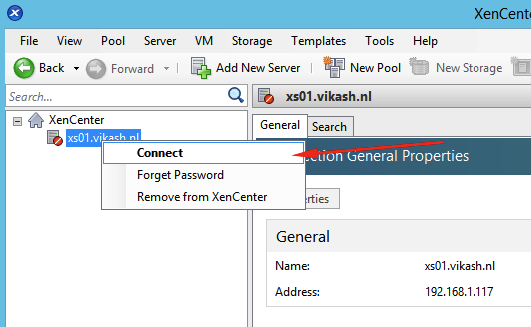
Now it is time to start XenCenter.

As you can see it has detected my connection to my XenServer 6.5 host. Right-click that and click Connect.
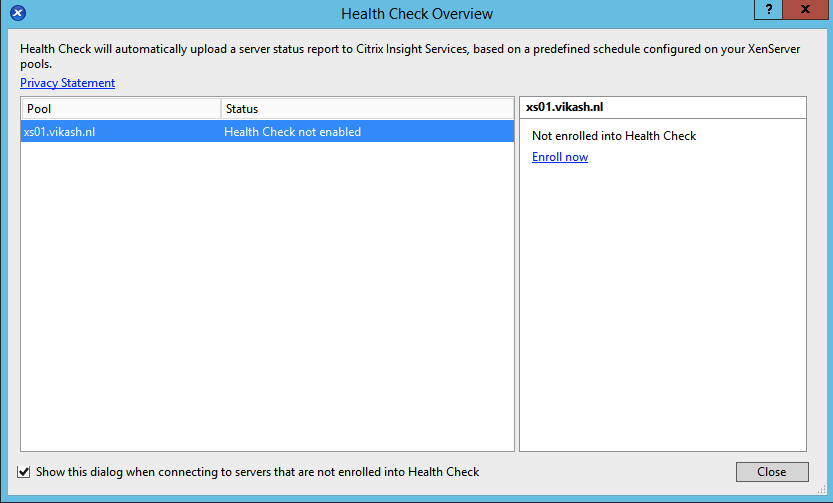
You can then choose to enrol Health Check. I did not, so I just clicked on Close.
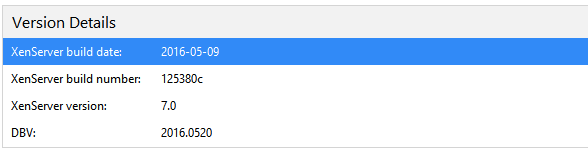
And we can see the XenServer host version information using XenCenter now.
So that’s it, the upgrade went great.
This concludes this tutorial. Feel free to contact me of you have any questions or comments. You can also follow me on twitter or add the rss feed from the blog and you will be notified when I add new posts.
great steps and easy to understand thanks.
Thanks 🙂
Awesome. Great Thanks a lot for sharing
Hi.
For me isn’t gone the right way.
I had a cluster, furtunately a TEST cluster running a secondary domain controller and a few test VMs. I started to upgrade the pool master as Citrix said, using the CDROM. My local datastore are empty, I have only a shared storage, but the installer fails on creating the new partition schema. No way to go ahead (reboot only).
I haven’t been able to restore even if the installer suggest the “restore 6.5” option.
In the meantime, the second node was in emergency mode (normal), I had to manually elect it to pool master. Once done, I tried to upgrade this one, and the SAME procedure went successfully.
Now I reinstalled the failed node with a clean 7.0 install and I have been able to add to the pool again. The only issue are the network interfaces: on the upgraded node I have one NIC order, and on the clean 7.0 install a different one. Both nodes have exactly the same hardware (IBM x3560), but the management on the upgrade node was eth5 (as before), where on the clean install it was eth0. That’s a mess and unacceptable. I had move the VMs to the clean installed node and elect it as pool master, then I re-installed the upgraded node and re-added to the pool. Now I have both servers recognizing the NIC with the same order (I had to phisically swith all the network cables).
So, I don’t trust so much this system.
Hi Mikey,
That is a very interesting case, and sorry that it didn’t work out for you. Did you check the HCL for Citrix XenServer? It is one of the things most people overlook. I cannot find your server on the HCL here: http://hcl.xenserver.org. The problems you encountered I have also, but it always happened with faulty hardware, configuration issues or hardware not compatible with Citrix XenServer. Also I would advise to check the support site for IBM, maybe they got a specific version specially build for your server hardware. That is the recommended way to go when upgrading enterprise hardware, always check the support site of your vendor before doing upgrades.
Now that being said, I know that Citrix XenServer can run on very versatile hardware, regardless of the HCL. And the way you did the upgrade it the way to go. It seems like the faulty server was somehow different then the other ones, if not in hardware then in software. In Citrix XenServer there is a lot more possible if you look under the hood using SSH. Maybe your configuration issues could’ve been fixed there, hard to say.
But it is good to hear that you have resolved the issues, and everything is working fine now. Good luck my friend!
Hi,
You explained the fresh installation. What about the existing configuration? I mean, i have a pool, 2 physical host and on it, 2 DC, 1 SQL server and VMs. And also SAN disk storage. How can i upgrade in this situation? Can you help?
Hi Omer,
There are a few things to take care of before you start. Make sure you got backups of your pooldata and all the VM’s running in there as well. Also check the hardware for compatibility with Citrix XenServer 7. If you have specific drivers there for communication with your SAN, make sure there are new versions available for Citrix XenServer 7. And make sure that you can upgrade the version you have running now to version 7.
Upgrade XenCenter to version 7, it is backwards compatible. Then you can start the Rolling Pool Upgrade Wizard from XenCenter and follow the steps there. This is how I would approach the upgrade. Feel free to contact me if you have more questions and good luck with the upgrade.
Hi.
It helped me a lot for upgrading Xenserver. Thanks.
But, I’ve got just one problem.
After upgrade to XenCenter7.0 the yellow arrow icon doesn’t appears on server, which is not upgraded to Xenserver7.0, despite other XenServer7.0 servers are connected to XenCenter.
Is this a bug or any options to fix it?
Hi, thnx for your comment. What do you mean with the icon not appearing on server? You have multiple servers in one pool I assume? Did the upgrade on all the server went ok? Were there any errors? And can you check on all the servers what version of XenServer is running now.
Great and professionally made post, thank you!
Hi I upgraded from 6.5 to 7.2 but after all stepts completed successfully /rebooted the node says its running 6.5!!
Also in xencenter it says 6.5.
If I enter local shell and type cat /etc/issue it says the host is booted completly to 7.2!
if I exit local shell all versions numbers in the gui dissapear!. Also i I press the reboot option it says the host is still booting.
We have tried to install it 3 times now witgh update option with the same result. any idea?
Hi,
I am sure there are some errors. I would suggest to do the upgrade in a controlled test environment. After that you can check the version via the console or XenCenter. Good luck.