Apply security update to Citrix ADC (CTX276688)
At the time of writing this blog post Citrix released information about 11 new vulnerabilities discovered in their NetScaler line of products including Citrix Application Delivery Controller, Citrix Gateway, and Citrix SD-WAN WANOP. As sysadmins we want to keep our infrastructure secure and in this blog post I will show you how to apply the security update to the Citrix ADC (CTX276688) and mitigate for these vulnerabilities.
What to do now? Simple, upgrade to the latest version of Citrix ADC firmware. At the time of writing that is NS13.0 Build 58.32. Let me show you how.
If you followed my recent post Upgrade Citrix ADC firmware using CLI and you upgraded your Citrix ADC to version 13.0-58.30 according to my blog post then you should already be fine! Yay! The newly discovered vulnerabilities are documented in the Citrix Support Knowledge Center and is know by the number CTX276688. According to Citrix these vulnerabilities can only be exploited in very unique situations and circumstances and as far as they know, they are not yet used in the wild. I will show you how to upgrade Citrix ADC to the patched firmware and keep hackers at bay.
Preparation
We will use the same steps from my blog post Upgrade Citrix ADC firmware using CLI. The difference now is that I will do the upgrade from version 13.0 Build 58.30 to the latest release version 13.0 Build 58.32.
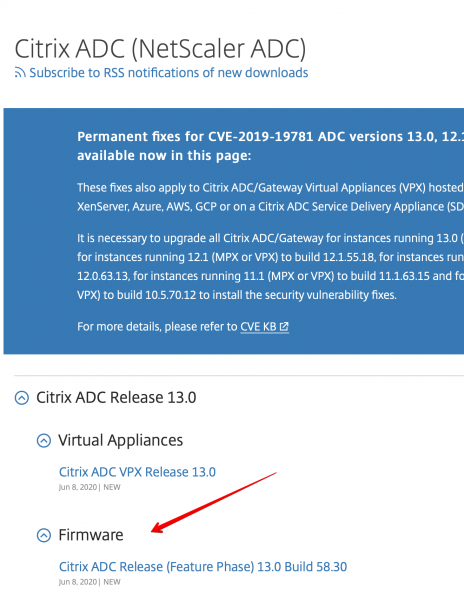
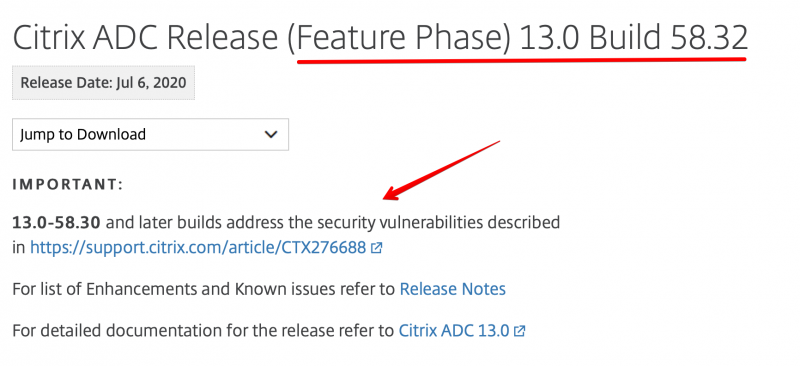
Download the latest firmware
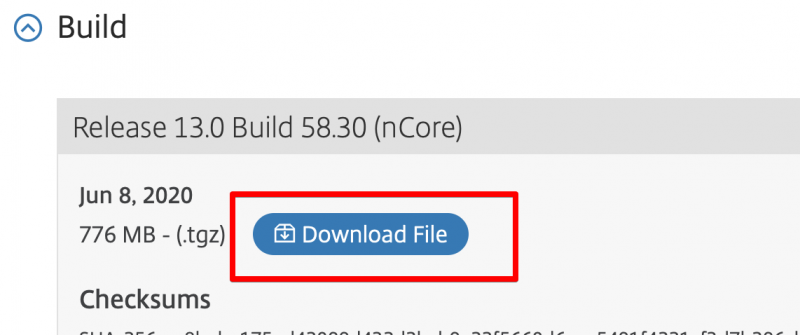
According to Citrix we need to upgrade our ADC with version 13.0 Build 58.32. You can find that firmware here. If you open up that page you will see the important message regarding CTX276688:
Download the firmware and safe it to your computer. We will upload this file to the ADC and then start the upgrade.

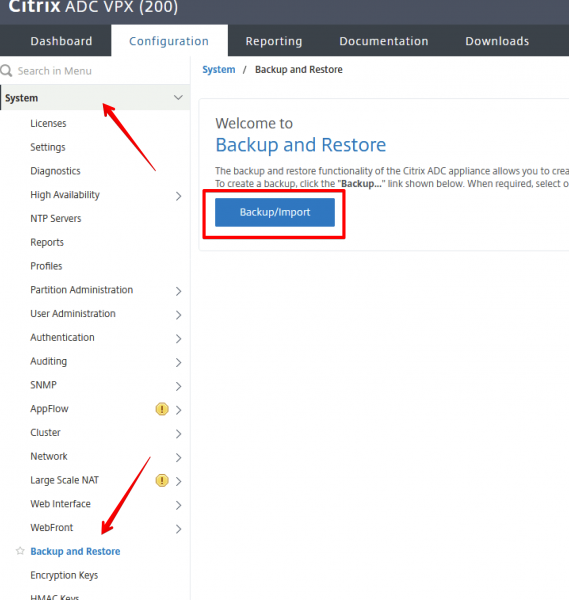
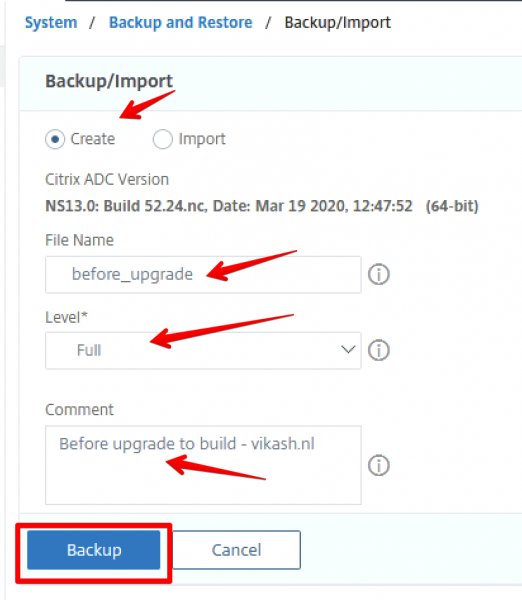
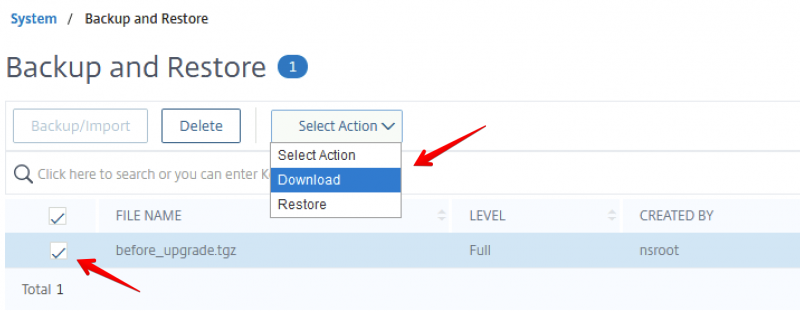
Backup your current configuration
Before we start the upgrade process we need to backup the current configuration. You can do that using the steps I described here.
Start the upgrade
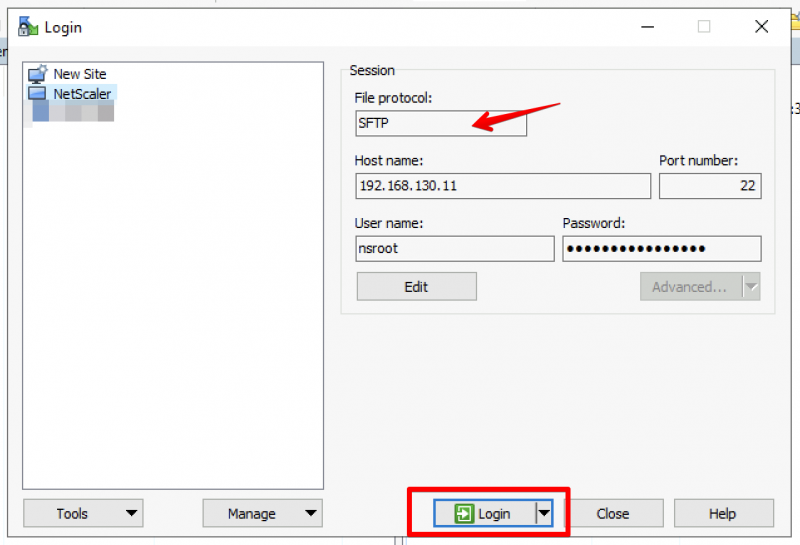
I am a big fan of CLI when it comes to upgrading these NetScaler appliances. But first we need to upload the new firmware to ADC. You can use the steps described here.
Start the upgrade script
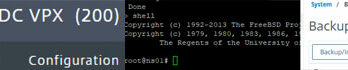
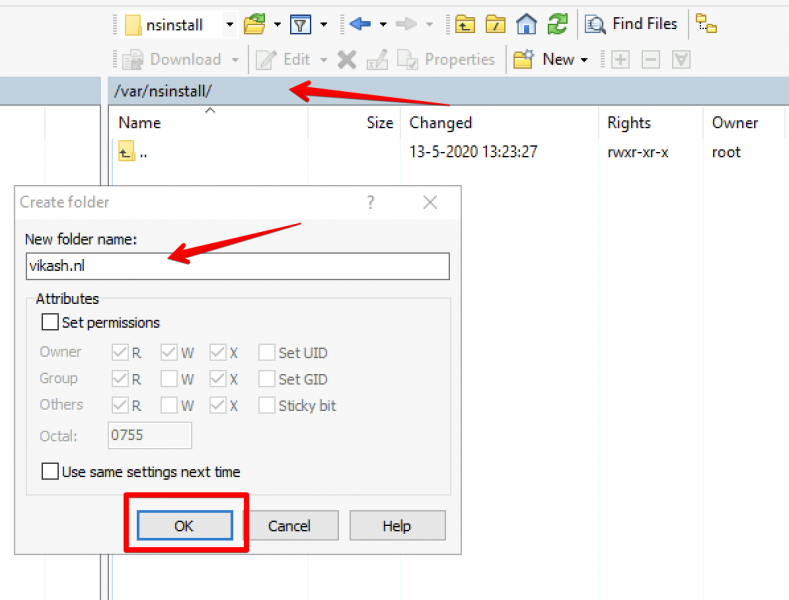
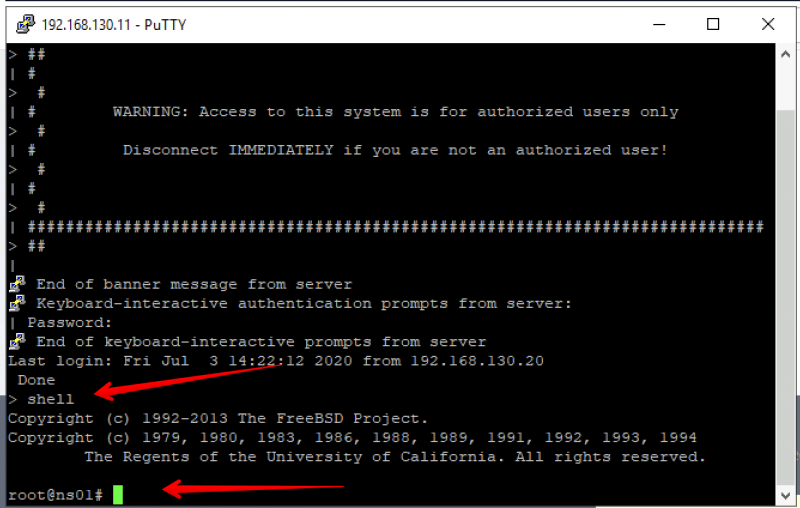
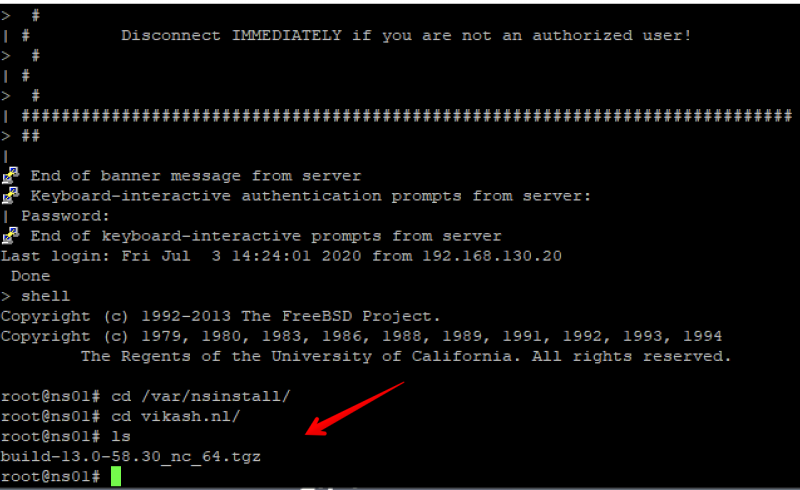
Login to the ADC using SSH. I use Putty for this. After login in you need to go to the directory where you uploaded the new firmware file. If you followed my post that should be somewhere in /var/nsinstall/<directory_name>. I have uploaded my firmware to the directory /var/nsinstall/vikash.nl:
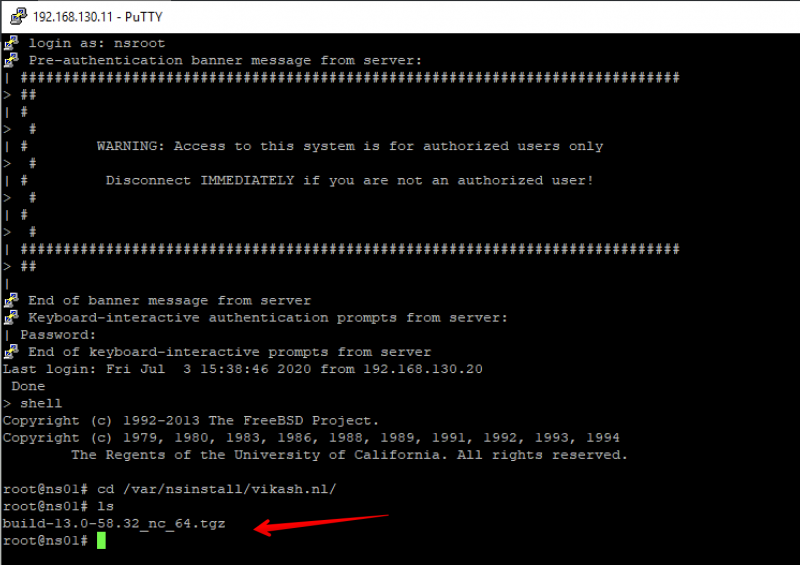
We can see the new firmware there. Now extract it using the following command:
tar –xvzf build-13.0-58.32_nc_64.tgz
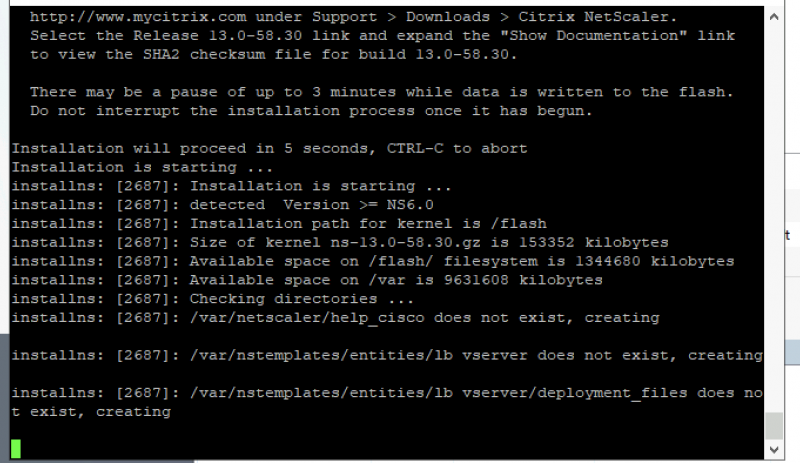
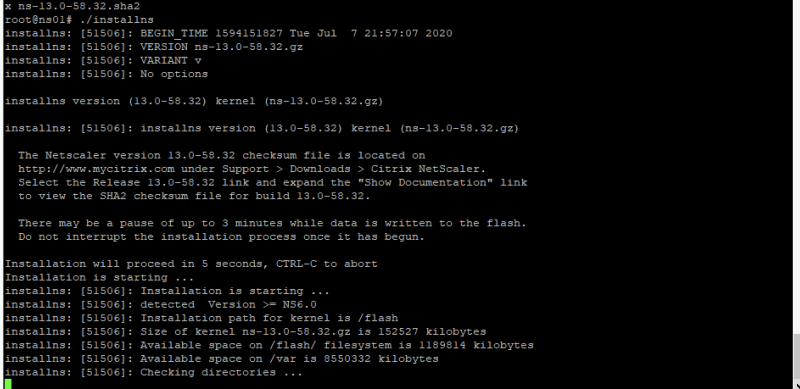
The tar -xvzf is the command you need to extract the file with name build-13.0-58.32_nc_64.tgz. Remember to replace the filename with the correct one. After the firmware is extracted you will have a lot of files there. The one we need is names installns. In your SSH / Putty session enter the following command to start the upgrade process:
./installns
The command start with a . yes. After typing in the command you will see the a similar screen like the one below indicating that the upgrade has started:
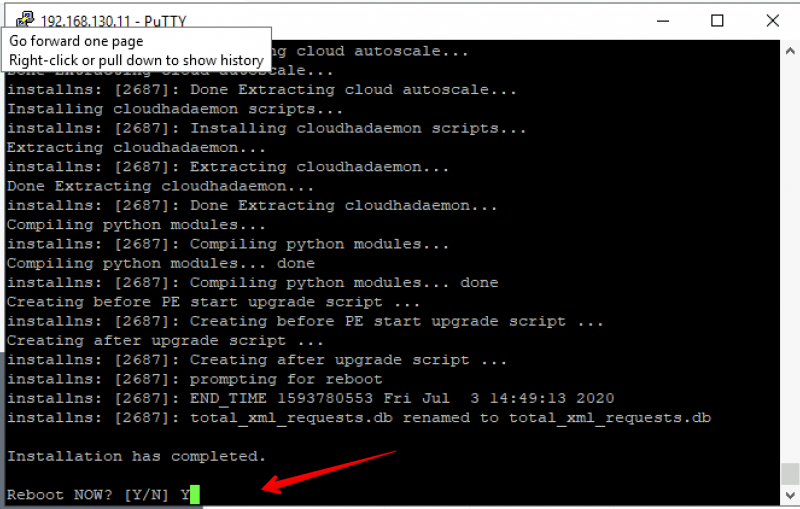
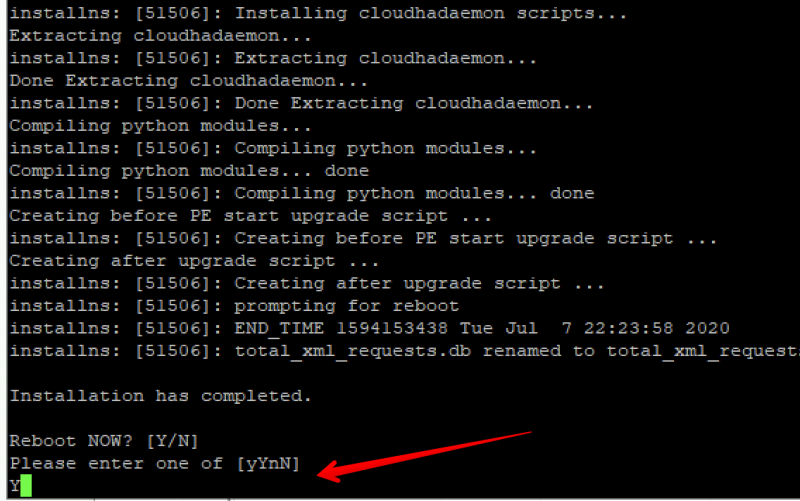
The update process will take a while. When the upgrade is finished you will be prompted to reboot the ADC. Enter Y and hit enter:
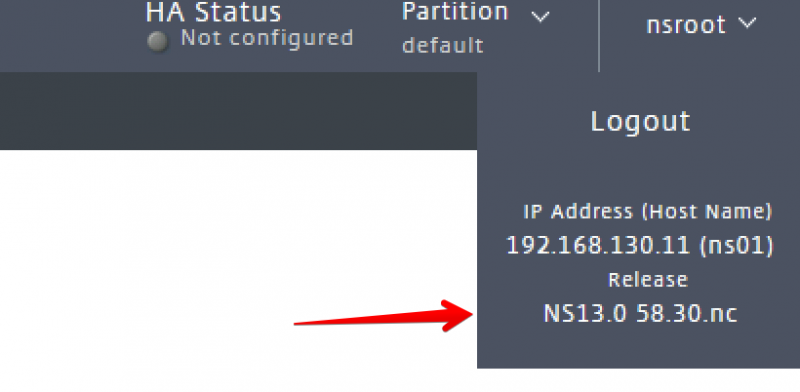
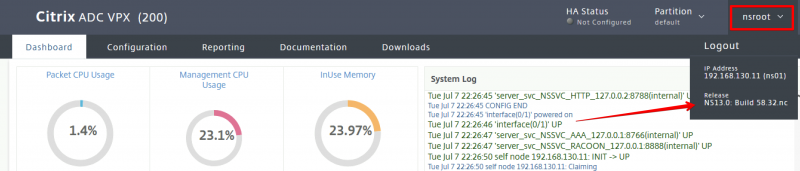
After the reboot let’s check the version and make sure everything went well. Open the management page (webgui) and check the firmware version:
You can check it using CLI. Login using SSH / Putty and enter the following command:
show ns version
You should get the following output displaying the firmware version of ADC:

If the version displays NS13.0 Build 58.32 then your ADC is protected from the vulnerabilities as described in CTX276688.
Steps for updating a Citrix ADC High Availability pair (HA)
The steps described in this blogpost apply in general for the ADC nodes which are running in a High Availability pair configuration. Every node can be upgraded using the same method I described in this post. Make sure you to upgrade the individual nodes in the following order:
- Upgrade the secondary node first.
- Reboot the secondary node.
- Disable HA-sync on the secondary node using cli: set ha node -hasync disabled.
- Upgrade the primary node.
- Reboot the primary node.
- Check that all the config is still there after the reboot of the primary node.
- Enable HA-sync on the secondary node using cli: set ha node -hasync enabled.