

Table of Contents
When running Citrix ADC it is vital to keep the ADC up-to-date. Usually Citrix ADC is very secure but every now and then they will discover bugs. That is when you need to update the firmware of the system. In this blog post I will show you how to upgrade Citrix ADC firmware using Command Line Interface (CLI).
Why do it using the CLI of there is a nice option in the webgui? In my experience doing it using the CLI is the most reliable way of getting the job done. The webgui is just not stable enough because on numerous occasions I have seen an upgrade fail when doing it using the webgui. And when such a system is running a crucial part of your infrastructure you don’t want to end up with a broken ADC. The CLI way has been rocksolid and delivers every time. It is not hard to do it if you follow the steps in this blog post.
Preparation
I will perform the upgrade on my ADC running in my lab environment. The version I am running here is 13.0 52.24. I will upgrade to the latest version. At the time of writing this post the latest version is 13.0 58.30.
Download the latest firmware
Download the latest firmware from the Citrix website. When you visit the website choose for the Firmware option:
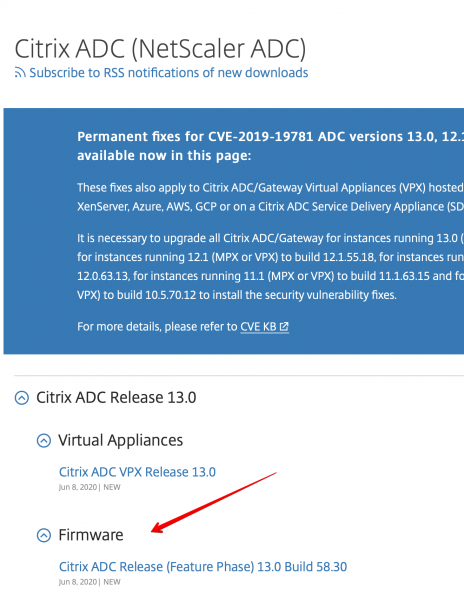
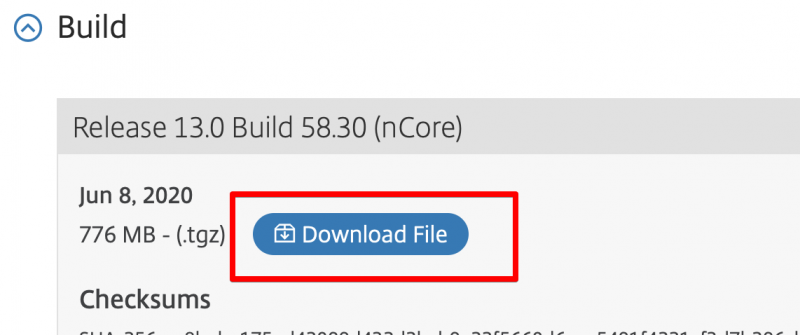
Then on the next page scroll down to the Build section and download the latest firmware:
Backup the Citrix ADC configuration
I’m sure you already know this but often this step is still overlooked. Backing up the components in your network infrastructure is a vital part of running an IT-infrastructure. Your backup strategy for Citrix ADC depends in the platform you are running it on. I have mine running on Windows Hyper-V 2019 so making a snapshot before starting the upgrade is pretty handy. I will also show you how to make a backup of the ADC configuration from the webgui. Making a backup using the webgui has always worked in me experience so no need for CLI here.
Login to the webgui and in the left menu expand System and click on Backup:
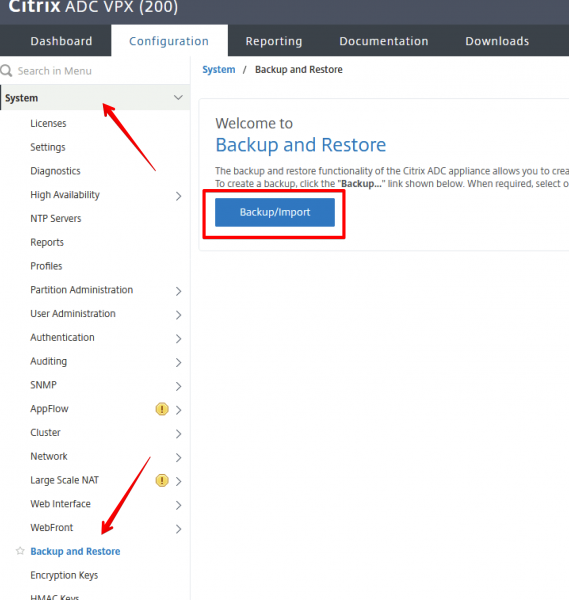
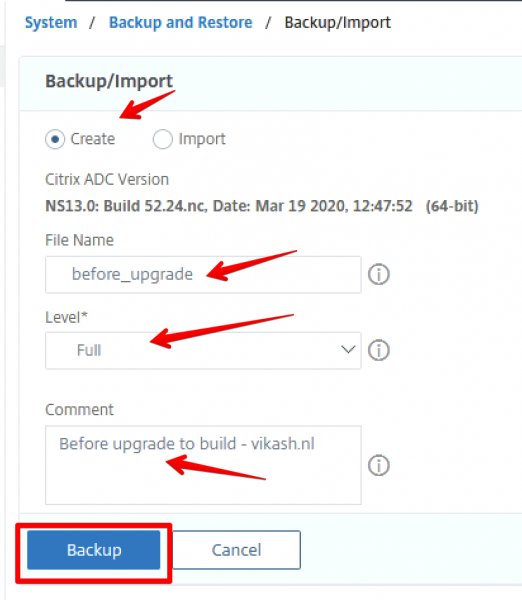
Then click on Backup/Import button. You will be presented with several options. Enter a file name for the backup and something in the description that makes is easy to see why this backup was made. The most important part here is to select the Full backup level. Then click on Backup:
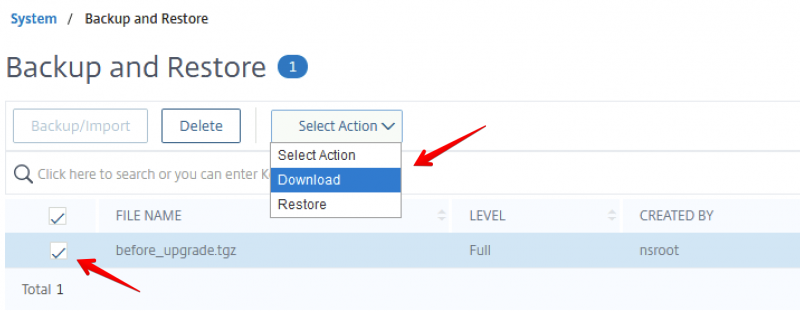
Now that the backup is made we need to download it from the ADC and keep is somewhere safe. Do this in case the upgrade does fail and you are not able to access the ADC using webgui of ssh. You will see an overview of all backups available on the appliance once you clicked on the Backup button as seen in the screenshot above. Select the backup you just made and from the action menu select Download to save the backup file to your local computer:
Start the upgrade
We have done our preperations and now we need to get the firmware we downloaded on the ADC and start the upgrade process.
Upload the new firmware
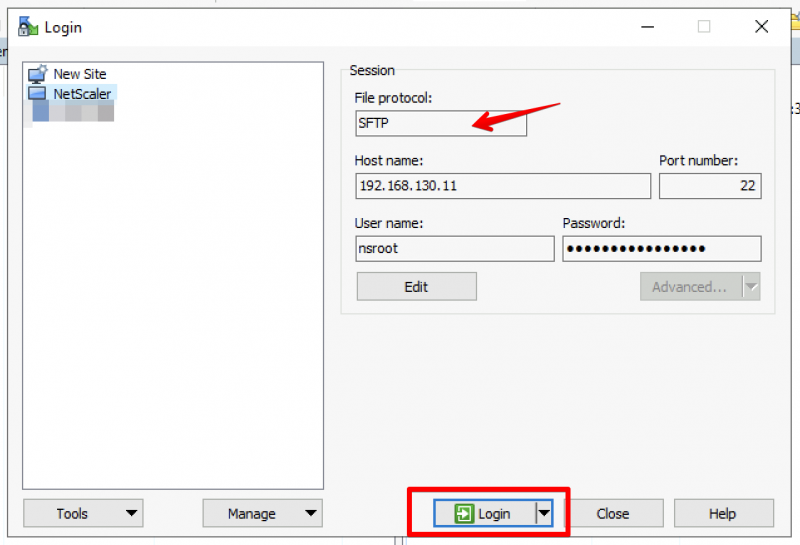
I use WinSCP to upload the new firmware to my ADC. Start WinSCP and login to your ADC using the option SFTP option:
After loggin in go to the /nsinstall directory and create a new directory there:
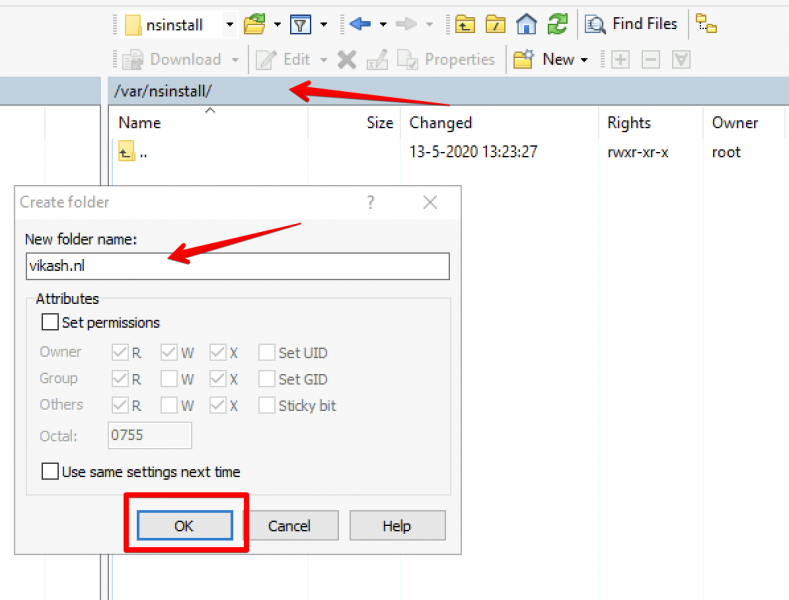
Upload the firmware using WinSCP:

Start the upgrade script
Login to the ADC using SSH. I use Putty for this. After login in you need to go to the directory where you uploaded the new firmware file. First enter the command shell to enter a shell:
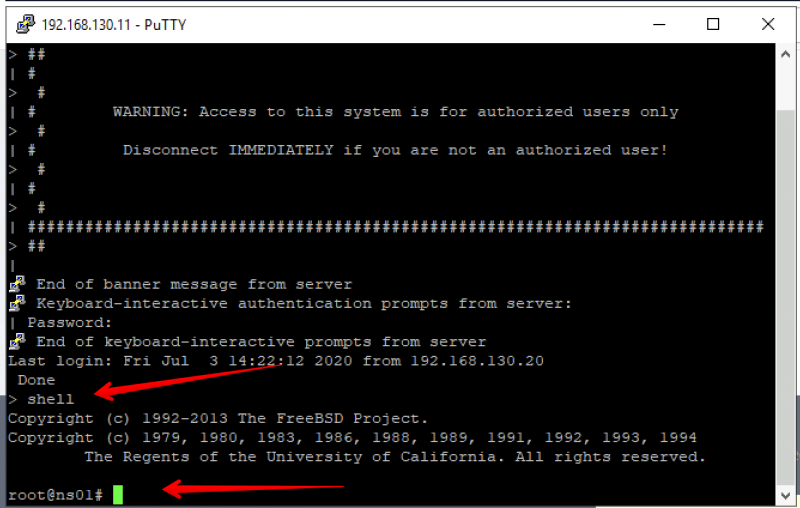
Go to the directory where you uploaded the firmware file using WinSCP. On my ADC that is /var/nsinstall/vikash.nl:
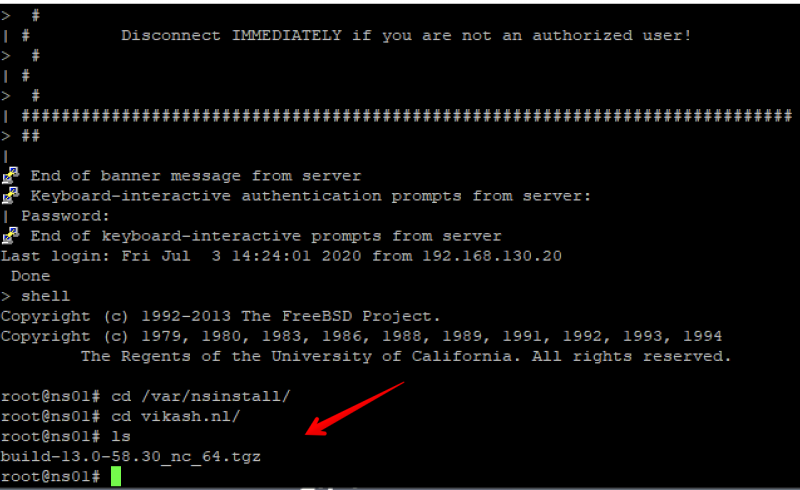
We can see the new firmware there. Now extract it using the following command:
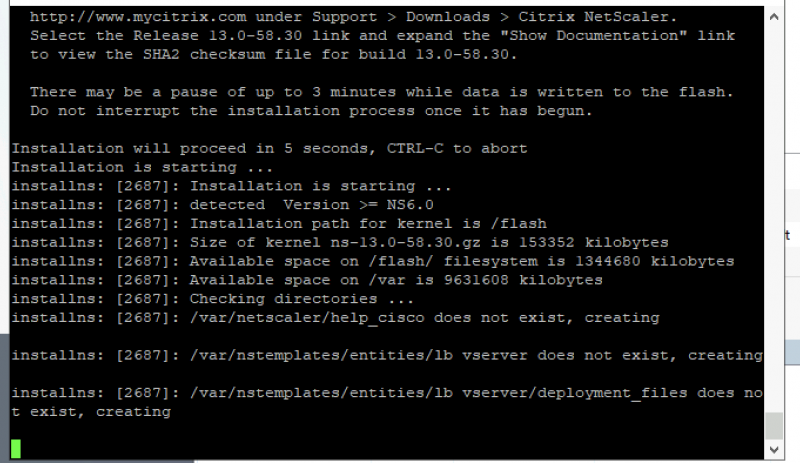
tar –xvzf build-13.0-58.30_nc_64.tgzThe tar -xvzf is the command you need to extract the file with name build-13.0-58.30_nc_64.tgz. Remember to replace the filename with the correct one. After the firmware is extracted you will have a lot of files there. The one we need is names installns. In your SSH / Putty session enter the following command to start the upgrade process:
./installnsThe command start with a . yes. After typing in the command you will see the a similar screen like the one below indicating that the upgrade has started:
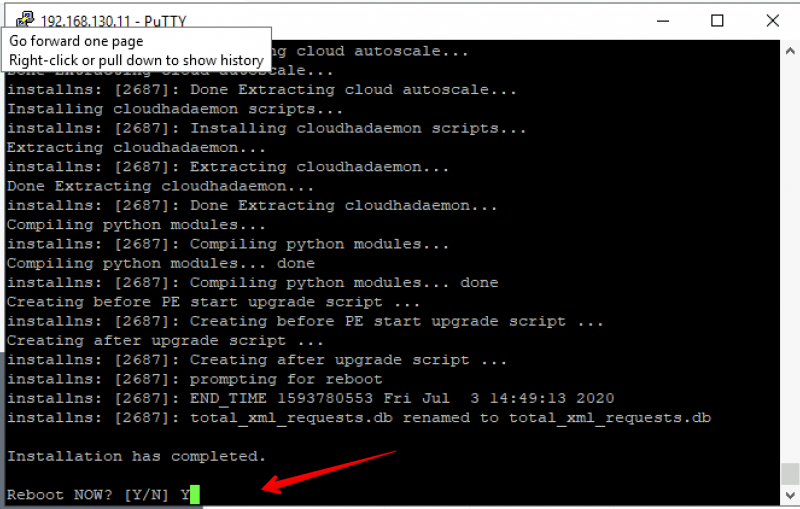
The update process will take a while. When the upgrade is finished you will be prompted to reboot the ADC. Enter Y and hit enter:
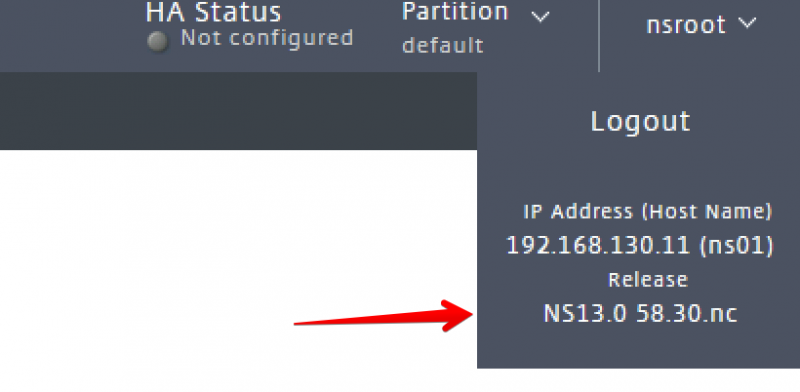
After the ADC has rebooted login using the webgui and check the firmware version to make sure the upgrade was successful:
How do I do it for ADC’s in a High Availability pair?
The steps described in this blogpost apply in general for the ADC nodes which are running in a High Availability pair configuration. Every node can be upgraded using the same method I described in this post. Make sure you to upgrade the individual nodes in the following order:
- Upgrade the secondary node.
- Reboot the secondary node.
- Disable HA-sync on the secondary node using cli: set ha node -hasync disabled.
- Upgrade the primary node.
- Reboot the primary node.
- Check that all the config is still there after the reboot of the primary node.
- Enable HA-sync on the secondary node using cli: set ha node -hasync enabled.
Upgrade Citrix ADC firmware using CLI is not that hard if you prepare beforehand and make sure that you have backups. Even upgrading nodes in a High Availability configuration is easy once you follow the steps in the same order as I described above. Good luck and stay safe!
Whats the reason for disabling HA-SYNC is it precautionary
You don’t want settings from the new version getting active on the primary one while that is still running and older version while you upgrade. Precautionary yes.