Setup and configuration of Citrix Provisioning Services 7.8
Recently Citrix has released Citrix Provisioning Services 7.8 (PVS). I wanted to see how this works, so I decided to set it up in my homelab and share the setup and configuration steps with you guys.
I will be needing this component to stream my desktops and servers. Citrix Provisioning Services (PVS) eliminates the need to manage, update and patch individual systems. Instead it allows us to use a master image to provision computers. This master image (vDisk) can be used simultaneously by multiple computers.
In this post I will show you how to:
- Install PVS
- Basic configuration using the PVS wizard
- Create a PVS farm
My lab setup:
- Windows 2012 R2 server with patches and updates which I will be using to install PVS
- Downloaded PVS ISO from www.citrix.com
- Service Account in Active Directory
- Local domain (vikash.nl)
- Domain controller (dc01.vikash.nl)
- Hypervisor Hyper-V 2012 R2
- SQL server (sql01.vikash.nl)
- Citrix License Server (dc01.vikash.nl)
- All servers running as virtual machines
Install Citrix Provisioning Services 7.8
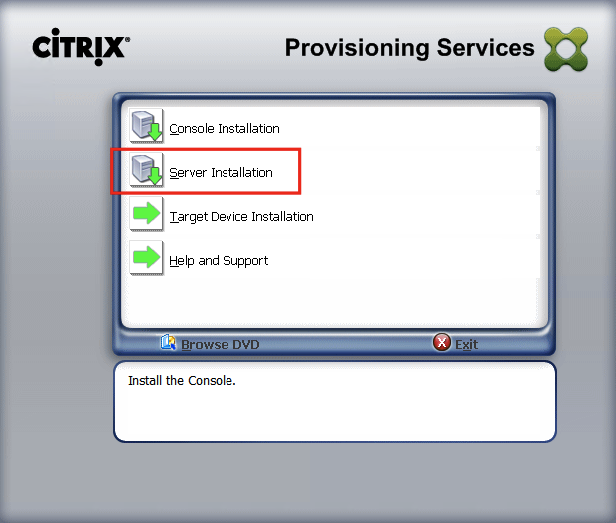
Mount the ISO to using Hyper-V manager on your virtual server and start the setup. Click on Server Installation.
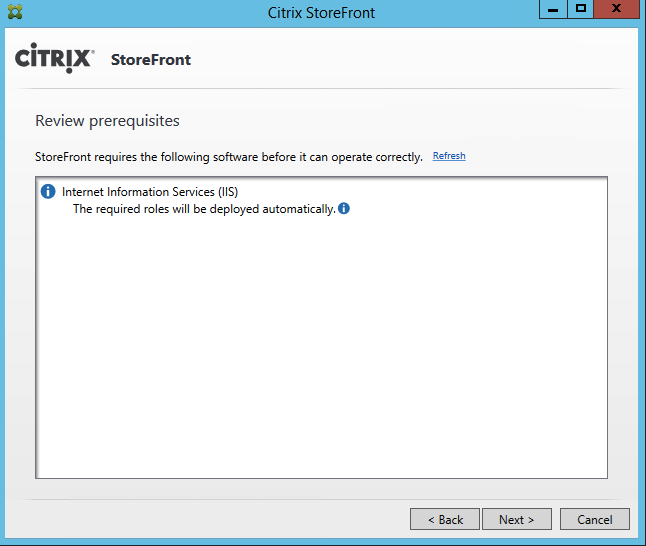
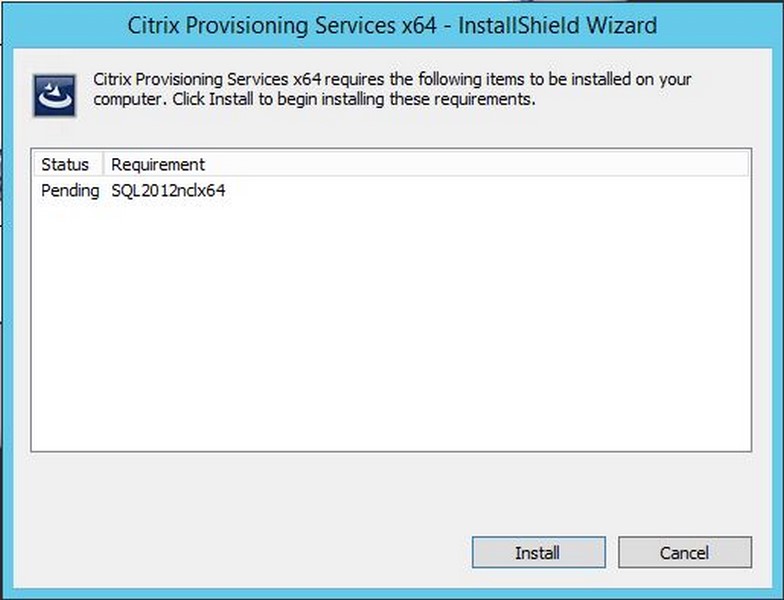
The setup wizard will automatically detect the required components and will prompt to install them. Click on Install.

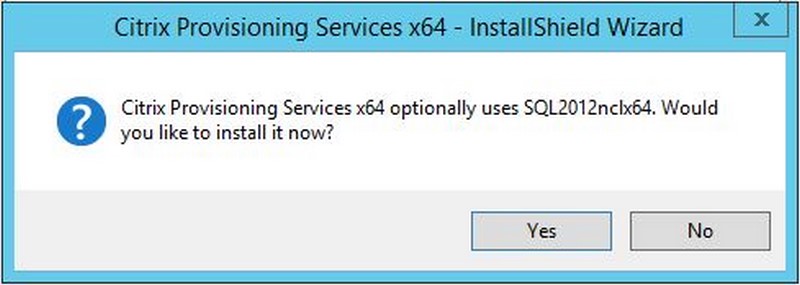
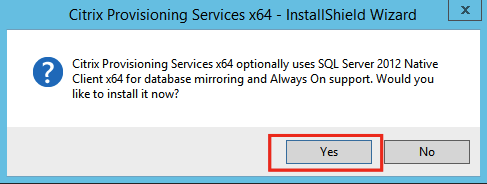
Click on Yes to install the SQL components.
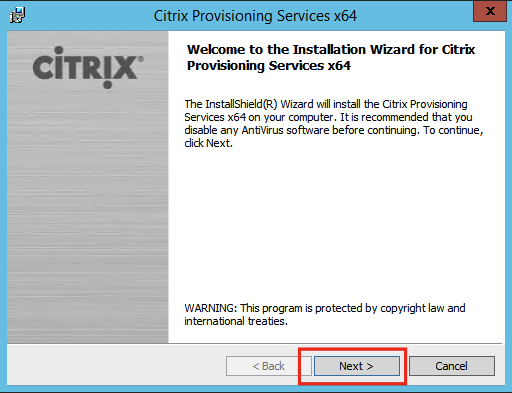
Click on Next on the welcome screen.
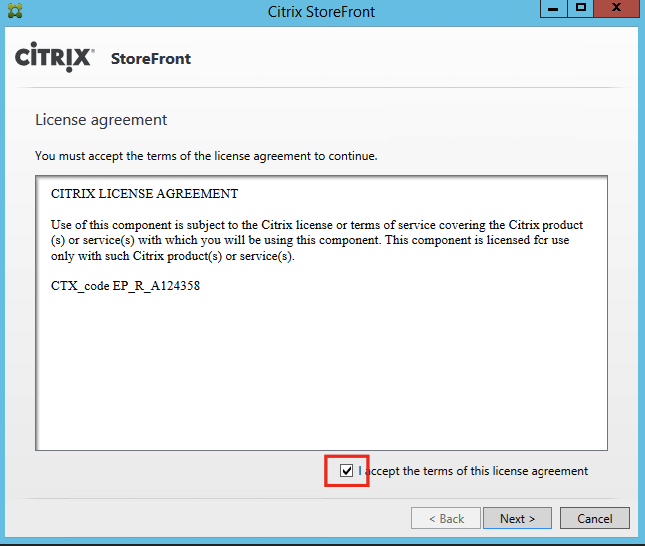
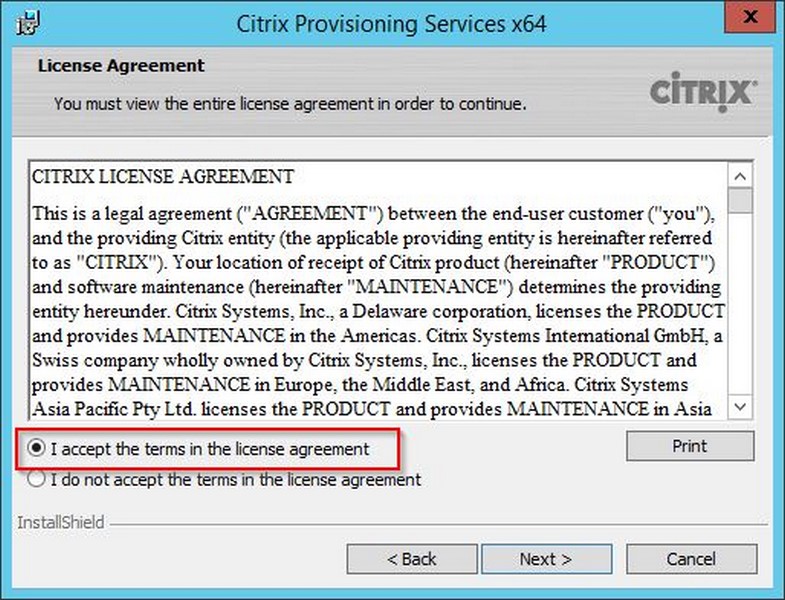
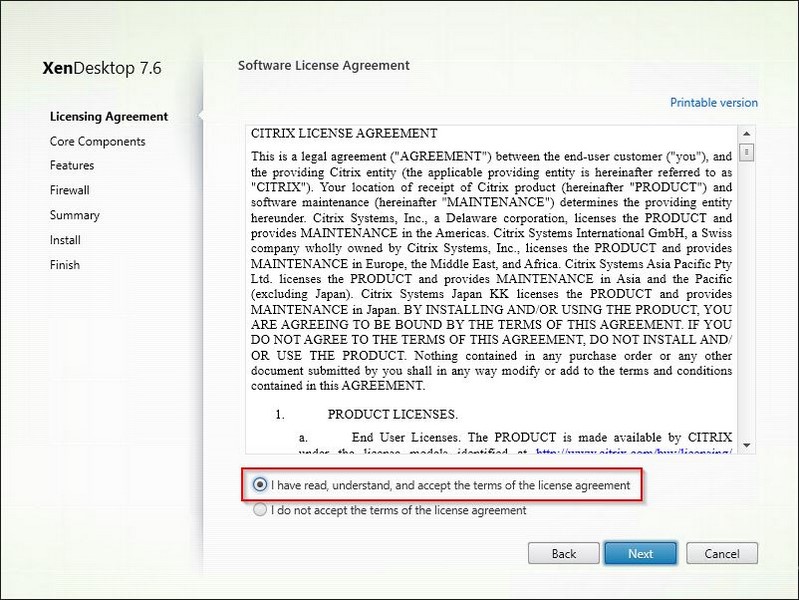
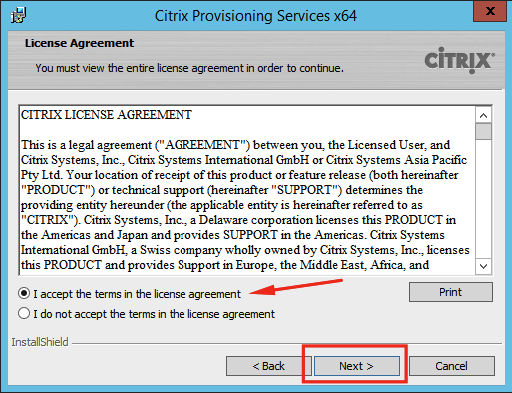
Accept the license agreement and click on Next.
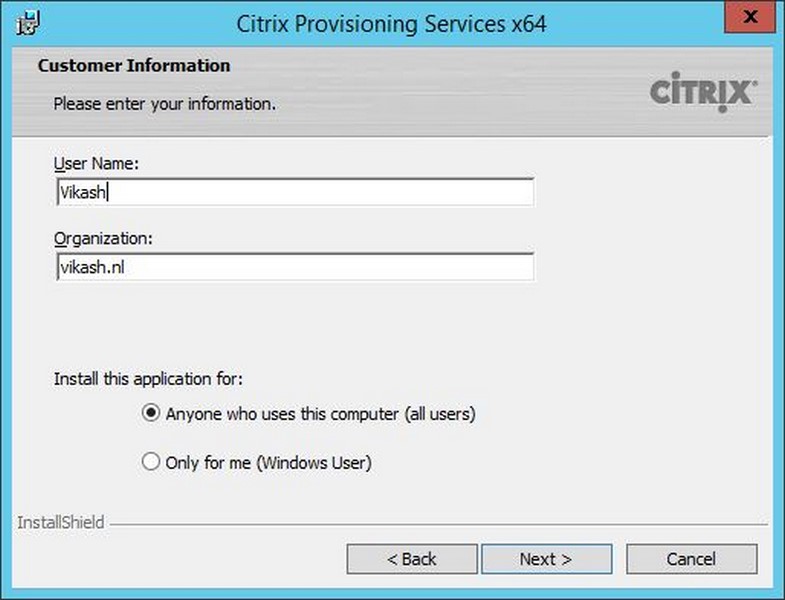
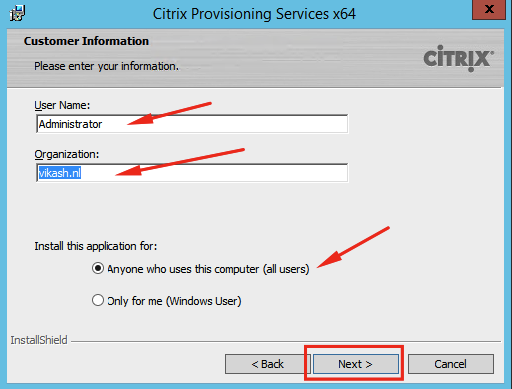
Enter the username and organization name. Select the all users option and click on Next.
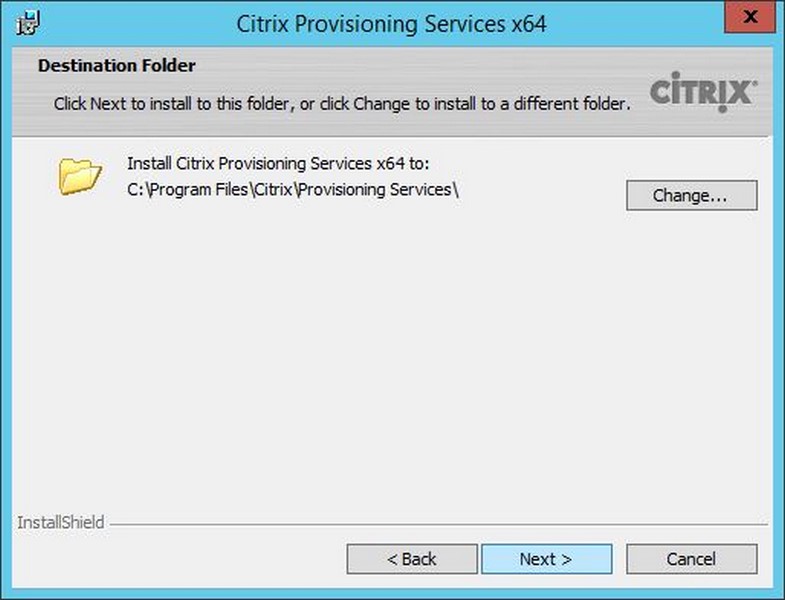
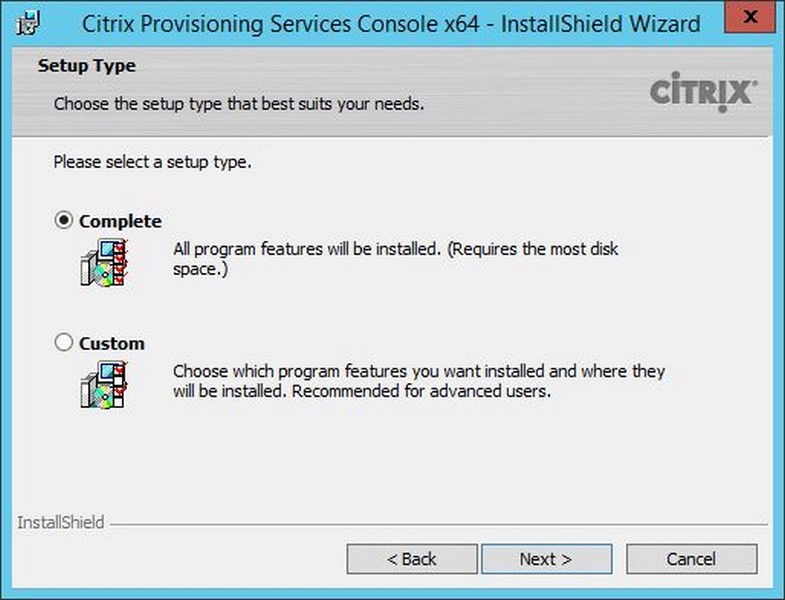
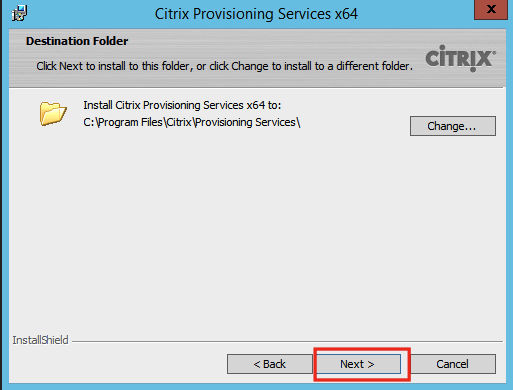
Choose the installation folder. In my case I left this default. Then click on Next.
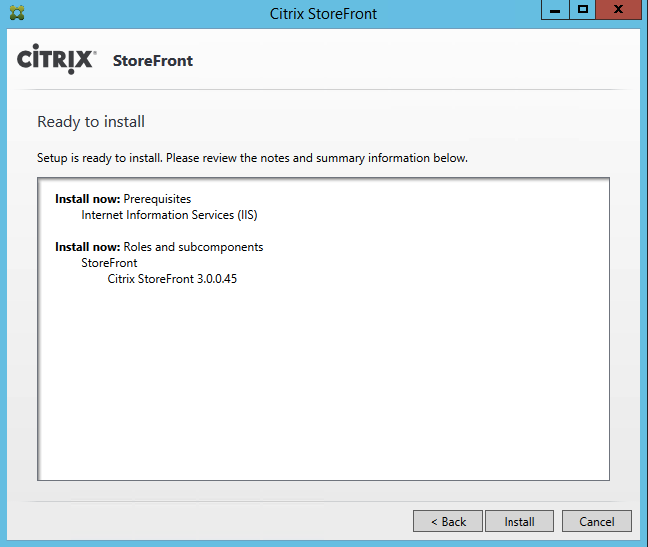
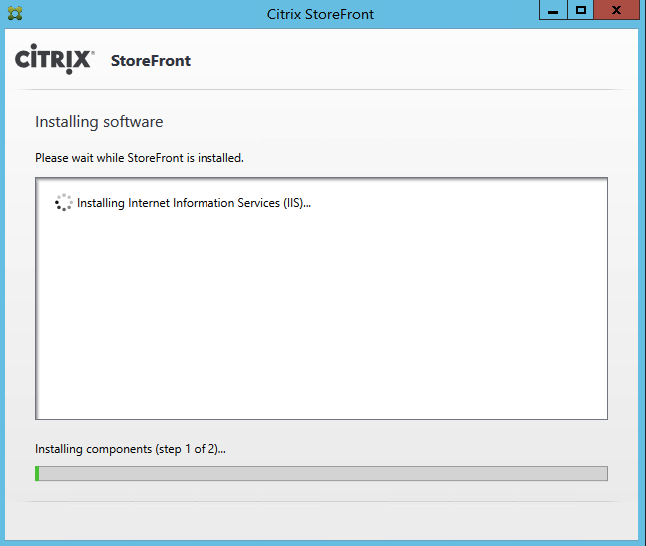
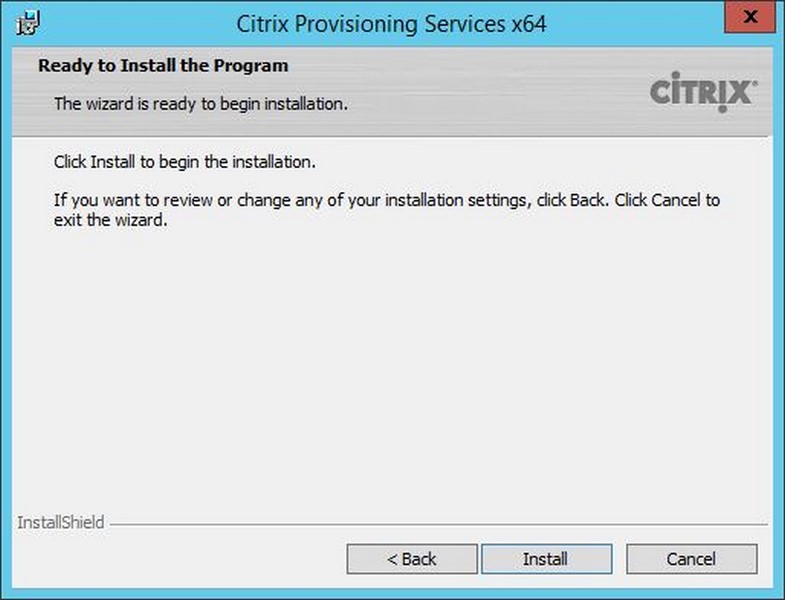
Click on Install to start the installation.

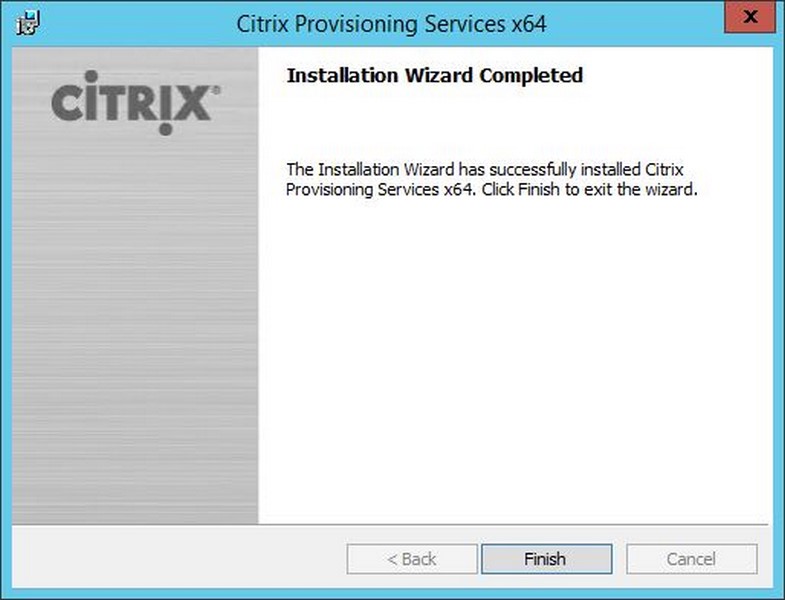
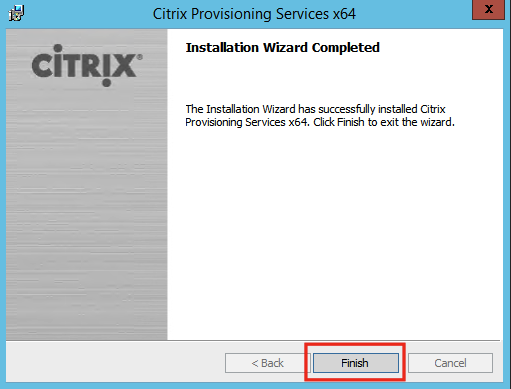
Click on Finish to finish the installation.
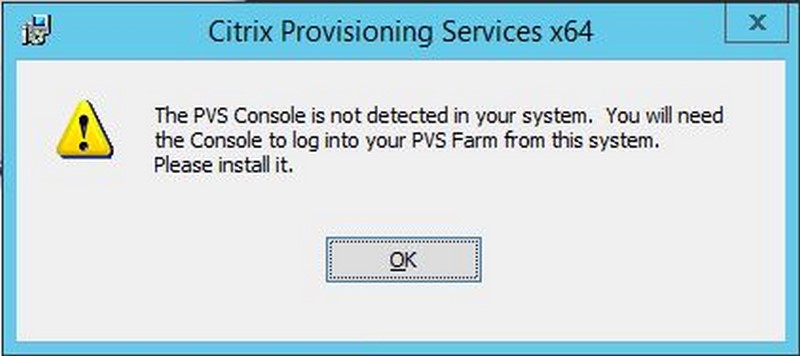
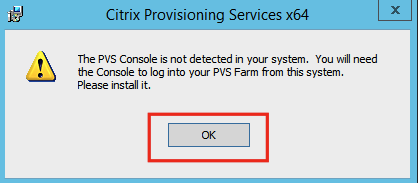
You will get a warning message about the PVS Console. We will install this later. Click on OK.
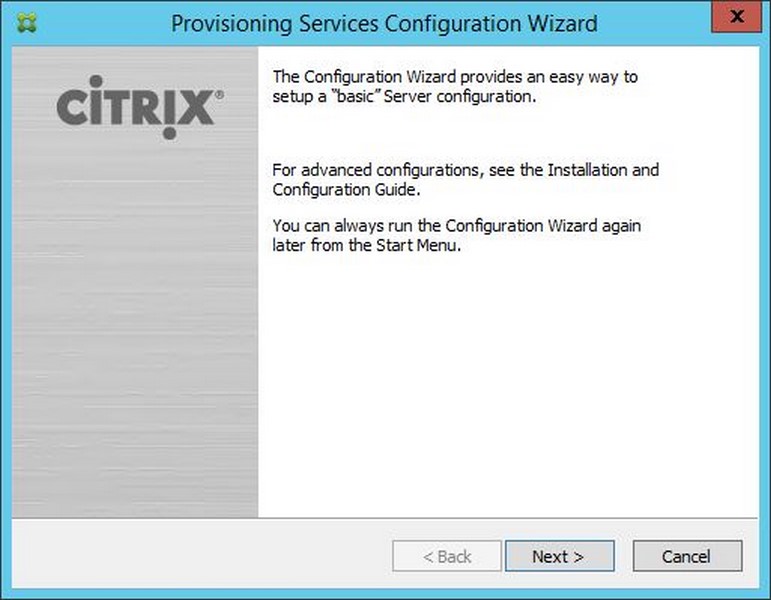
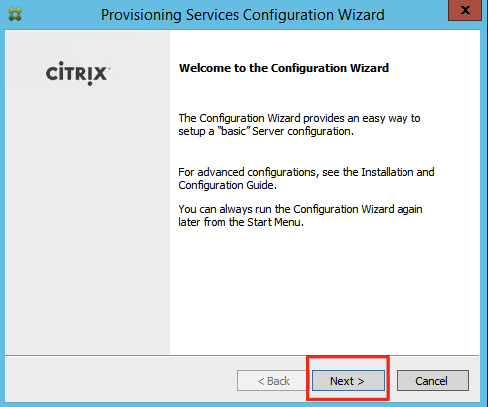
Now the Provisioning Services Configuration Wizard will automatically start. Click on Next.
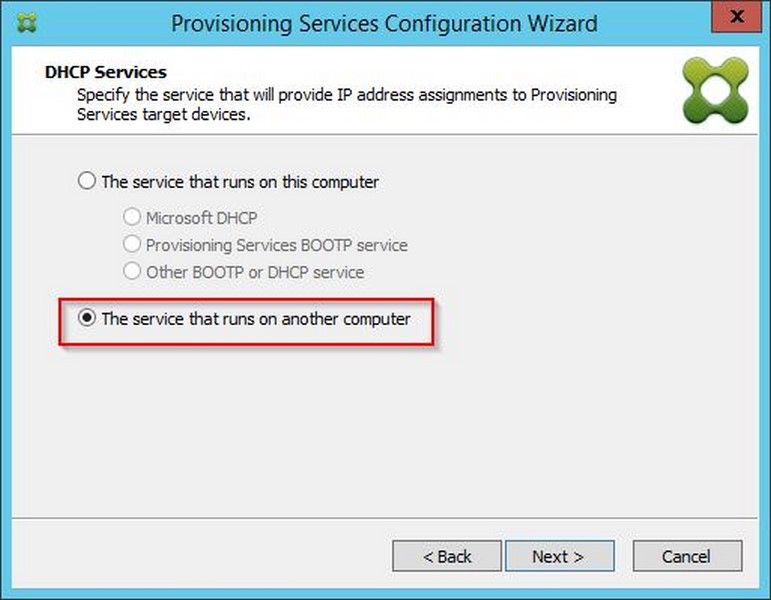
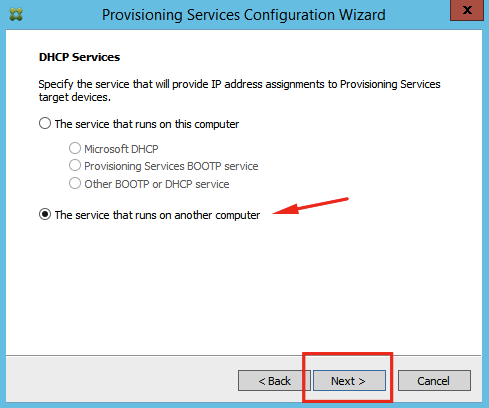
You will now be prompted to choose a DHCP option. When the PVS server is running DHCP (local service), choose The service that runs on this computer. In my case my DHCP is running on my router, so I choose The service that runs on another computer. Click on Next.
Choose the PXE options. If your virtual machines will boot using the PXE service, enable this. In my environment I will be using a bootable ISO for all the virtual machines running from PVS. You can see  here how to create a bootable ISO. So I choose The service that runs on another computer and click on Next.

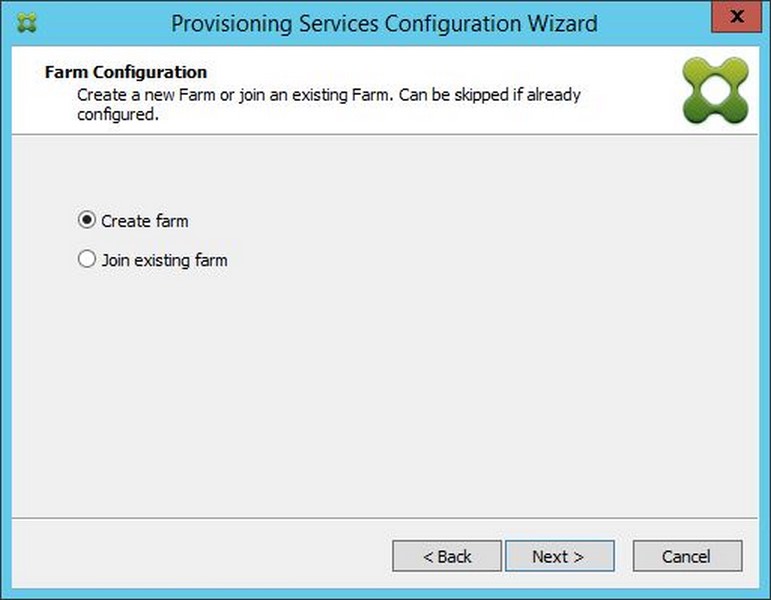
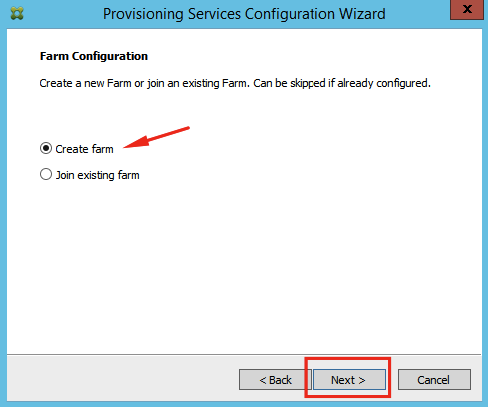
Now we have to create a new farm since this is my first PVS server. Choose Create farm and click on Next.
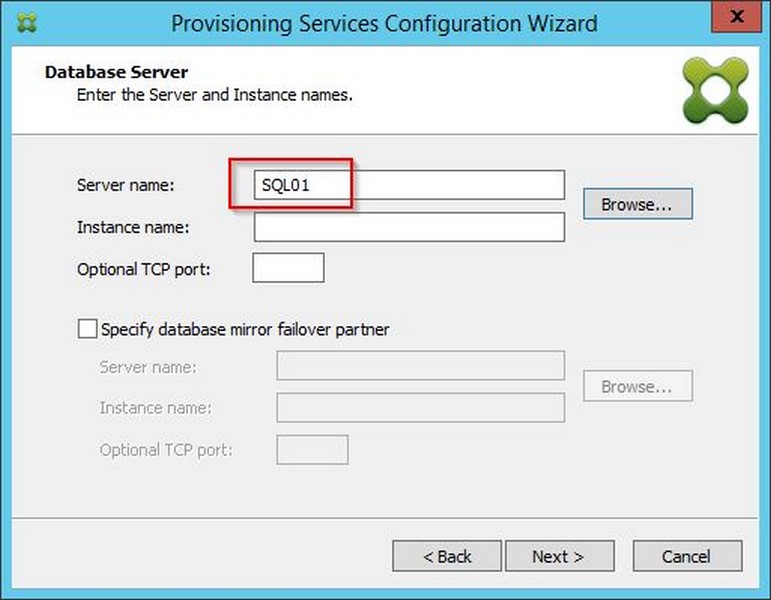
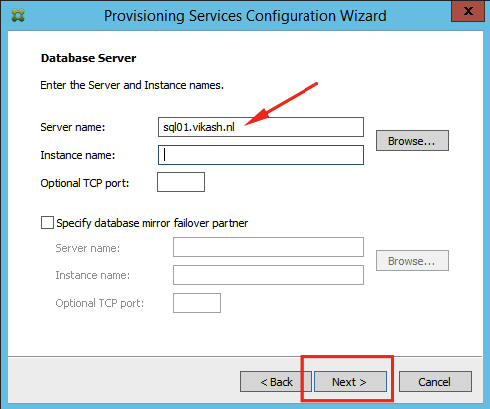
The wizard will create the database now. The active directory account running the configuration wizard should have rights to create the database on the SQL server. Otherwise make sure the database is created beforehand and that you have the correct account to login to the database. Enter the SQL fqdn and click on Next.
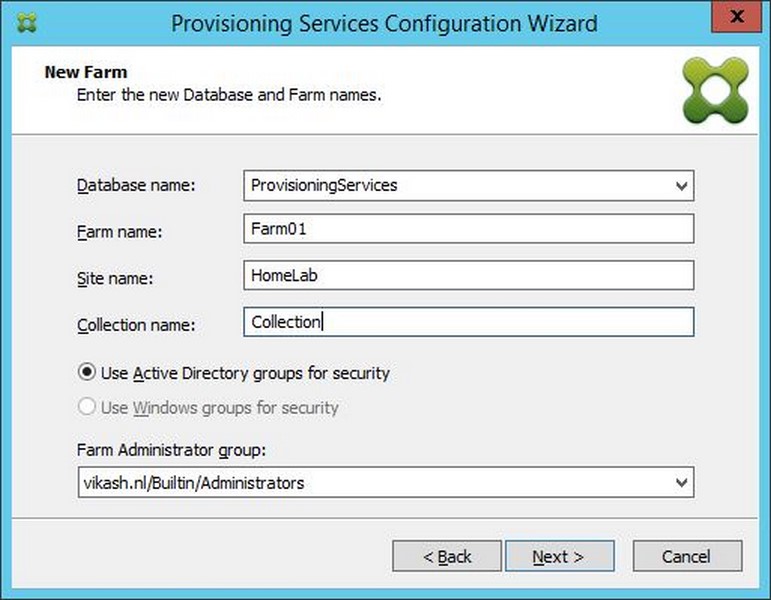
Enter the database name. If this is an existing database, choose the name using the dropdown menu. Make sure to select the correct Active Directory group to manage the PVS server (Farm Administrator group). Enter the other information needed to create the farm and click on Next.

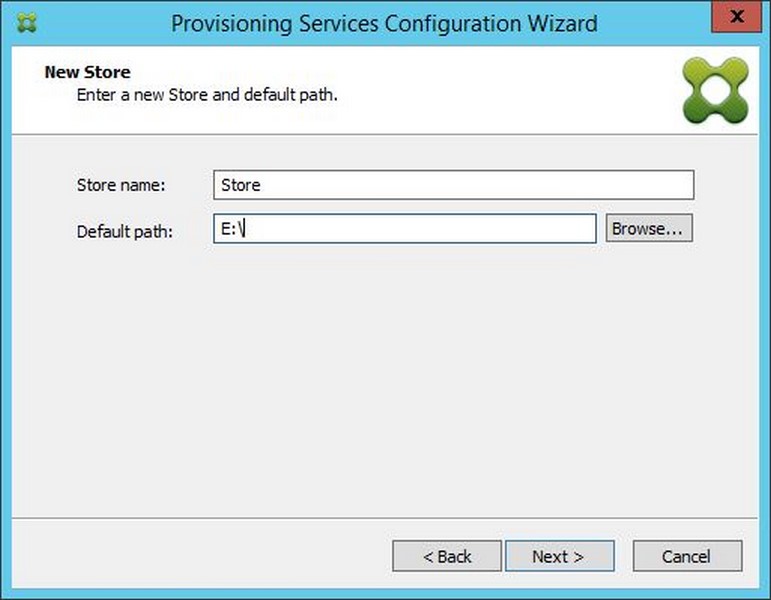
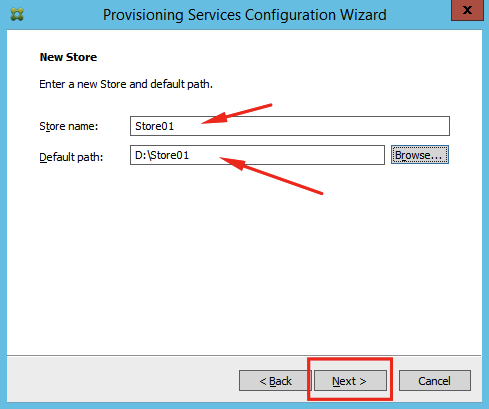
Select the destination to store the virtual disks for the virtual machines running from PVS. Give it a name and click on Next.
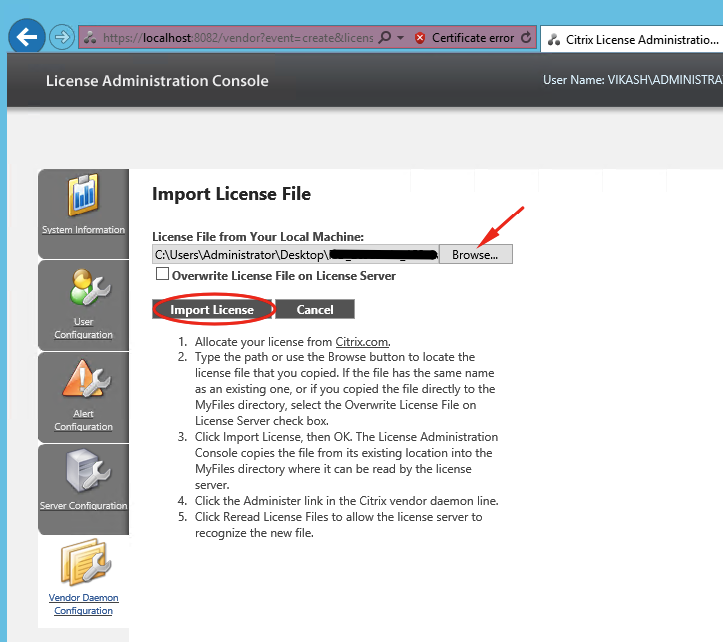
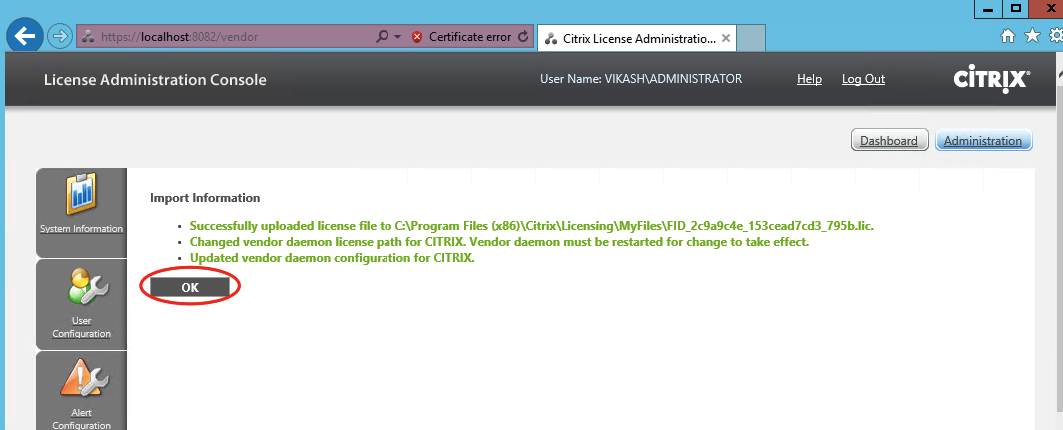
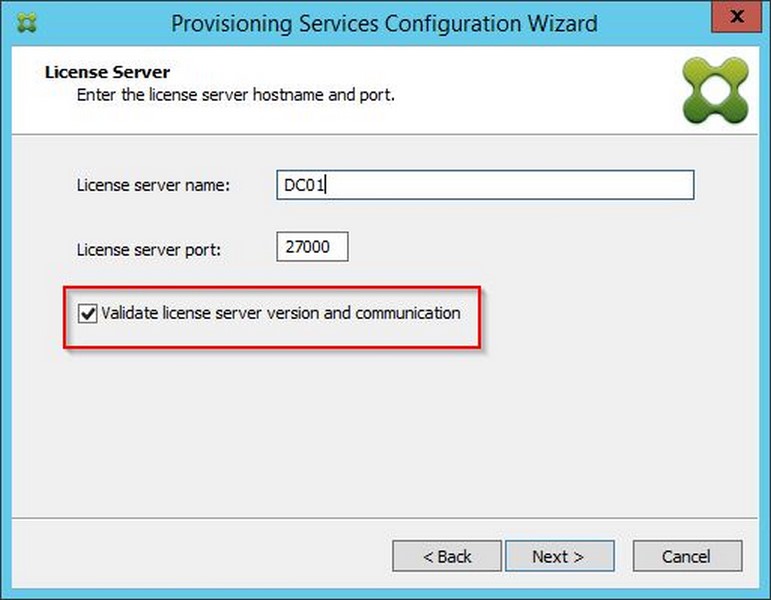
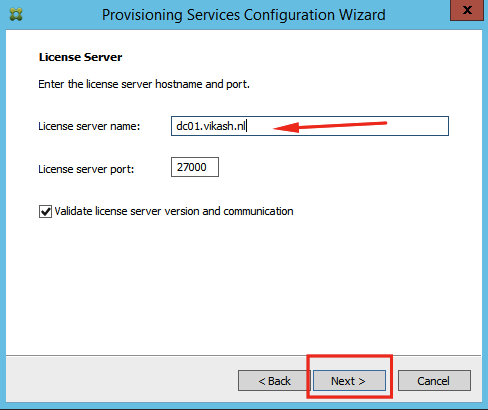
Enter the license server fqdn. Click on Next.
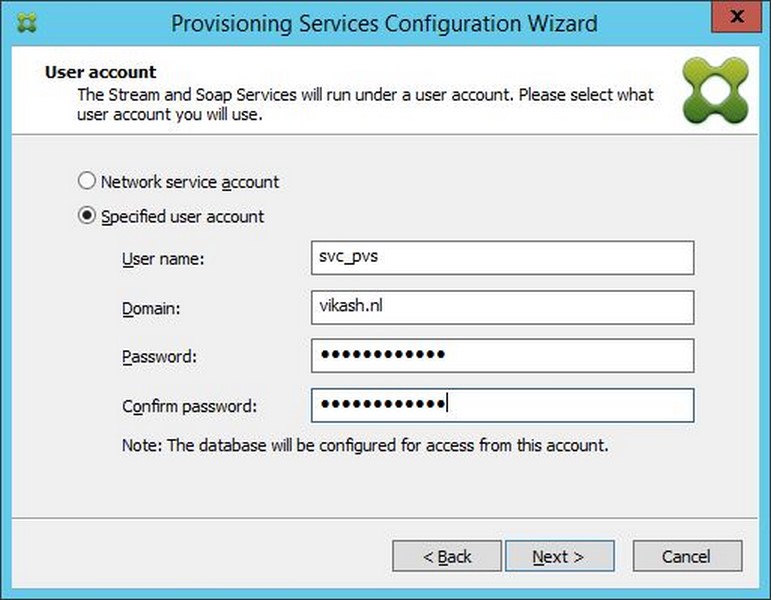
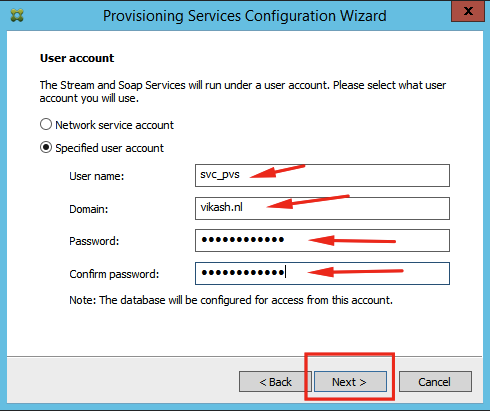
Now we have to specify an account for running the PVS service. This will be used to run the Stream and Soap service. Enter the correct information and click on Next.
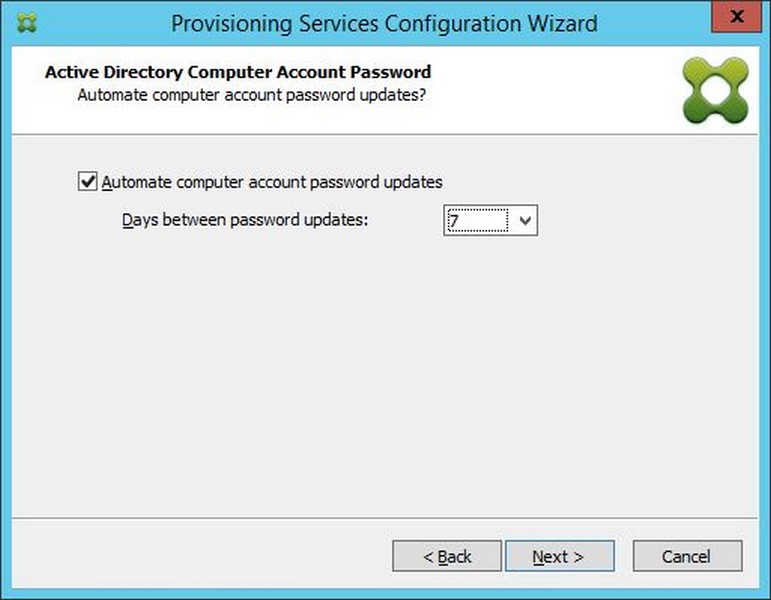
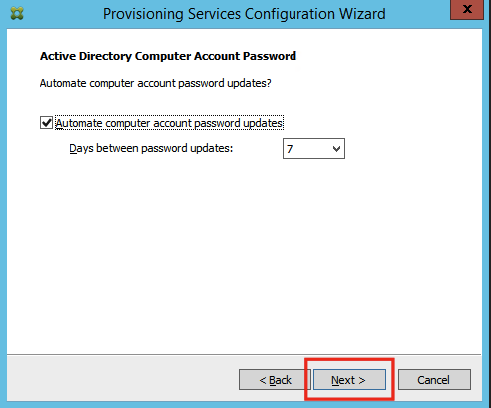
The target devices running from PVS cannot update their own password in the Active Directory, so we must enable PVS to do this for us. Make sure this is enabled and click on Next.
Check the network communication settings for management and streaming. Select the correct interface, check with your network admin in case this is not clear. In my case my PVS server has one NIC. Click on Next.

Next you will be prompted to enter the TFTP options. Enable it and click on Next.

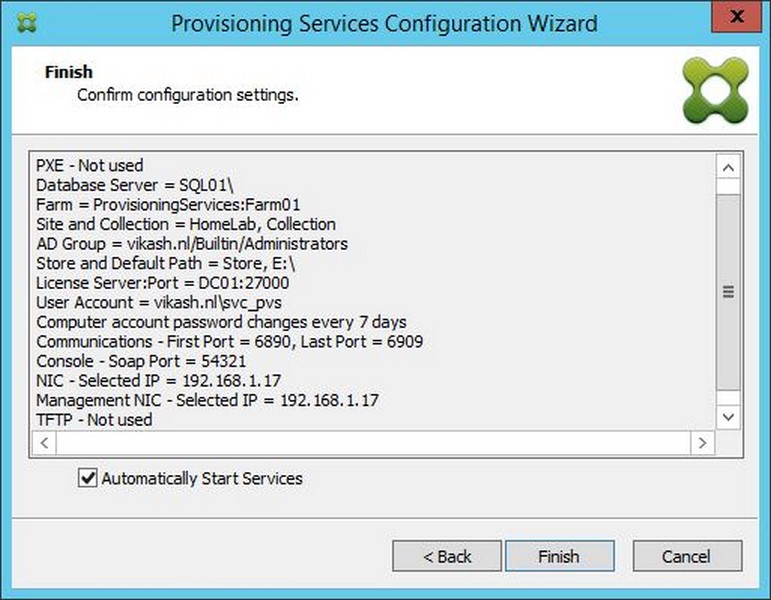
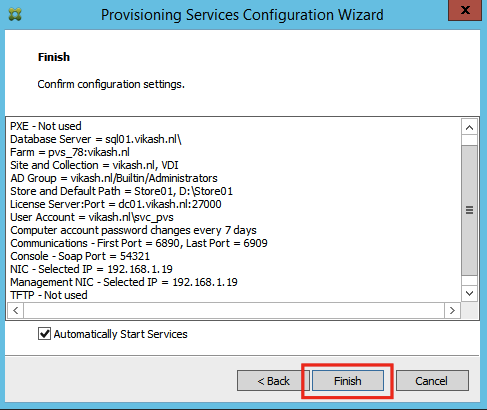
Now everything is setup to finish the configuration wizard. Click on Finish.
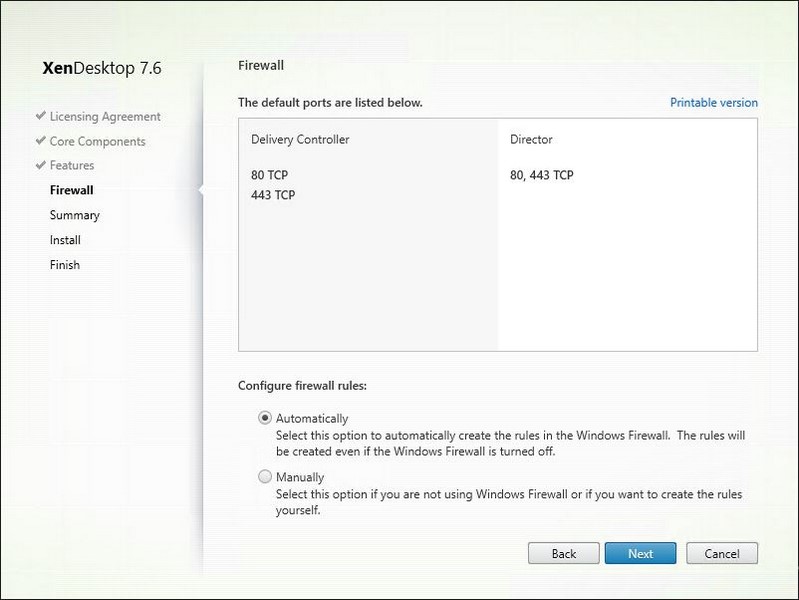
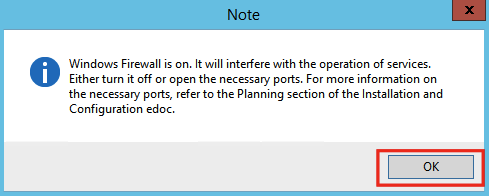
If you have Windows Firewall running on your server, you will get a message about that. Make sure you disable it later or open the necessary ports. Click on OK.
Click on Done after the configuration wizard has finished.

Install the Citrix Provisioning Services Console
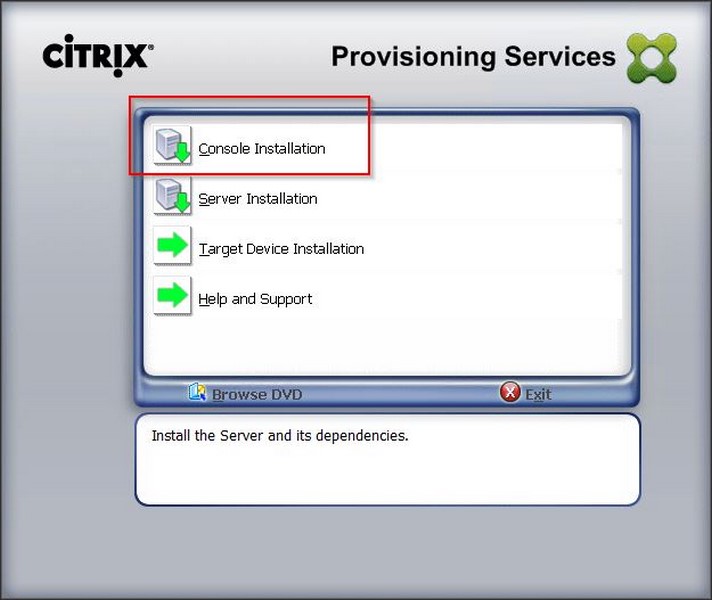
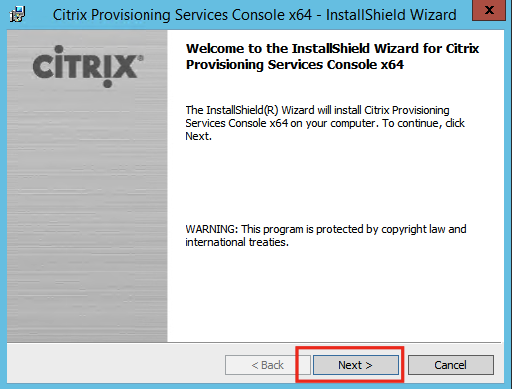
In order to manage Citrix Provisioning Services you need to install the console. Run the setup from the Citrix Provisioning Services ISO and this time click on Console Installation.

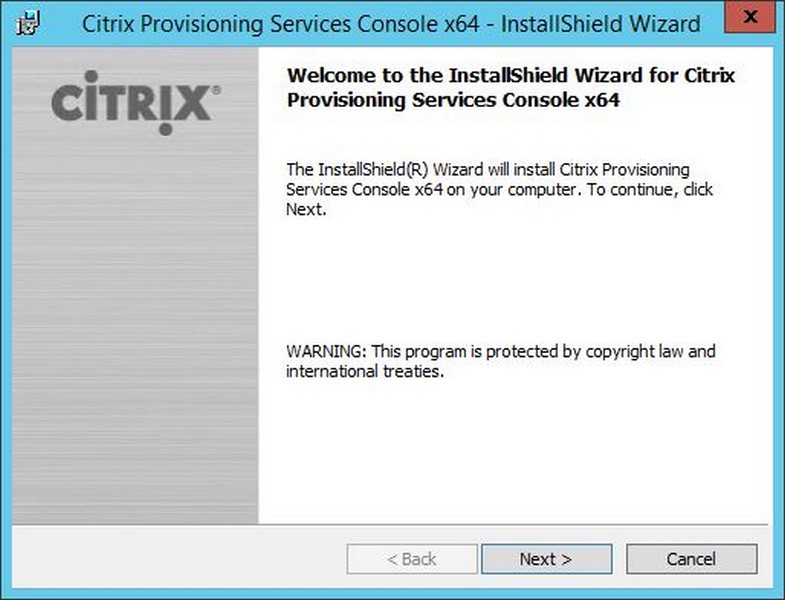
Click Next in the welcome screen.
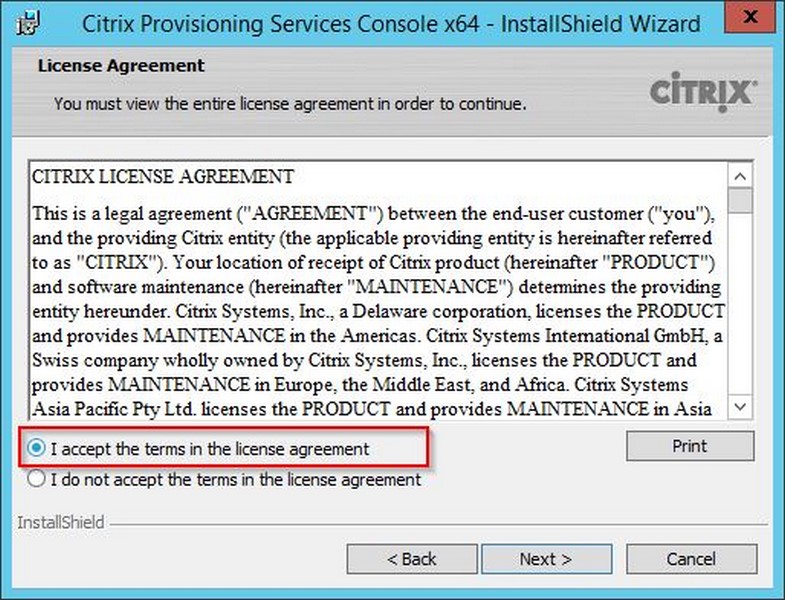
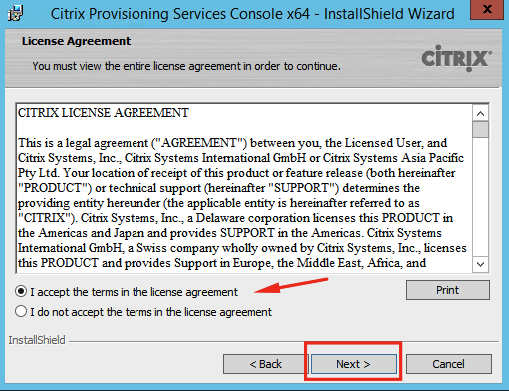
Accept the License Agreement and click on Next.
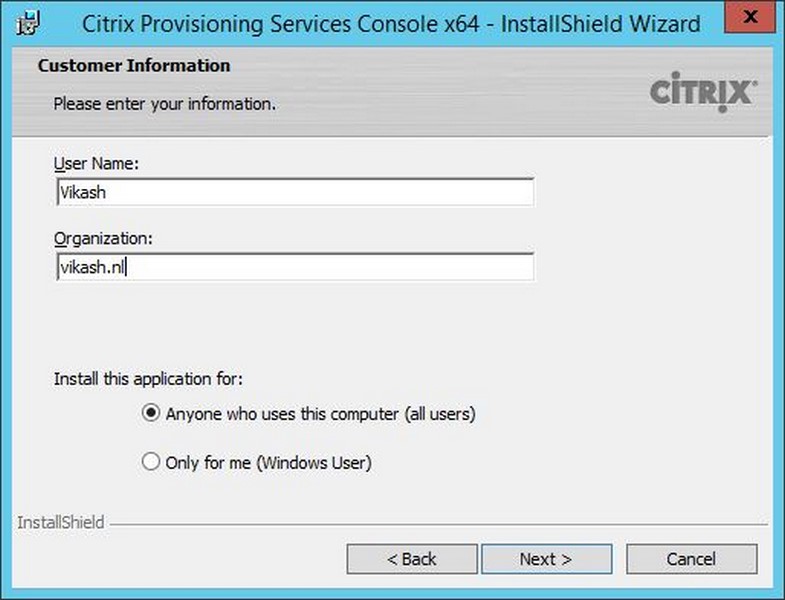
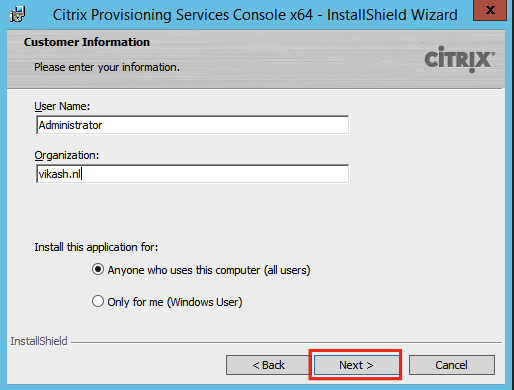
Enter the Customer Information and click on Next.
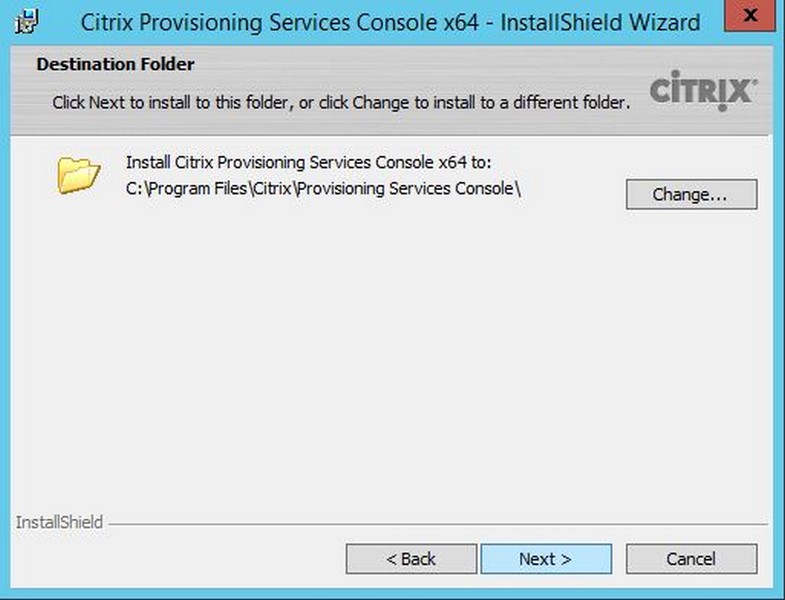
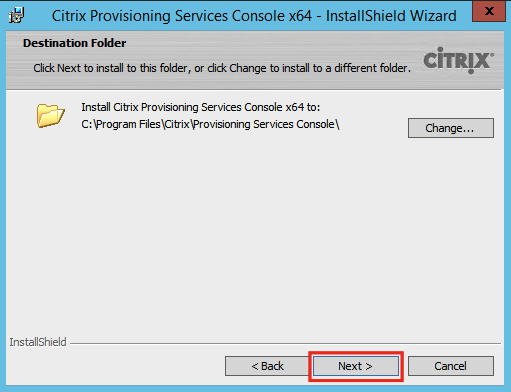
Choose the installation path and click on Next.
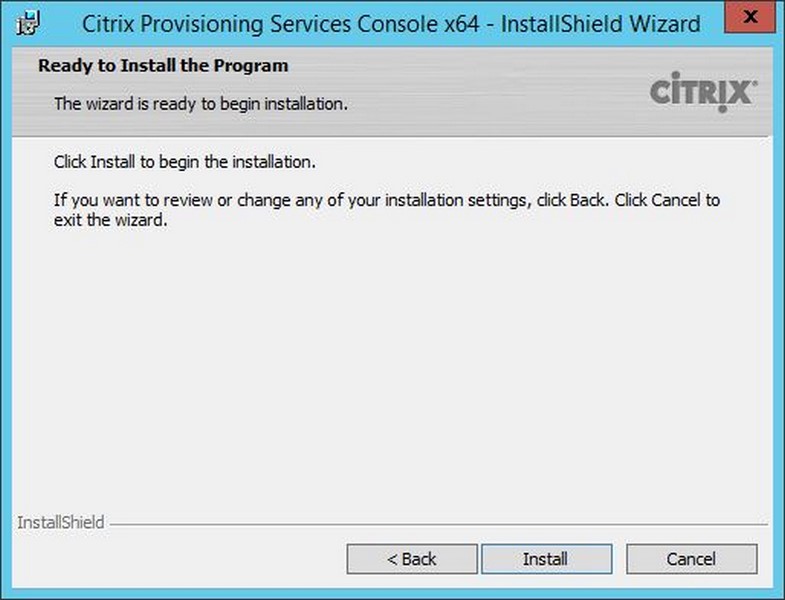
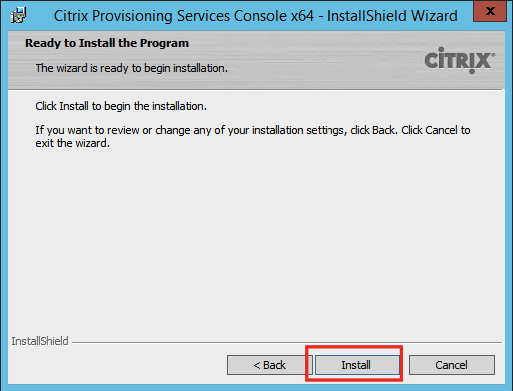
Click on Install to begin the installation.
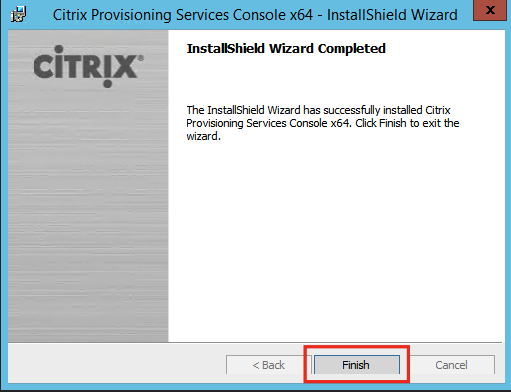
After the installation is finished, click on Finish.
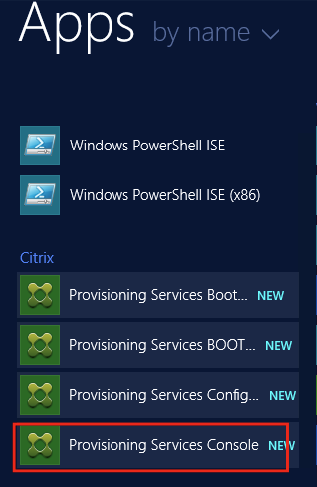
Now go to the Start Menu and start the Provisioning Services Console.
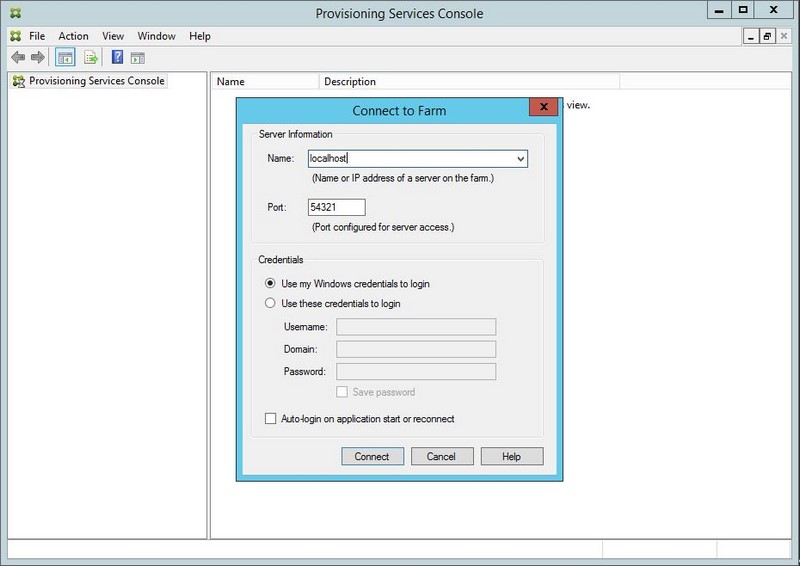
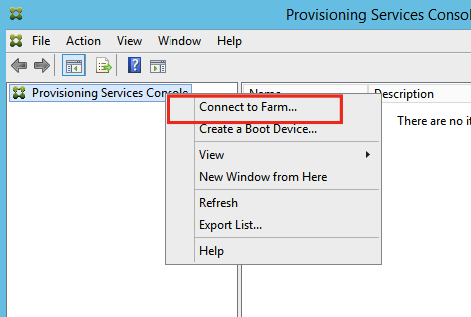
Right click Provisioning Services Console and click on Connect to Farm….
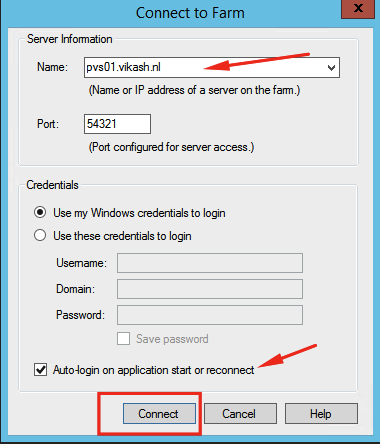
Enter the correct fqdn, select Auto-login on application start or reconnect to automatically connect to the PVS server and then click on Connect.
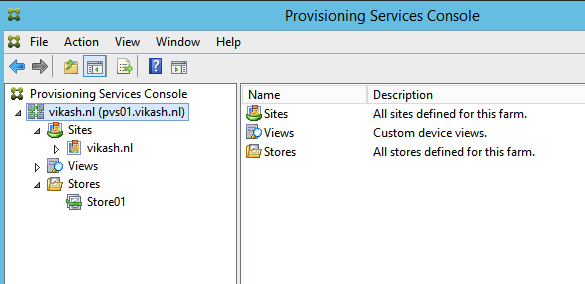
Now you should be able to manage the PVS server.
This concludes this tutorial. Feel free to contact me of you have any questions or comments.
You can also follow me on twitter or add the rss feed from the blog and you will be notified when I add new posts.
Setup and configuration of Citrix Provisioning Services 7.8 Read More