Reading Time: 8 minutes
What is WireGuard VPN?
I’m sold on WireGuard and I hope that it get used more and more in the future. That’s why in this post I will show you how to setup WireGuard VPN server and clients running on iOS and Windows.
WireGuard is another Virtual Private Network (VPN) tech. It is fairly new. Now do we actually need another VPN? Well I think we do if you look at the specs and performance of WireGuard. It literally puts the old guard in the shade in terms of performance. It is build from the bottom to be fast, modern, secure and at the same time lightweight on resource usage. For example when I run OpenVPN on my iPhone my battery drains real quick so I cannot leave it running the whole day. With WireGuard on my iPhone I don’t need to worry about battery drain and I can leave it running the whole day! Recently I just forgot to disable WireGuard and it was running for a couple of days on my iPhone without me noticing it. I benefit from the added security and privacy as it seamlessly switches between mobile data and WiFi. And it is fast too in switching the VPN tunnel between mobile data and WiFi. I know that OpenVPN takes some time to activate when you switch from network and sometime you have to manually restart the process. If you want to read more about WireGuard check out their website here.
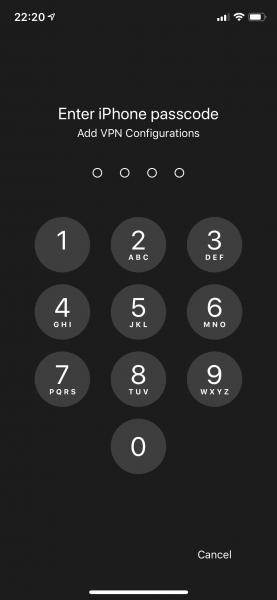
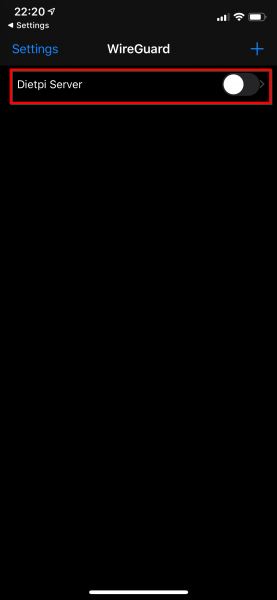
In this blog post I only show you how to configure the Server side. For the client configuration check my other blog post:
Where can you use it?
I will show you how to setup WireGuard on you home network. This will be the server side of WireGuard. Then I will show you how to setup a client on Windows 10 and on iOS. With WireGuard server running at home and your computer and mobile phone running the client you can safely connect to you home network when away from home. And for me the most important benefit from connecting to my home network when I am away is that I can benefit from the added security I have from my Pi-Hole. Check my blog post here about setting up a Pi-Hole on your home network.
Having WireGuard and connecting back to home also means that I don’t have to worry about being tracked or my data leaked when I am on another WiFi network like at a restaurant or in a hotel. Because everything goes trough my WireGuard VPN tunnel to my own network no one will be able to see what is going on because the traffic is completely end-to-end encrypted. That is security and privacy away from home in your pocket right there :).
Requirements
WireGuard is so lightweight that it can even run on a Raspberry Pi. I am running it on a Raspberry Pi 3 Model B and it can easily max out the network speed without breaking a sweat. The max network speed of that type of Raspberry Pi is 100Mbit/sec and I have it pulling about 90Mbit/sec. Wow!
Meet DietPi
On my Raspberry Pi I am using DietPi as my operating system. DietPi is a lightweight Linux distribution aimed at single board computers. Check out their website here. It is optimized for Raspberry Pi, lightweight and it has a software repository which makes it very easy to setup several software packages on the Raspberry Pi. DietPi also takes care of system settings and NAT rules on the local system required for WireGuard. Hey I am all up for automation. I will show you later on how those look.
For this blog post I will use a Hyper-V DietPi version (for demo purposes) but the performance tests I will show you how my production Raspberry Pi performs. It is a beast!.
Install and configure WireGuard server
Start by downloading the correct version of DietPi for your hardware. As you can see in the screenshot below DietPi offers an image for a variety of hardware:
If you download the image for one of the single board computers like the Raspberry Pi, you can use Rufus (or similar software) to write that image on your SD-card and boot the system. Basically that is all you have to do to get DietPi running.
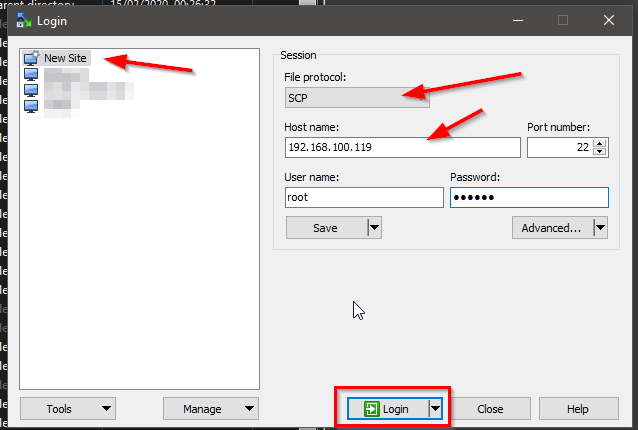
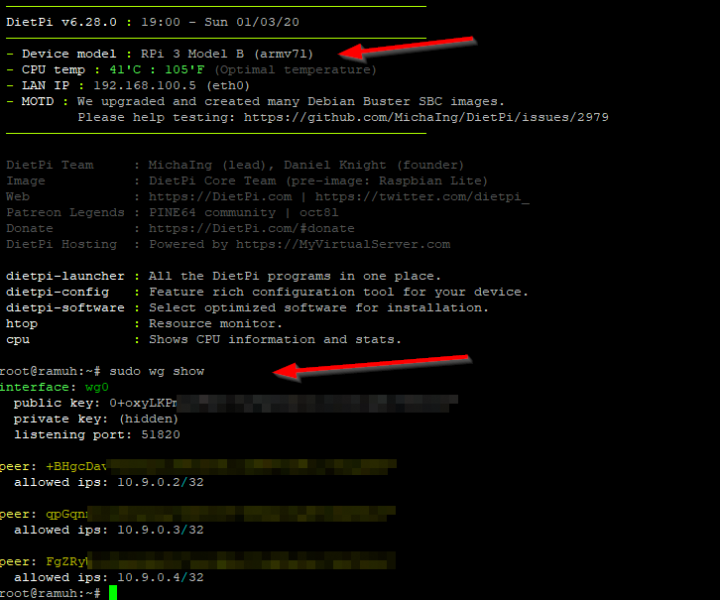
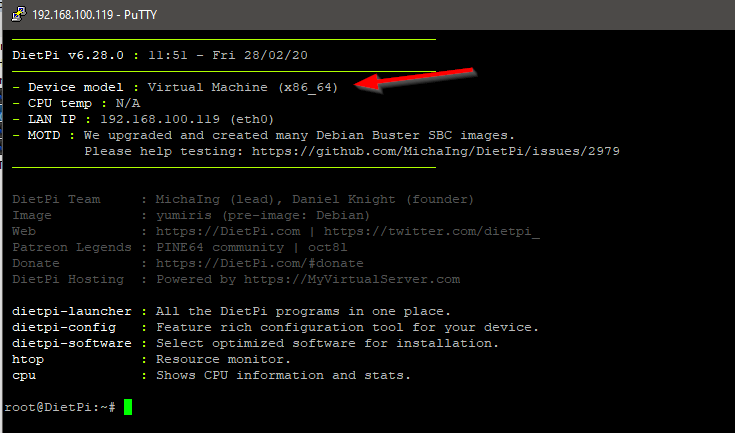
Login using SSH with your favorite program. I am using Putty. You will be greeted with some information about DietPi and some stats. In the screenshot below you can see that I am using a virtual machine for this blog:
Run the following command to start the software selection tool:
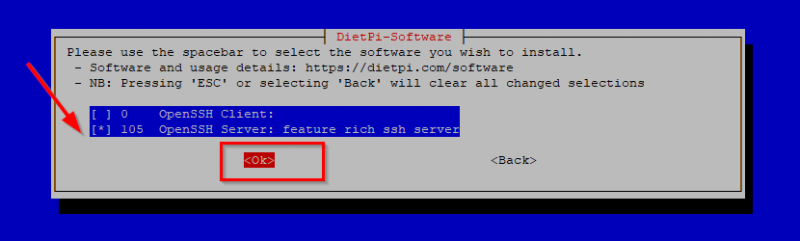
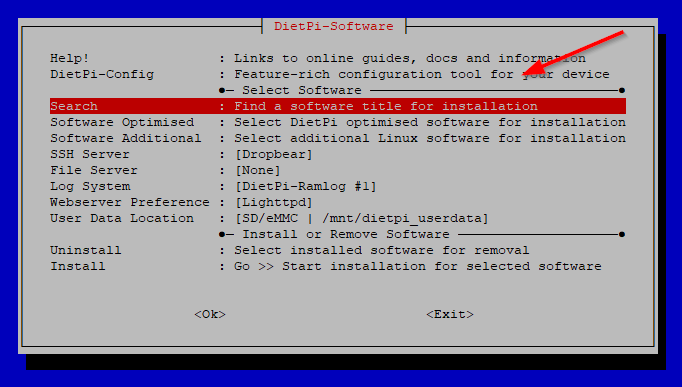
You will see the DietPi-Software utility. Because there are a lot of packages we will search for WireGuard. Select the Search option and hit enter:
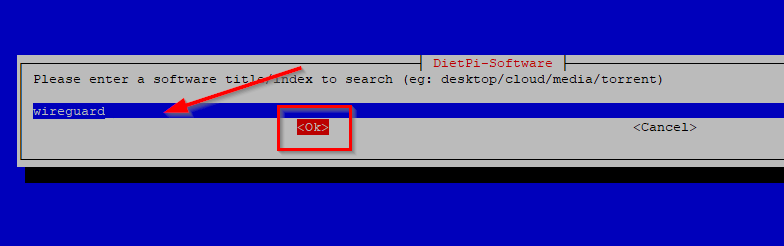
Enter wireguard in the search field and select OK:
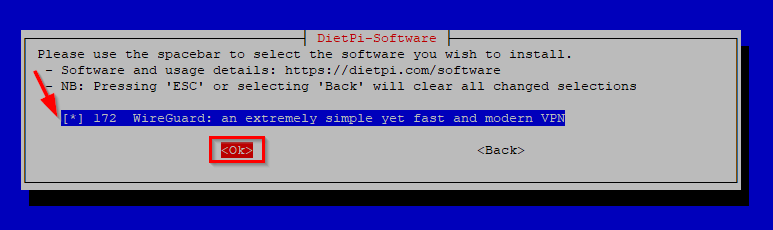
You will see that is has found wireguard server. Select the package with your spacebar and the hit OK like in the screenshot below:
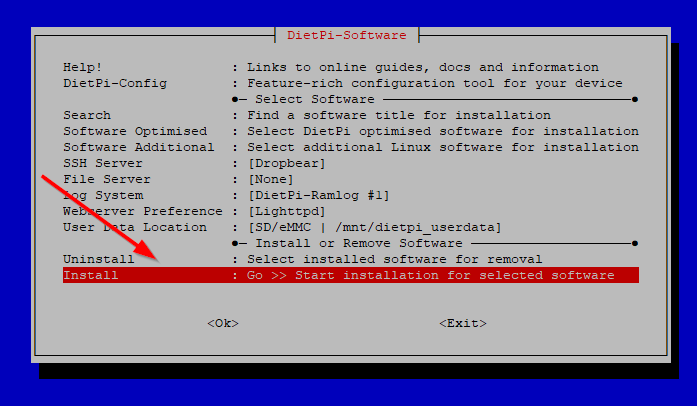
You will be back at the start screen for the software install utility. Now select the Install option and hit enter:
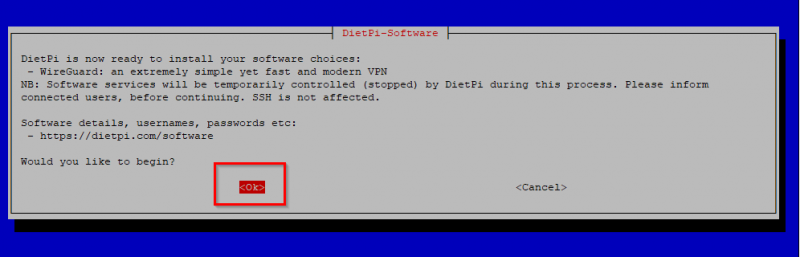
DietPi will ask you if you would like to begin the installation. Select OK and hit enter:
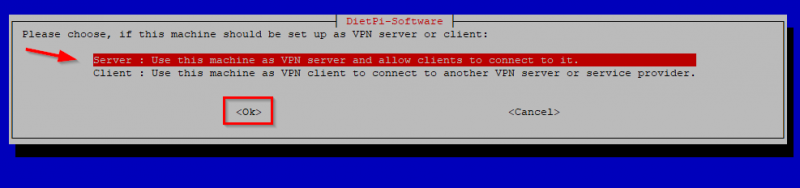
The setup will start and DietPi will automatically install the required package. Then a screen will popup asking you if you want the machine to be setup as VPN server or client. We will choose Server and hit OK.
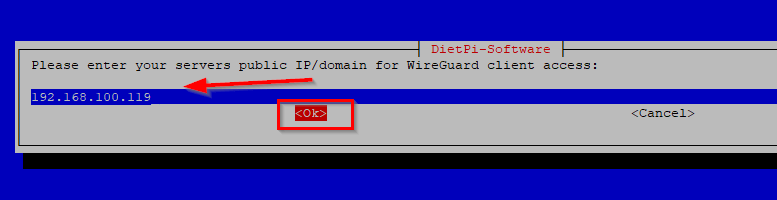
The next screen is very important. The setup will ask you to enter the public IP address or domain. That means you WAN IP address or public DNS name. If you WAN IP address is using DHCP (check your internet provider for this) you will want to setup some kind of dynamic DNS name and use that here. There are some free services on the internet like DynDNS or No-IP where you can set this up. If your WAN IP address is static use that. For this blog I will use a LAN IP address and for testing purposes this is fine. So enter your WAN IP address or internet dns name in the screen and hit OK:
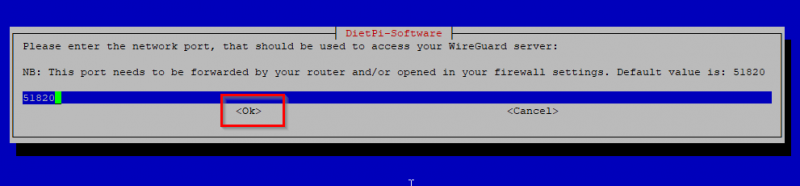
Nest the setup will ask you the port number to run WireGuard server on. I leave this at default, which is port 51820 and hit OK.
Now WireGuard server is basically setup. The finish the installation the system will need a reboot. Hit OK to do that now:
Server configuration
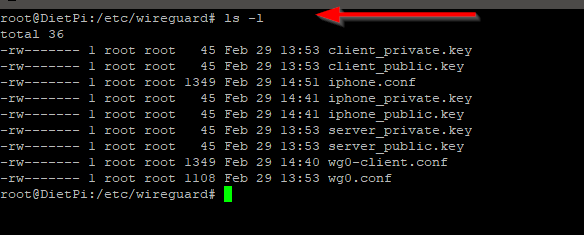
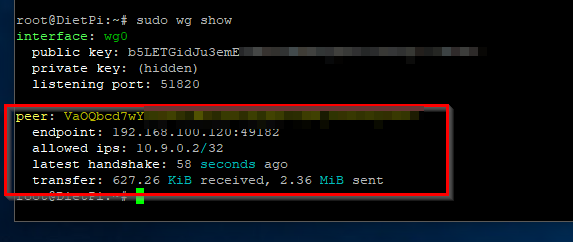
After the reboot reconnect again using SSH to your DietPi. DietPi generates the basic configuration for the server and also for one client. The configuration of all those components can be found in the location /etc/wireguard/. There you can see the configuration and the keys used for authentication and traffic encryption. See screenshot below:
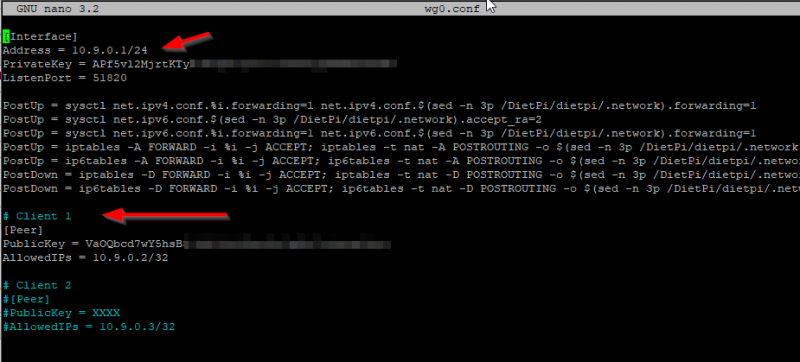
Let’s take a look at the server configuration. Open the file wg0.conf (the server file) with nano and you will see that DietPi software installation script has configured everything on the server side for us. It does the iptables rules as well as enabling forwarding of network traffic and it also has generated the configuration for our first client:
The Address 10.9.0.1/24 is automatically added and will be used for WireGuard Server. So the server will be on 10.9.0.1 and the first client will get 10.9.0.2 as you can see in the screenshot above. You can change those but that is beyond the scope of this blog post. If you change those keep in mind that it will affect the WireGuard server setup and you may have to do some troubleshooting there. My advise is to just leave it as is. This works.
Client configuration (first client)
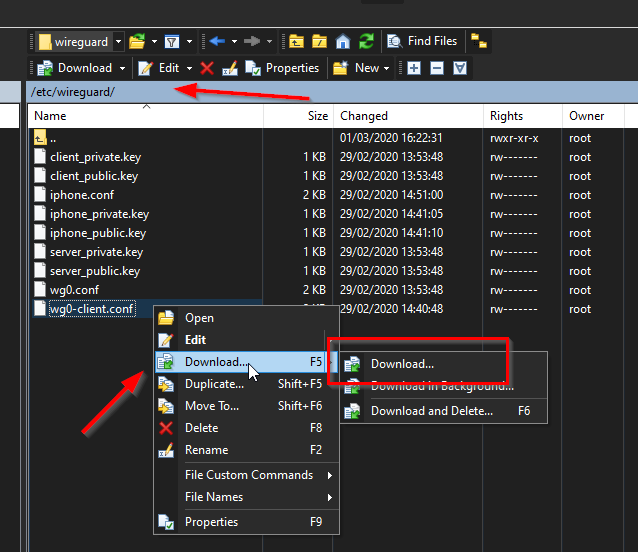
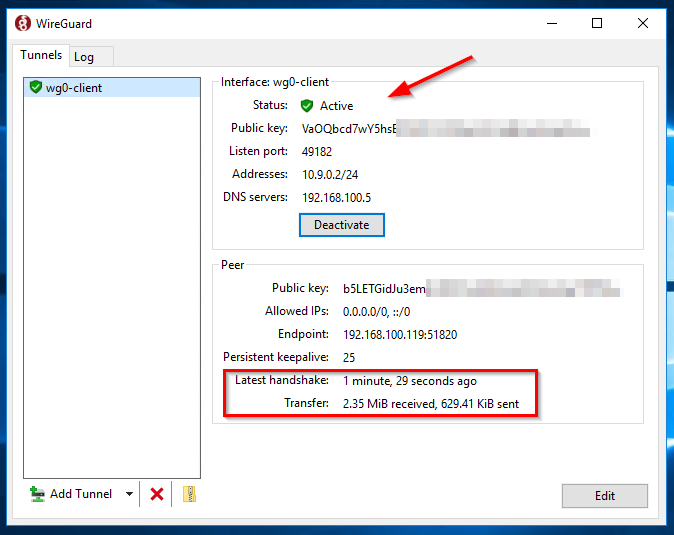
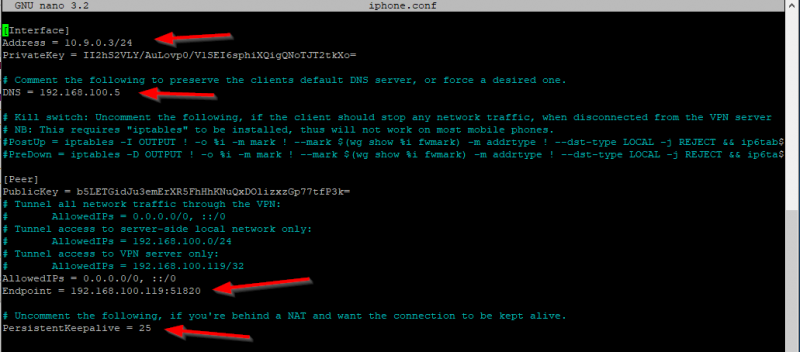
My first client will be my Windows 10 laptop and I will use the automatically generated client configuration wg0-client.conf. Navigate to /etc/wireguard and open this file with nano your favorite terminal editor. You will need to change some setting here like DNS server and enable KeepAlive. My DNS server is my Pi-Hole and that is what I want to use when connecting to my WireGuard server. This setting should point to the IP address of the DNS server you are using in your network. The KeepAlive option is required because my WireGuard server is using NAT and is sitting behind my pfSense firewall. This will be also the case for most of you out there so enable this by uncommenting the line. Note that the WireGuard installer has created the public and private keys for the first client with the names client_private.key and client_public.key.
While you are here make sure that Endpoint is your public IP address or public DNS name.
Client configuration (second client)
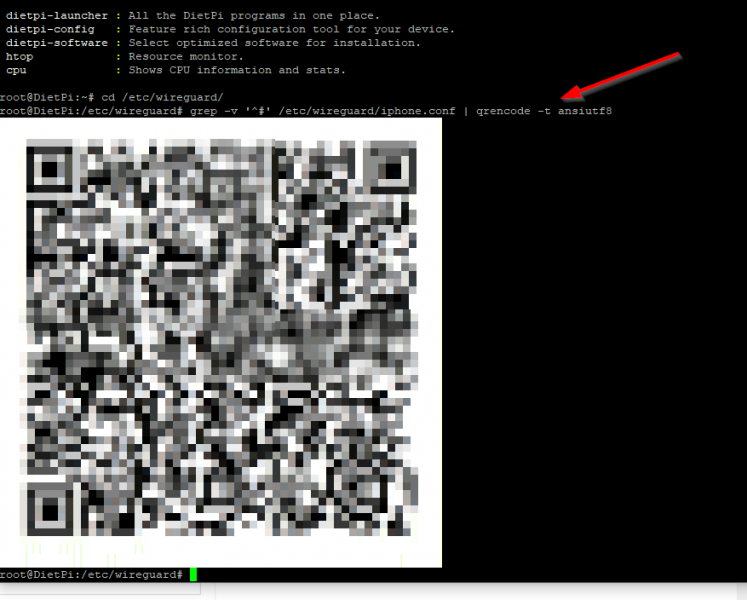
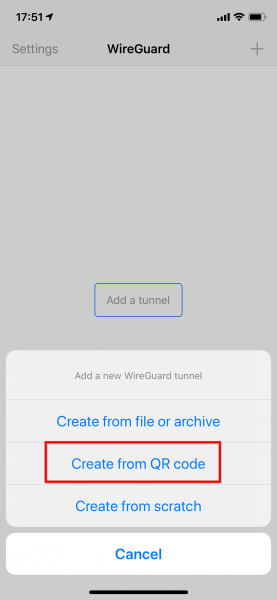
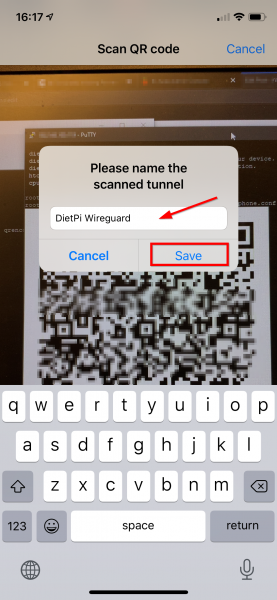
The second client I will use WireGuard on is my iPhone. There are some steps involved in generating key pairs and then the client configuration file. Navigate to /etc/wireguard and enter the following commands:
umask 0077
wg genkey > iphone_private.key
wg pubkey < iphone_private.key > iphone_public.key
umask 0022
You can change the names as you like. I named my with the prefix “iphone”. You will see that the private and public key files for my iphone client have been generated:
The next step is to generate the client configuration file using those keys. We will use the wg0-client.conf as base file and clone it with the correct keys. Execute the following commands:
cp -a wg0-client.conf iphone.conf
G_CONFIG_INJECT 'Address = ' 'Address = 10.9.0.3/24' iphone.conf
G_CONFIG_INJECT 'PrivateKey = ' "PrivateKey = $(<iphone_private.key)" iphone.conf
Make sure to use the names correct like in my example above. You can see that I am using iphone.conf as name for my iPhone client and also using iphone_private.key. The IP address part here is also very important. The server is using 10.9.0.1, my Windows 10 client is using 10.9.0.2 and so my iPhone client will use 10.9.0.3. If you add more clients you need to up the IP address every time because WireGuard doesn’t have DHCP yet. If all the commands are ok you should see something like this:
Check to make sure all the information is correct in the configuration file of the iPhone (iphone.conf in my case). See the arrows for the important parts:
If you need to add more clients just follow the same steps as above and make sure you use the next available IP address in the network range of the WireGuard server, so in this case a third client would get 10.9.0.4 as IP etc etc.
Add the clients to the server
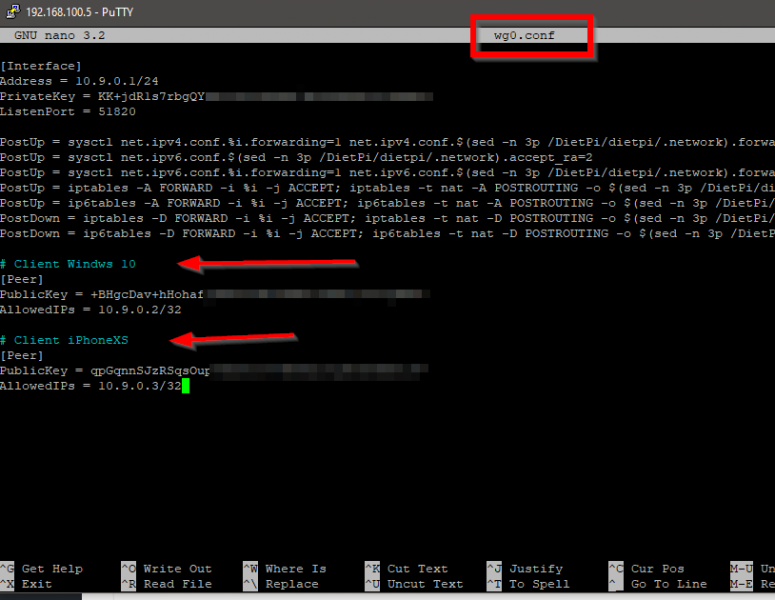
After creating the clients keys and configuration files we need to tell WireGuard server what clients are authorized to connect. Login via SSH on your WireGuard server (the DietPi here) and navigate to /etc/wireguard. Open the wg0.conf file and add the clients at the bottom of the file. Add the lines like this:
# Client Windows 10
[Peer]
PublicKey = +BHgcDav+hHohafj6KXXXXXXXXXXXUUUUUUUUUUUUUUU
AllowedIPs = 10.9.0.2/32

# Client iPhoneXS
[Peer]
PublicKey = qpGqnnSJzRSqsOuXXXXXUUUUUIIIIIXXXXXXXXXIIIII
AllowedIPs = 10.9.0.3/32
Make sure that you use the correct corresponding PublicKey for the clients! It should look like this:
Close the file and reboot the server. That’s it for the server part! For the client configuration check my other blog post:
Setup WireGuard VPN server Read More