

Table of Contents
Citrix NetScaler is a very powerful and versatile platform for application delivery. Load balancing is one of the key features of Citrix NetScaler. Many organisations are using Microsoft Exchange 2016 to provide email, calendar, tasks and other enterprise collaboration solutions to their employees and customers. Deploying Citrix NetScaler in front of Microsoft Exchange 2016 ensures security, reliability and performance for end-users and IT-engineers. This method is also known as “reverse-proxy” for Microsoft Exchange.
Requirements for the configuration:
- Citrix NetScaler 11.1 (www.citrix.com)
- Microsoft Exchange 2016
- SSL Certificate
My homelab setup
My homelab setup is not that complex. I am running the Exchange 2016 server and the NetScaler as a Hyper-V virtual machine. For load balancing usually you need more then one back-end resource (Exchange 2016 server), but for testing the load balancing concept it’s fine. Also I am using a self-signed certificate. If you run this similar setup in production, you need a valid certificate singed by a public certificate authority.
So let’s start.
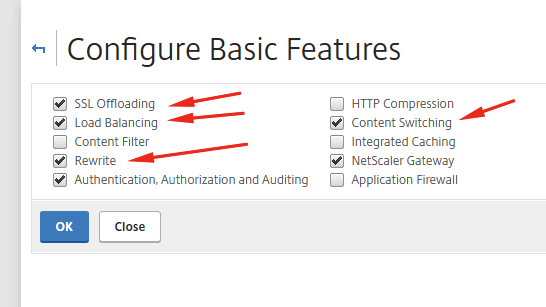
Logon to the NetScaler and go to System-> Basic Configuration and enable the correct featured in the Basic Features panel according to the screenshot below.
Add Servers (back-end servers)
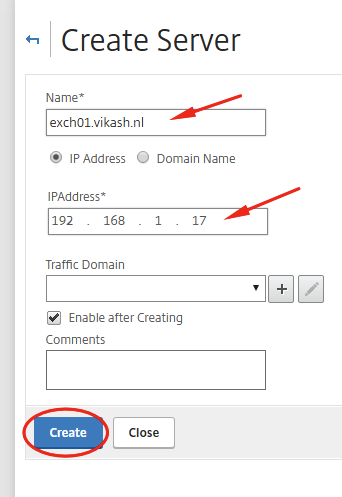
Let’s add the servers we will be using to load balance. In my case this is my Exchange 2016 Server. When we add the server here, we can later use it in the Service Group as a resource.
Navigate to Traffic Management -> Load Balancing -> Servers and click on Add.

Enter the required information and click on Create.
Set up Service Groups
We will need a total of five Service Groups. See the table below. Let’s setup the Service Groups needed to feed the Load Balancing vServer.
| Load Balancing Service Group Name | Exchange feature | Protocol | Port |
|---|---|---|---|
| lb_svg_exch2016_owa | Outlook Web Access | SSL | 443 |
| lb_svg_exch2016_ews | Exchange Web Service | SSL | 443 |
| lb_svg_exch2016_activesync | ActiveSync Service for mobile mailclients | SSL | 443 |
| lb_svg_exch2016_rpc | Outlook Anywhere or RPC over HTTPS | SSL | 443 |
| lb_svg_exch2016_autodiscovery | Autodiscover Service | SSL | 443 |
Navigate to Traffic Management -> Load Balancing -> Service Groups and click on Add.
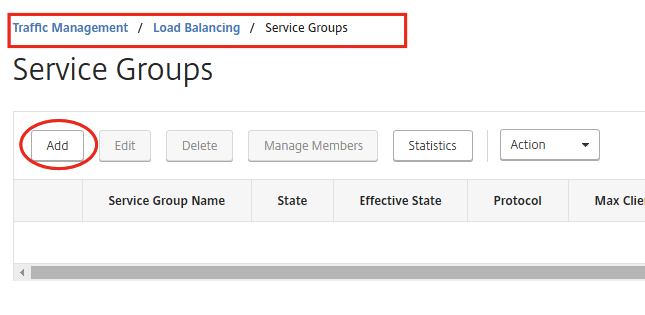
Enter the required information and click on OK. Make sure to choose SSL as Protocol.

Click then on OK again.
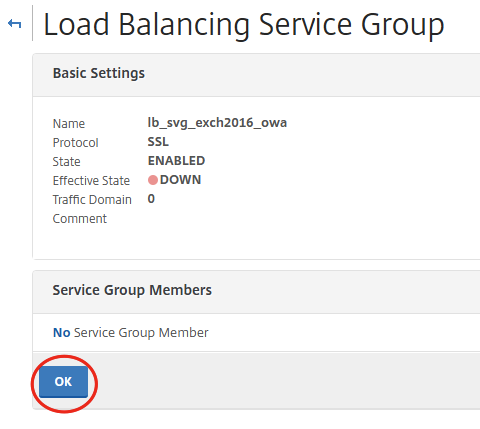
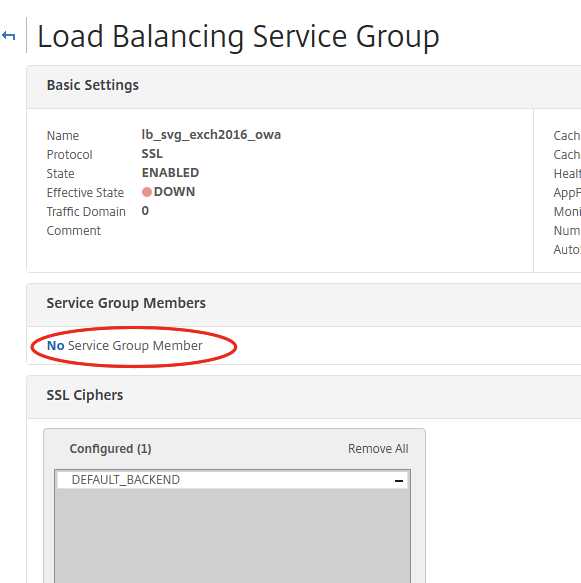
Now we have to assign Service Group members. These are your Exchange 2016 servers off-course. In my case there is only one as I explained earlier in my post. Click on No Service Group Member.
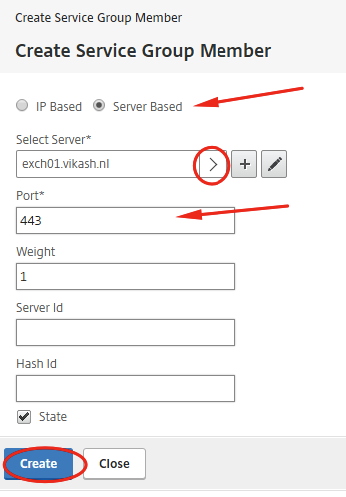
Click on Server Based to select the server you added earlier. In my case that is exchange01.vikash.nl. Make sure you use port 443. Click on Create.
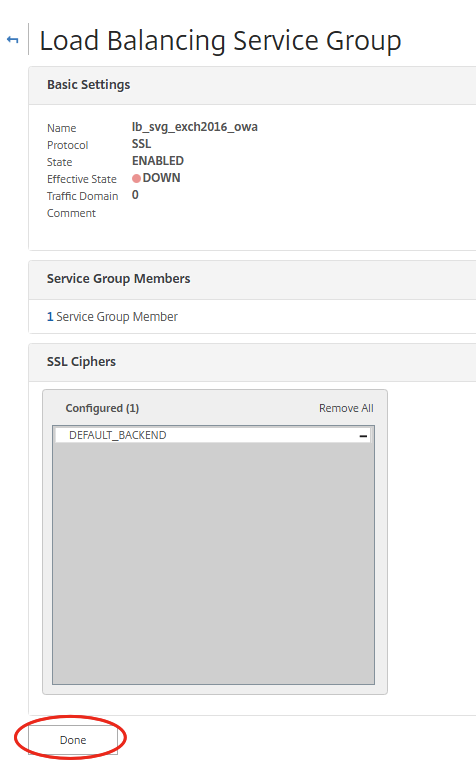
Click on Done.
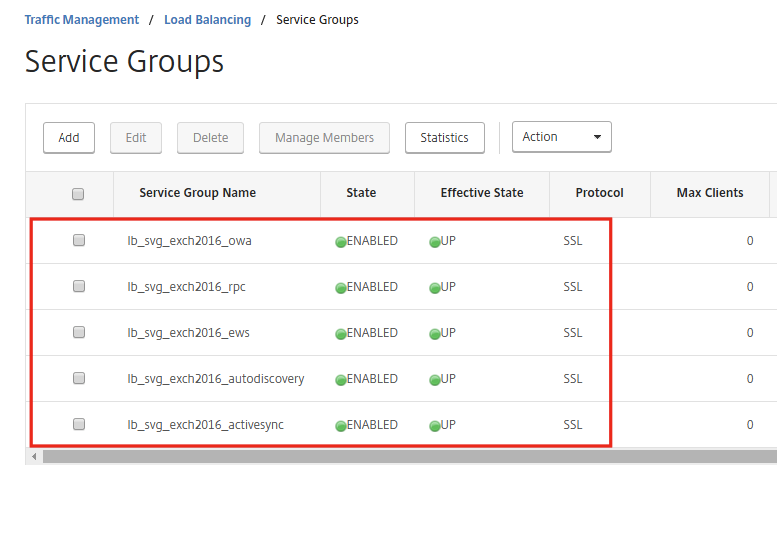
You will now be taken to the overview of the Service Groups. Using the steps above create the other needed Service Groups. You can select the lb_svg_exch2016_owa and then click on Add. This is how it should look in the NetScaler interface when you have create all the Service Groups according to the table above.
Set up Load Balancing Virtual Servers
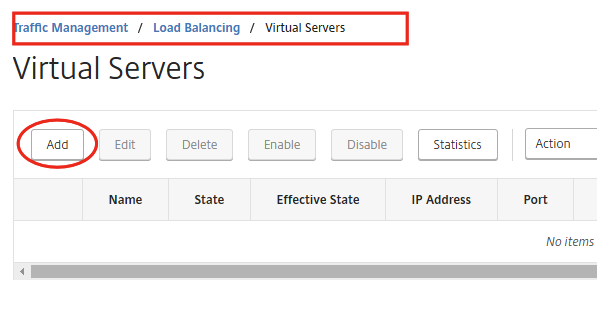
Navigate to Traffic Management -> Load Balancing -> Virtual Servers and click on Add.
We will create five Load Balancing Virtual Servers. In the table below I have specified them:
| Load Balancing Virtual Server name | Load Balancing function |
|---|---|
| lb_exch2016_vsrv_owa | Outlook Web Access |
| lb_exch2016_vsrv_ews | Exchange Web Services |
| lb_exch2016_vsrv_autodiscovery | Autodiscover Service |
| lb_exch2016_vsrv_activesync | ActiveSync Service for mobile mailclients |
| lb_exch2016_vsrv_rpc | Outlook Anywhere or RPC over HTTPS |
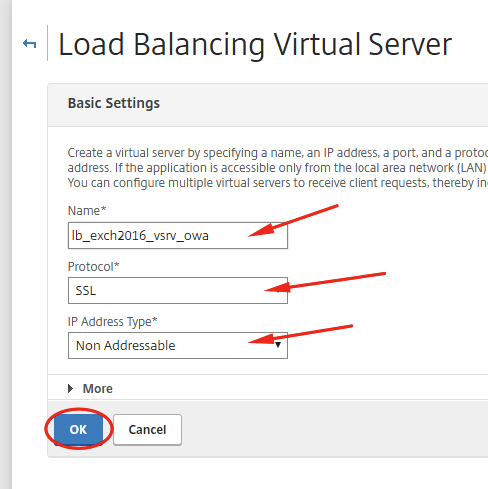
Enter the required information. Make sure you choose SSL for protocol and make the IP Address Type Non Addressable. We don’t want the Virtual Server to be directly accessible on the network. Instead we will use the Content Switching feature of the Citrix NetScaler to direct traffic to where we want it. Click on OK after setting up everything like the screenshot below.
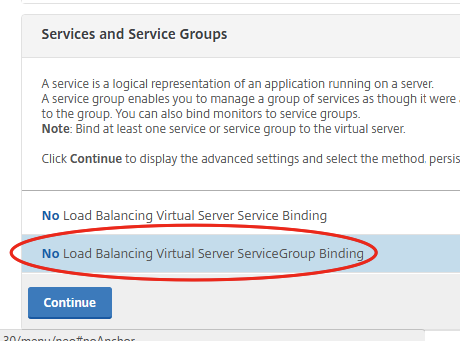
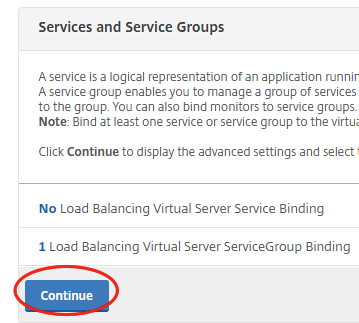
Click on No Load Balancing Virtual Server ServiceGroup Binding.
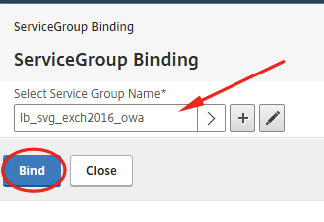
Select the a Service Group to bind and click on Bind.
Click on Continue.
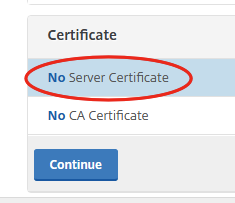
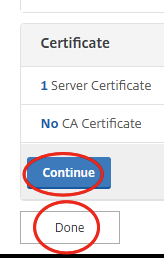
Click on No Server Certificate to bind a certificate.
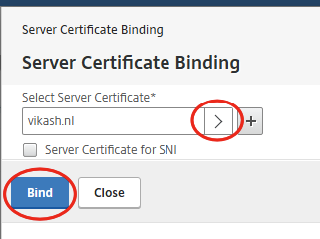
Select the appropriate Server Certificate. In my case this is my self-signed certificate, which is fine for testing purposes. In this post I show you how to import a PFX certificate on the NetScaler. After selecting the correct certificate, click on Bind.
Click on Continue.
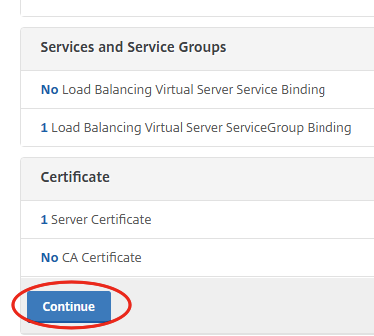
Click on Done.
Create the other Load Balancing Virtual Servers like I specified in the table above. Just select the Load Balancing Virtual Server we just added, and click on Add and follow the steps as described above.
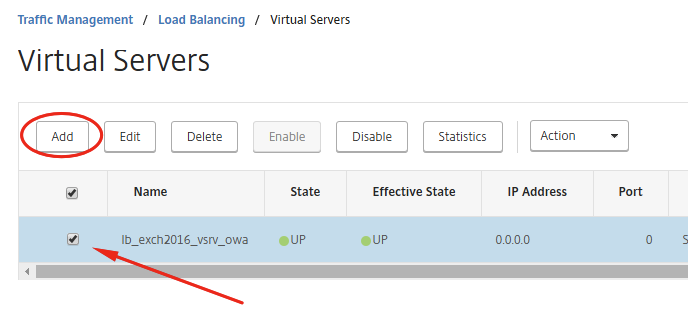
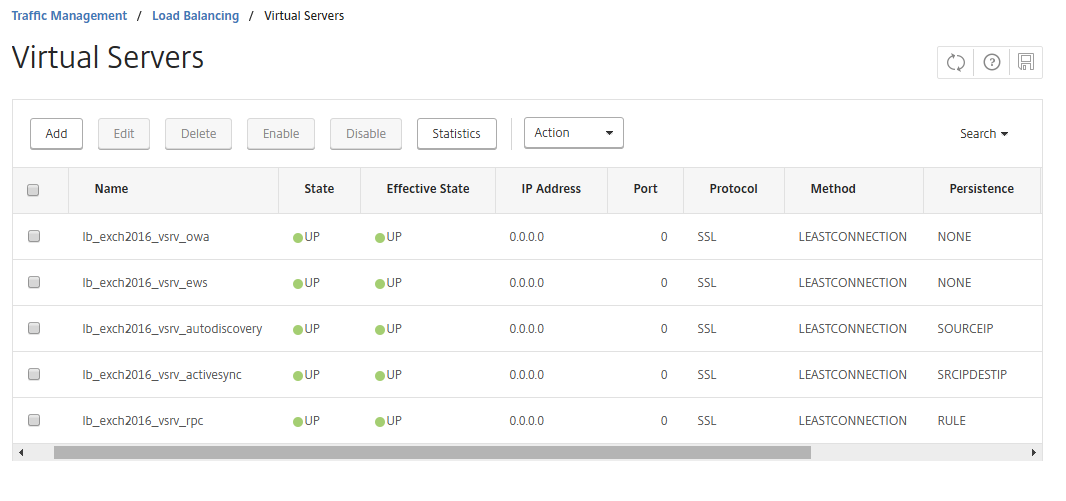
After adding all the Load Balancing Virtual Servers, the list should look like the screenshot below.

Set up Persistence
Several of the Load Balancing Virtual Server require a different setting for Persistence. In the table below I have specified the settings:
| Load Balancing Virtual Server Name | Exchange Feature | Persistence Type | Setting per type |
|---|---|---|---|
| lb_exch2016_vsrv_owa | Outlook Web Access | NONE | Default |
| lb_exch2016_vsrv_ews | Exchange Web Service | NONE | Default |
| lb_exch2016_vsrv_activesync | ActiveSync Service for mobile mailclients | SRCIPDESTIP | Default |
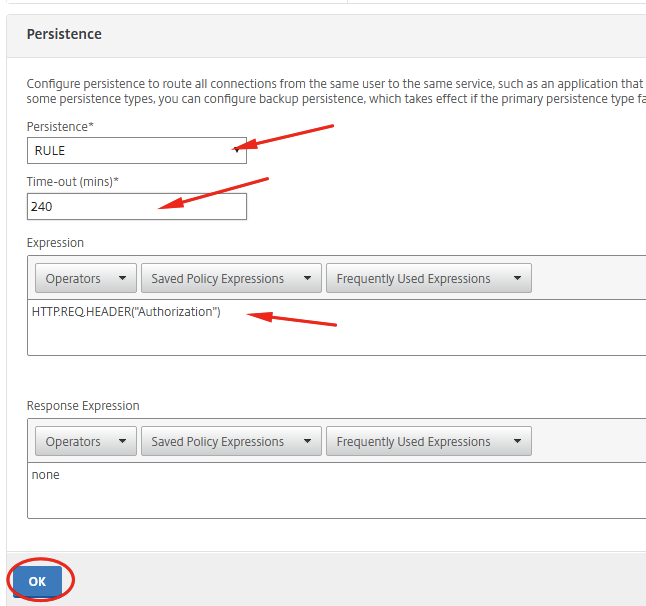
| lb_exch2016_vsrv_rpc | Outlook Anywhere or RPC over HTTPS | RULE | TimeOut: 240 Expression: HTTP.REQ.HEADER("Authorization") |
| lb_exch2016_vsrv_autodiscovery | Autodiscover Service | SOURCEIP | Default |
Navigate to Traffic Management -> Load Balancing -> Virtual Server and select lb_exch2016_vsrv_rpc. Then click on Edit. You will should see the screen below. Click on Persistence in the right column of the page.

Select the setting for this specific virtual server in the drop-down menu. Enter the expression HTTP.REQ.HEADER(“Authorization”) and click on OK.
Click on Done.
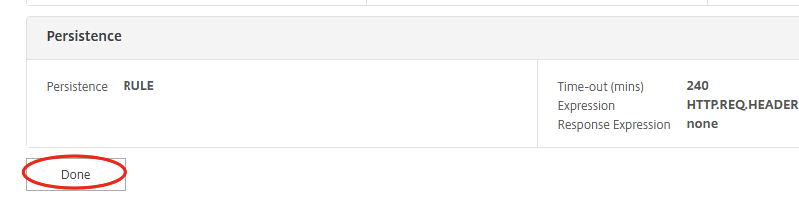
Now do the same for the other load balancing virtual servers. Check the table for the specific settings. In the end you should end your Virtual Server should look like the screenshot below.
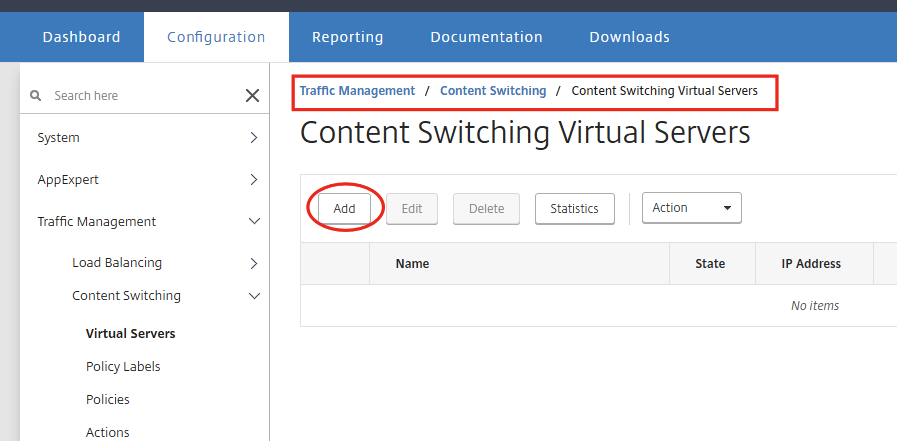
Set up Content Switching Virtual Servers
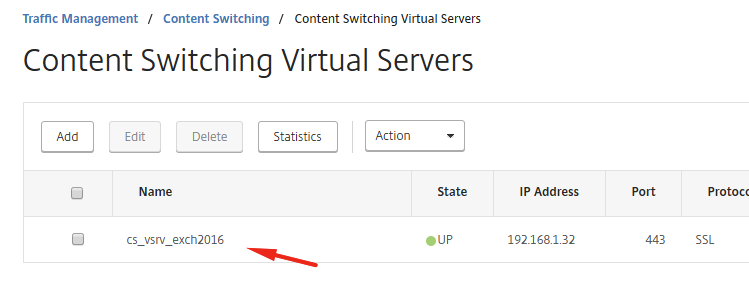
The content switching server will redirect the traffic to the appropriate load balancing server. After creating the content switching virtual server we will define the content switching actions and policies, and bind them to the content switching virtual server. Navigate to Traffic Management -> Content Switching -> Content Switching Virtual Servers and click on Add.
Enter the information and make sure you use a new IP address and port 443.
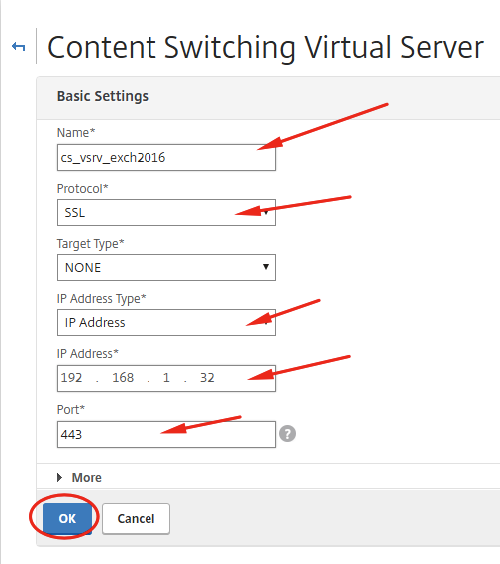
Click on OK.
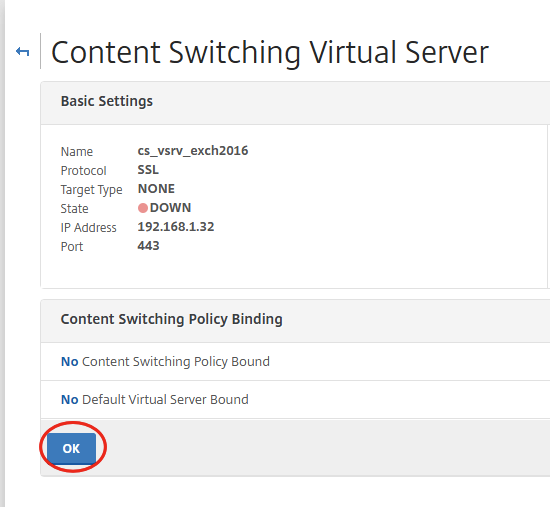
Now we have to bind the SSL certificate. Click on Certificate in the right column.

Select the certificate (in my case vikash.nl) and click on Bind.

Click on Continue and then on Done.
We can now see that the virtual server is up.
Create Content Switching Actions
Now we have to create the content switching Actions. These actions will send the traffic to the appropriate backend load balancing virtual server.
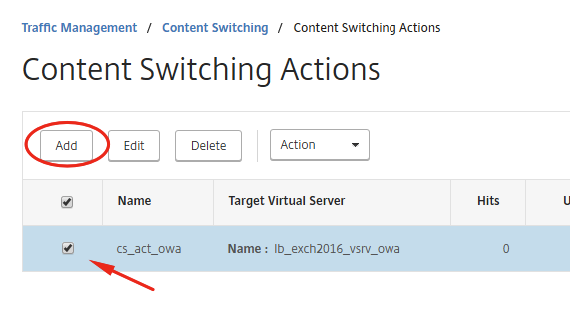
Navigate to Traffic Management -> Content Switching -> Content Switching Actions and click on Add.

Fill in the name, select Loadbalancing Virtual Server and select one of the Load Balancing Virtual Servers. In my screenshot I start with the load balancing server for Outlook Web Access. Click then on Create.

Now select the content switch action we just created, and then on Add. This will duplicate the switch action, making it easier to adjust settings for the following switch actions.
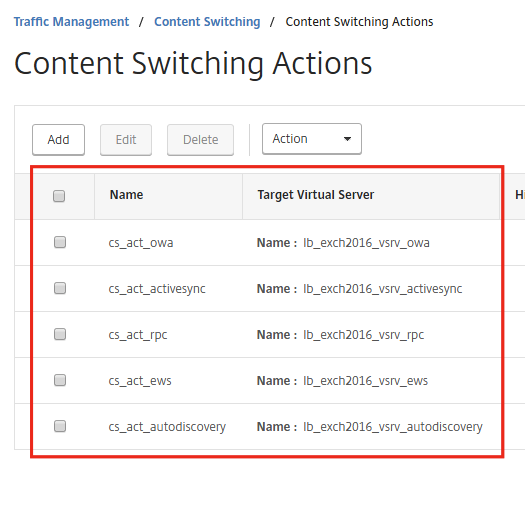
In the end you should have all the load balancing virtual servers connected to a specific content switch action, and your screen should look something like the my screenshot below.
Create Content Switching Policies
In the content switching policies we will tell Citrix NetScaler where to redirect the requests to. In the table below I have created an overview of the policies.
| Policy Name | Expression | Action |
|---|---|---|
| cs_pol_activesync | HTTP.REQ.URL.CONTAINS("Microsoft") | cs_act_activesync |
| cs_pol_rpc | HTTP.REQ.URL.CONTAINS("/rpc") | cs_act_rpc |
| cs_pol_ews | HTTP.REQ.URL.CONTAINS("/ews") | cs_act_ews |
| cs_pol_autodiscovery | HTTP.REQ.URL.CONTAINS("/autodiscover") | cs_act_autodiscovery |
| cs_pol_owa | HTTP.REQ.URL.CONTAINS("/owa") | cs_act_owa |
Navigate to Traffic Management -> Content Switching -> Content Switching Policies and click on Add.
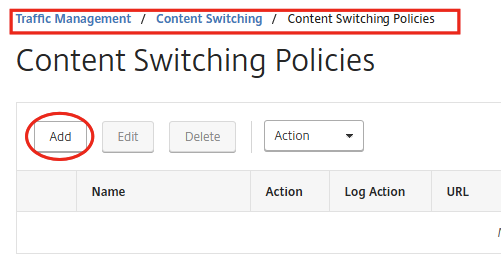
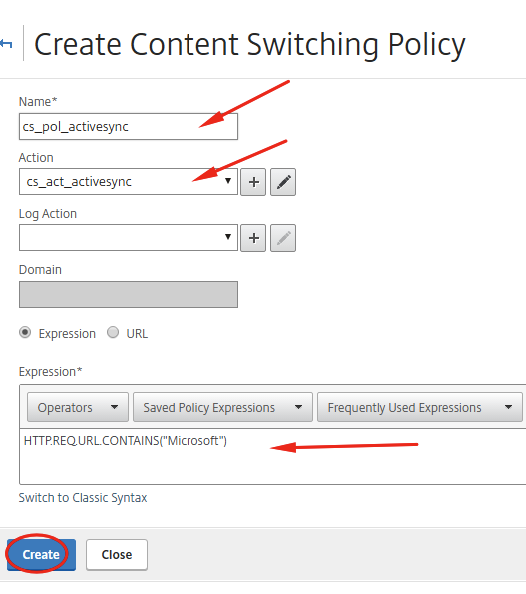
Give a name and select the appropriate action. Fill in the correct expression (see table above) and click on Create.
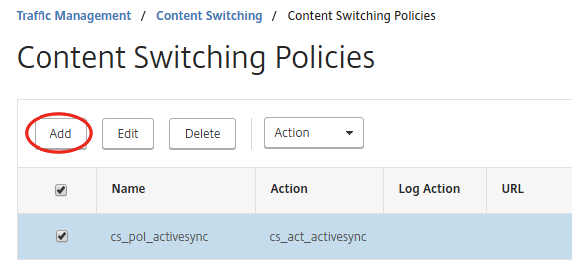
Now select the content switch policy we just created, and then on Add. This will duplicate the switch policy, making it easier to adjust settings for the following switch policies.
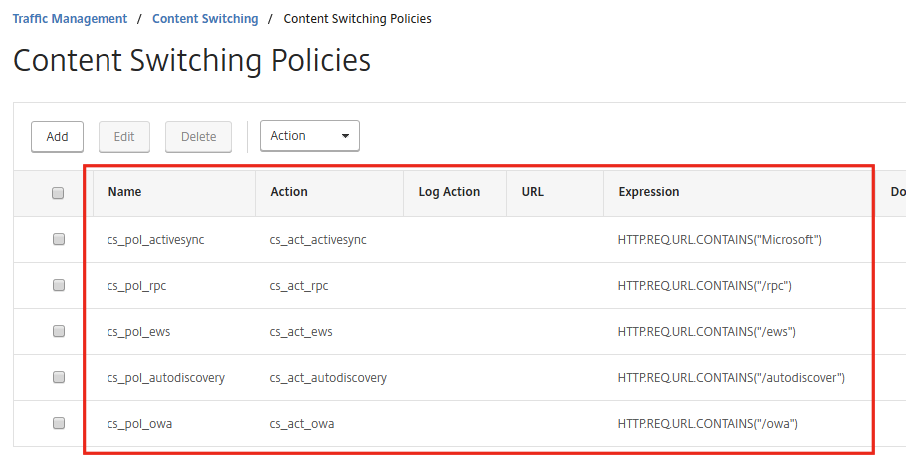
In the end your list of policies should look like my screenshot below.
Bind Content Switching Policies
Now we have to bind the content switching policies to the content switching virtual server. This is the server where all the traffic comes in, and according to the policies the NetScaler redirect the traffic.
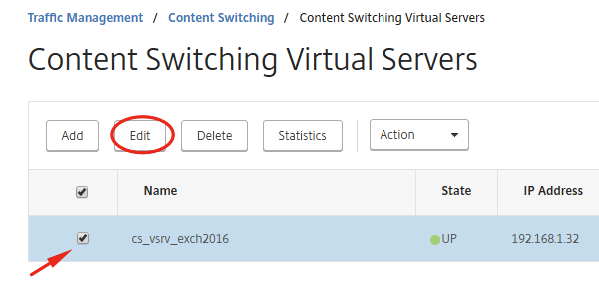
Navigate to Traffic Management -> Content Switching -> Content Switching Virtual Server. Select the content switching virtual server and click on Edit.
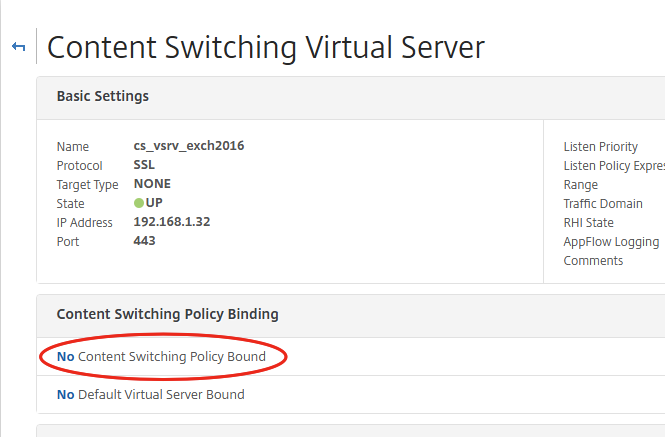
Click on No Content Switching Policy Bound to bind the policies.
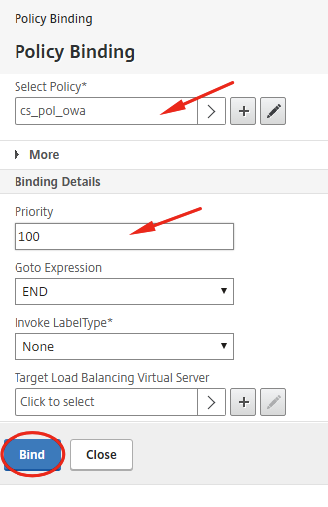
Select the policy and set the priority. Click then on Bind.
Do the same for all the policies. Your screen should look like my screenshot below.
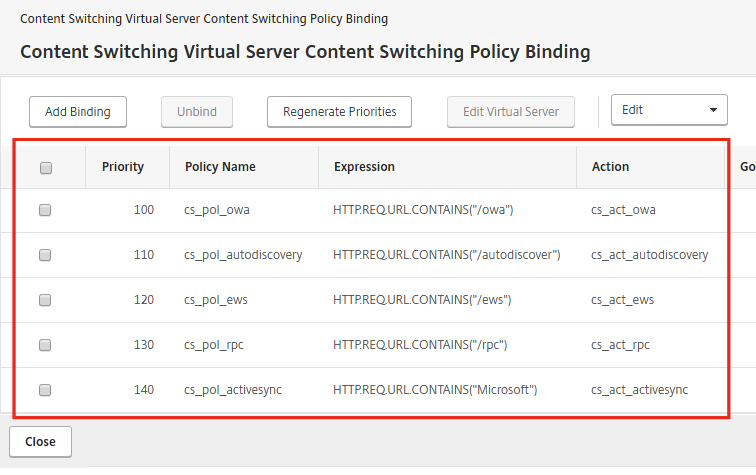
You should have 5 content switching policies bound to the switching virtual server.

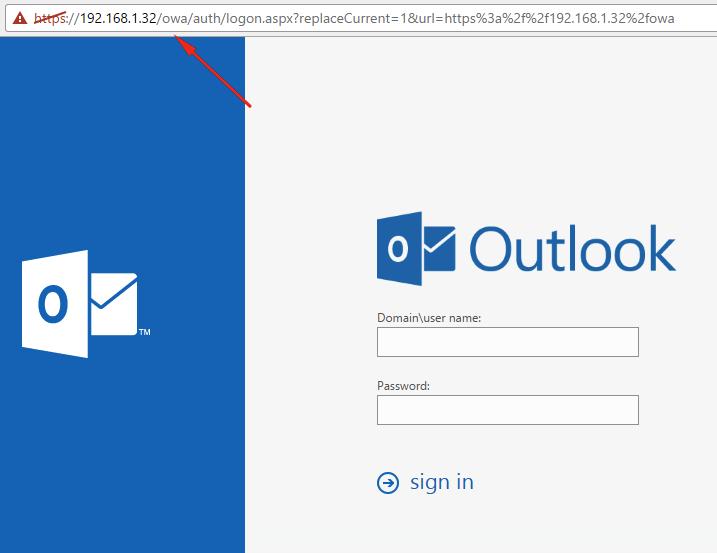
Testing
Now you can test! You should be able to connect to the ip address of the content switching server and it should redirect you to the appropriate resource on the backend.
This concludes this tutorial. Feel free to contact me of you have any questions or comments.
You can also follow me on twitter or add the rss feed from the blog and you will be notified when I add new posts.
Nice Share dear . keep it up
Thnx!
Hi Vikash,
Great article, this helped me more then the official guide from Citrix!
Can you explain how to:
– redirect http to https, and;
– how to handle owa.domain.com\oew to owa.domain.com
Thanx
Hi Gerwin,
Thnx for you comment. The http to https redirect can be done in the properties of Virtual Servers when using the protection option. In fact there are several ways to redirect, it depends on your infrastructure. To redirect /owa to a fqdn you should be able to use the content switching policies in the same way I described in my blog. Gooed luck and let me know how it works out.
Nice read, Vikash! cheers
Thanks!
Hi Vikash,
this is a helpful article…
Kindly can you explain the http to https redirect for Exchange 2016 done on which Virtual Servers , OWA LB Virtual Servers or CS Virtual Server.
Thanks
Hi Hazam,
You can do http to https redirection in a few ways on the NetScaler. I would set it up on the Virtual Server using the “Redirect from Port” option. If you edit the Virtual Server, click on More under Basic settings. Good luck.
I see that you are not configuring any monitors? Is this not necessary with Exchange 2016?
Hi Brian,
In my case I didn’t configure a specific monitor. You can configure a https-ecv monitor and under special parameters – add a send string of “GET /owa/healthcheck.htm”. Then set it to receive string of “200 OK”. The “healthcheck.htm” is a special monitoring page for Exchange 2016. Good luck.
Hi Vikash,
This article is very useful
we implemented at one customer place with same settings
Hi Vikash
its a great article for configuring Content Switching even for beginner, I have followed every steps to configure load balancing and Content Switching, I can open outlook web from virtual IP but while I am trying to login to access email , its not going forward , even not generating any credential error, would you please guide me trouble shoot
I suggest you turn on logging on the NetScaler. Capture packets on the NetScaler and on your Exchange server so see what is happening. Do you have firewalling/routing between those components? If so then check the logging there as well.
Hello Vikash,
Thank you for the step to step instructions but after completing the configuration and when testing the things internally as well as externally i am getting http error service unavailable for some reason.
Do we need to install the same certificate on both netscaler as well as on exchange servers as i got a wildcard on netscaler and mutli SAN on all exchange servers?
Not too sure how to resolve this issue.
Any help greatly appreciated.
Thank you
Hi,
Thanks for reading my blog and good to know that the blog helped you out. In my experience most of the time something like that happens you should check routing and firewall rules. I expect your Exchange servers and the NetScaler is behind some kind of firewall? The next step is to see what happens when you have a workstation in the same network as where the NetScaler’s listener’s for Exchange are. Furthermore I would suggest to do some packet tracing on the NetScaler and see if the traffic is hitting the correct IP’s. Good luck my friend.
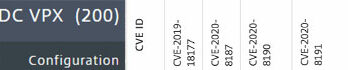
Thanks Vikash. Seems there is a bug. Any idea if this been resolved. had to change the registry value to 1 and it worked right after.
https://discussions.citrix.com/topic/400007-netscaler-vpx-exchange-2019-time-out-during-ssl-handshake-stage-https-webservices/
Appreciate your response
Hi Pavan,
Glad to be able to help out! Thanks for sharing the link about the solutions :). I’m sure other will benefit from your knowledge and experience.