

Use Pi-hole with Microsoft Active Directory
I’m a big fan of Pi-hole and have been using it to get rid of advertisement and tracking. Check my blogpost here if you want to know how to set Pi-hole up. It’s an amazing piece of software to protect your online privacy and provide network wide ad-blocking. In my day job I’m an IT-consultant for enterprise IT-solutions and in this post I will show you how to use Pi-hole with Microsoft Active Directory and protect all your domain joined clients from advertisement, tracking and also keep your clients secure from those malware websites.
Of course, you need to test this extensively before rolling it out in your infrastructure. I cannot stress this enough. The solution described in this blogpost did not show any kind of strange unexpected behaviour in my testlab but every infrastructure is different. Especially with endusers and applications there may be some challenges. So test before you implement!
Requirements
Microsoft Active Directory depends on Active Directory-Integrated DNS Service and Active Directory-Integrated DHCP Service. In this scenario all your domain joined clients are getting their IP-addresses and DNS settings from the Microsoft DHCP server. The DNS settings is used by the domain joined clients to talk to the Active Directory for DNS lookups and Active Directory related tasks. My testlab is running on Windows Server 2019 Active Directory and DNS Service, but this should also work if you are running a Windows Server 2016 environment. The requirement list is:
- Microsoft Windows Server 2019
- Microsoft Active Directory 2019
- Microsoft Active Directory-Integrated DNS 2019
- Microsoft Active Directory-Integrated DHCP Server 2019
- Pi-hole Server
- Domain joined client(s)
Let’s get started
They key Pi-hole feature we will be using in order to get this working is called Conditional Forwarding. I will explain in this post later on how we will use this feature.
DHCP Server settings
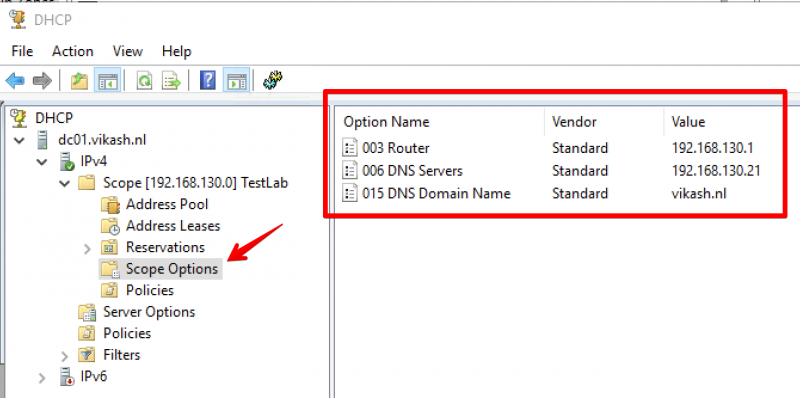
My DHCP Server is running on my Active Directory Domain controller. I’m sure a lot of you have the same setup which is fine. In the DHCP Server we have to specify certain options like DNS Servers and DNS Domain Name. My DHCP server is running on IP-address 192.168.130.10. My DNS Domain Name is vikash.nl. For DNS Servers fill in the IP-address of your Pi-hole Server. My Pi-hole server is running on IP-address 192.168.100.21.
On your DHCP server open the management console for DHCP Server and expand the scope options. Make sure the values match your network infrastructure:
Pi-hole Server settings
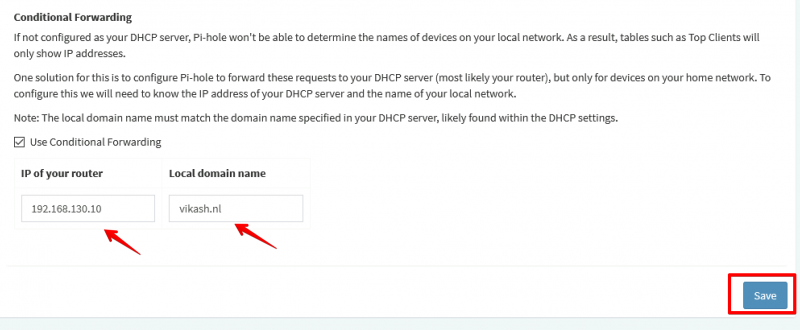
Now I will show you how to use Pi-hole with Microsoft Active Directory. The idea here is provide the Pi-hole Server as the DNS server to your domain joined clients. Then in the Pi-hole Server settings we will enable the option called Conditional Forwarding. Here we have to enter the IP-address of our Active Directory-Integrated DHCP server and also a Local Domain Name. This local domain name has to be your Active Directory name. In my case that is vikash.nl. What will happen now is that if the Pi-hole gets DNS requests from clients that need to resolve something.vikash.nl it will forward that request to our DHCP server which is also our Active Directory Domain controller. This makes sure that all the Active Directory related communications between my domain joined clients and Active Directory are completed successfully.
On the Pi-hole server go to Settings and select the DNS tab:
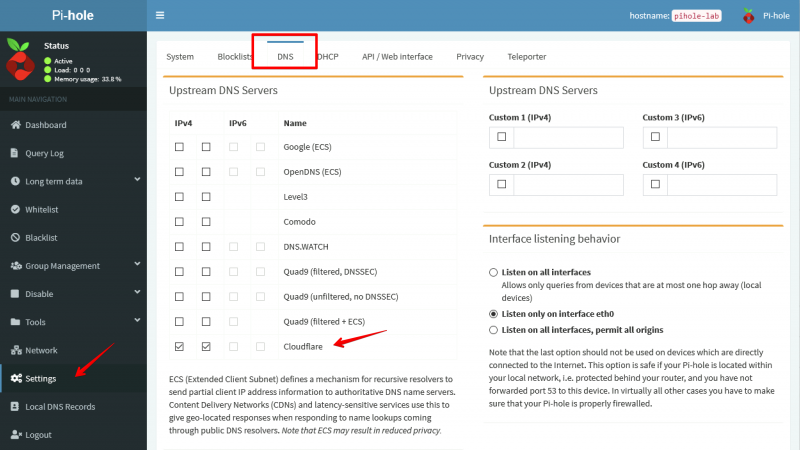
As you can see in the screenshot above I am using Cloudflare DNS Servers as my Upstream DNS. You can use any DNS Server as your upstream DNS. This basically means that for all DNS requests not related to vikash.nl the Pi-hole server will resolve those using Cloudflare. That is exactly what we want because it will make sure that internet is still working for all our domain joined clients. At the same time we will be able to see all the DNS requests in the Pi-hole Server Query Log for every client. This gives us control to protect our domain joined clients from ads, tracking or even malware.
In the DNS tab scroll to the bottom of the page and enter the DHCP server IP-address and the Local Domain Name. My DHCP server is 192.168.130.10 and my Local Domain Name is vikash.nl. Check your network infrastructure for your specific settings and click Save:
Testing
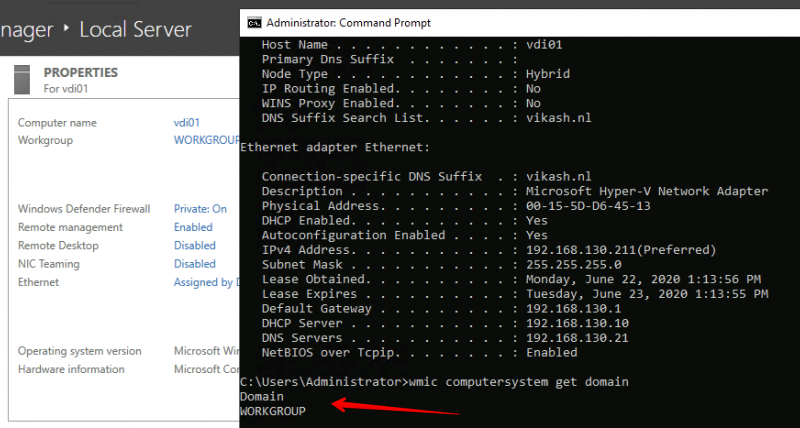
Now let’s make sure that everything works. First we will check that the correct DHCP settings are distributed to a client we want to join to the domain vikash.nl. I will use a Windows Server 2019 as client with the name vdi01.
Check IP-address
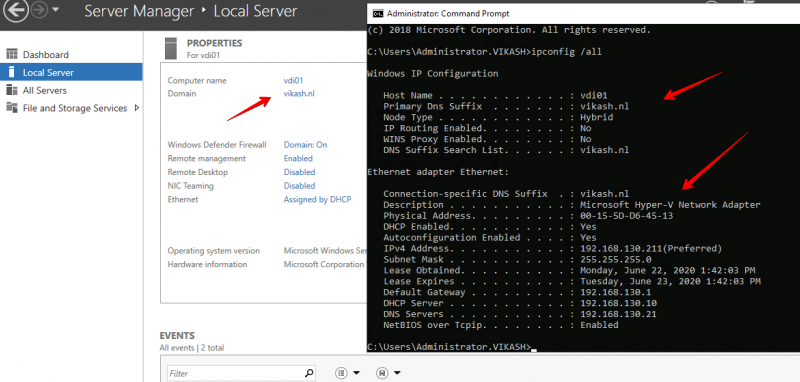
Open up a command prompt on the machine and make sure that the client is getting the correct settings from the DHCP server:
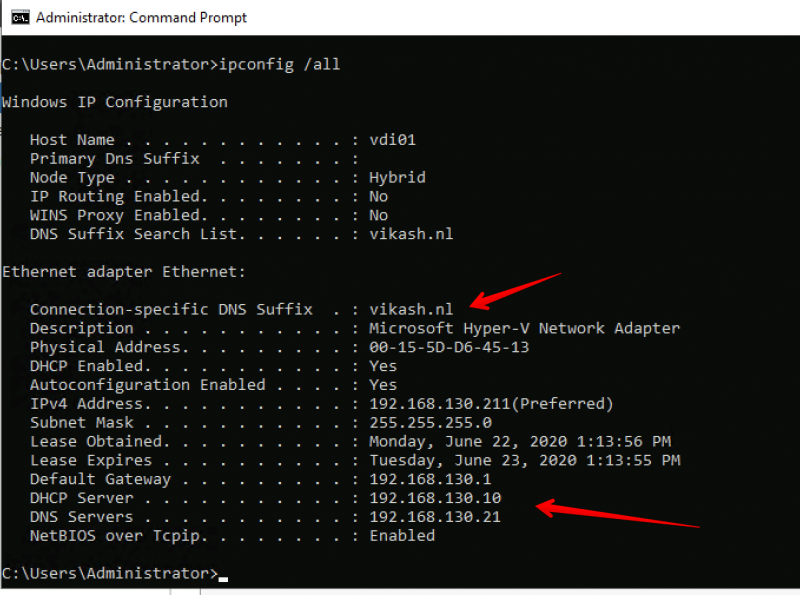
As you can see in the screenshot above the client is getting the DNS Domain Name and the DNS Server settings according to our scope options in the DHCP server. Check that the client is not already domain joined:
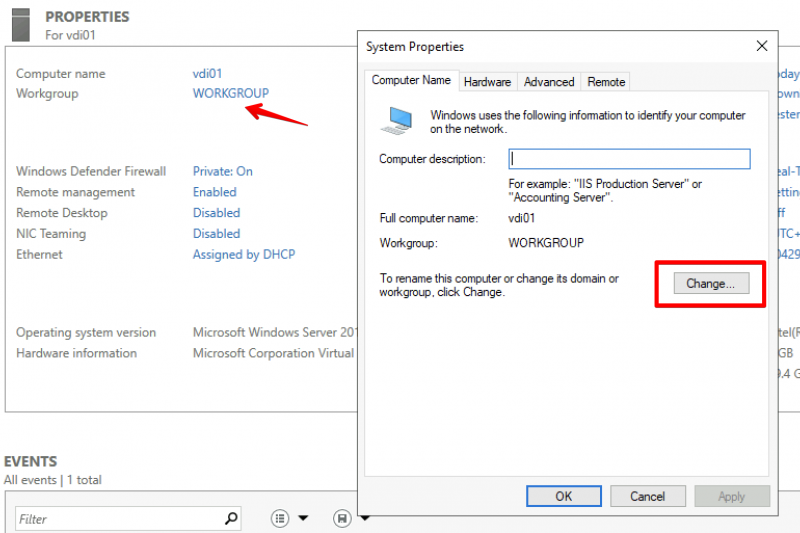
Join the client to the domain
Next step is to join the client (my vdi01) to my domain vikash.nl. Click in the Server Manager on WORKGROUP and then click on Change in the window that pops up:
Select the Domain option here and enter your domain name. Remember that this must be the same as DNS Domain Name entered in the DHCP Scope options and in the Conditional Forwarding on the Pi-hole. In my case this is vikash.nl. Then click on OK.

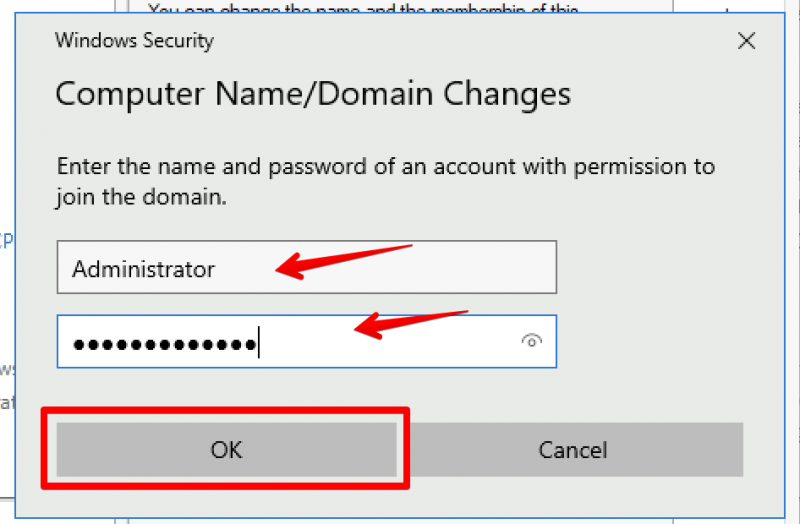
Windows will prompt you to enter Domain credentials which are allowed to do a domain join. In my testlab I use the domain administrator account for that. Enter the credentials and click on OK:
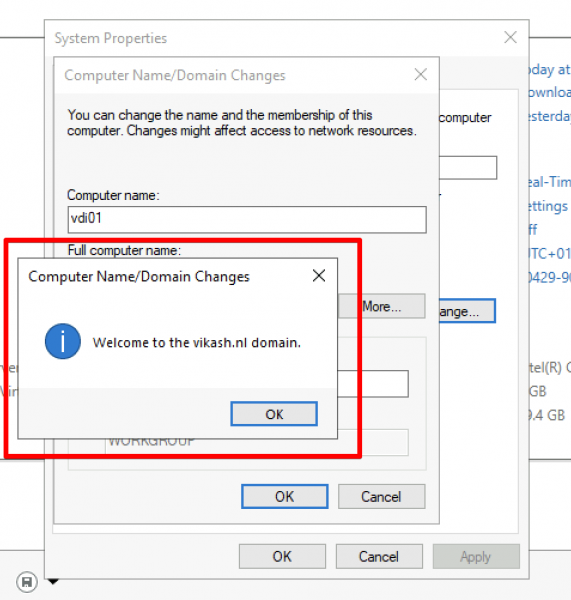
You will get a prompt from Windows telling you that the domain join was completed successfully. It looks like everything is working :). Click on OK and reboot you client.
After the client reboots login using a domain account:
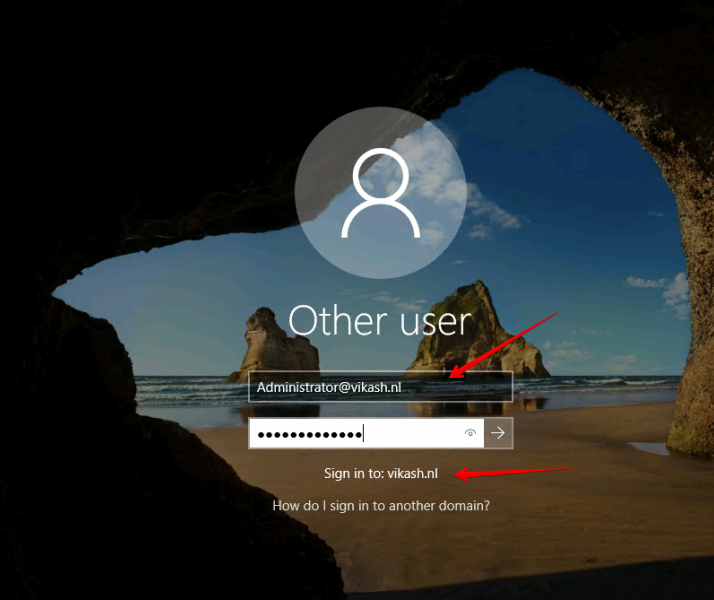
Check that everything is ok and the client is a member of the domain:
Check Pi-hole Query Log
We can see the magic happening when we check the Query Log on our Pi-hole Server. Open the admin page of Pi-hole server and select the Query Log in the left menu:
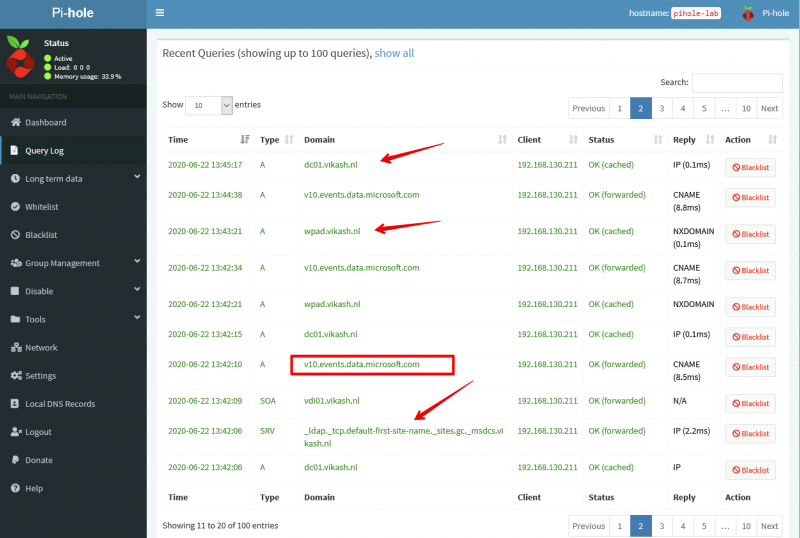
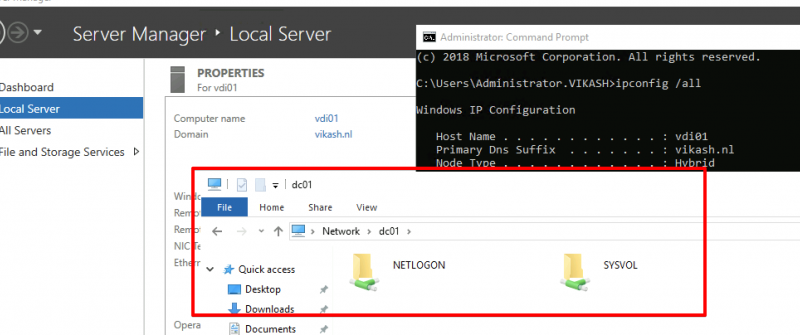
As you can see in the screenshot above my client with IP-address 192.168.130.211 (vdi01.vikash.nl) is able to resolve internet queries as wel as queries related to my domain vikash.nl. Filesharing is working fine as well:
How amazing is this?! We are using Pi-hole with Microsoft Active Directory infrastructure and that means that we can now benefit from the protection of Pi-hole on enterprise level :). Of course this test is limited but imagine the possibilities. You can now provide all your endusers with a ad-free and tracking free internet experience but still be in control if some specific website needs to be unblocked.
Use Pi-hole with Microsoft Active Directory Read More