
In my last post here I showed how to setup Citrix Licensing Server. This is one of the main components for any Citrix environment. In this post I will cover Citrix XenDesktop 7.18 Delivery Controller installation. I will be needing this to publish my desktops and applications. I will show you in future posts how to integrate with Citrix NetScaler, Azure and also implement MDM and MAM solutions in my environment. So for now let’s start the setup.
My lab setup:
- Active Directory on Server 2016.
- Citrix XenDesktop 7.18 ISO downloaded from the Citrix website.
- Microsoft SQL server.
Install Delivery Controller
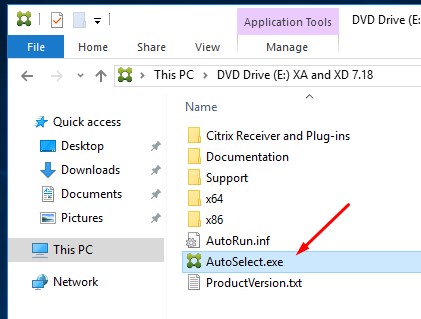
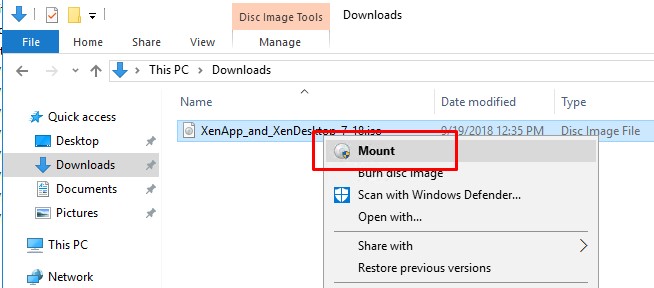
Download the installation ISO from the Citrix site and mount it using Windows Explorer. Double click on AutoSelect.exe to start.
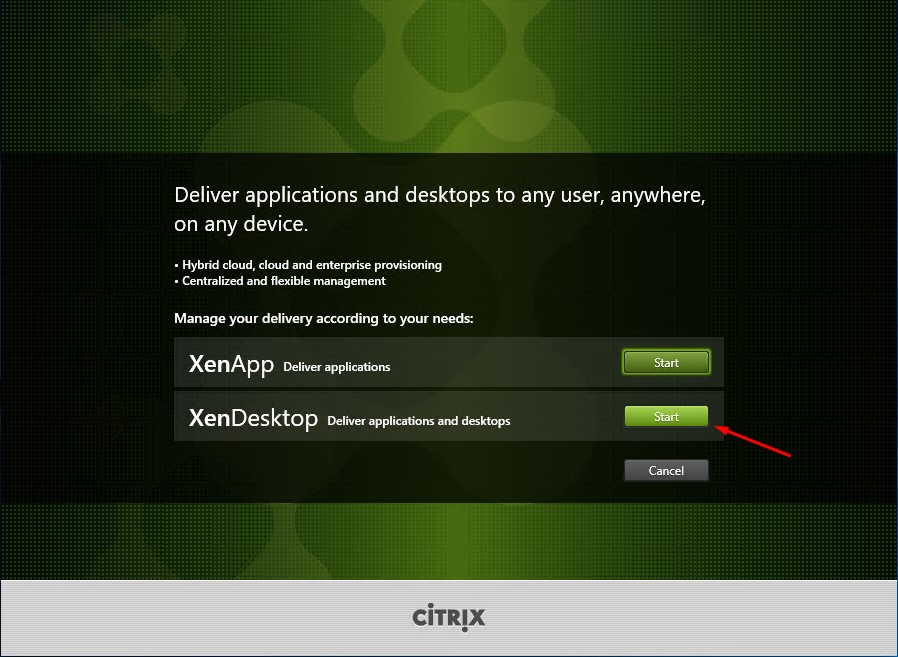
Click on Start the XenDesktop line.
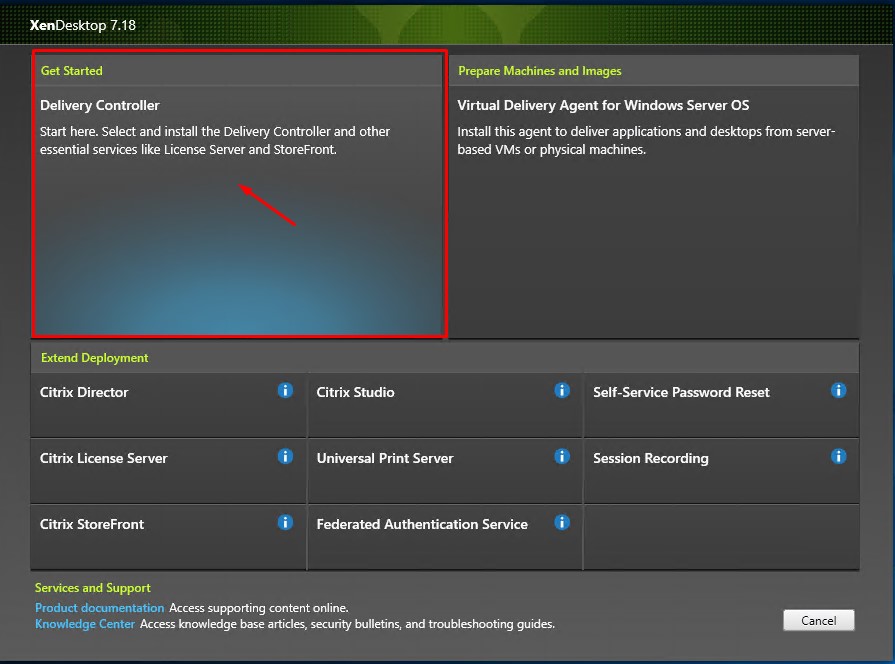
Select the Delivery Controller option. As you can see here there are options to install the other components. I will show these in upcoming posts. For now let’s click in Delivery Controller.
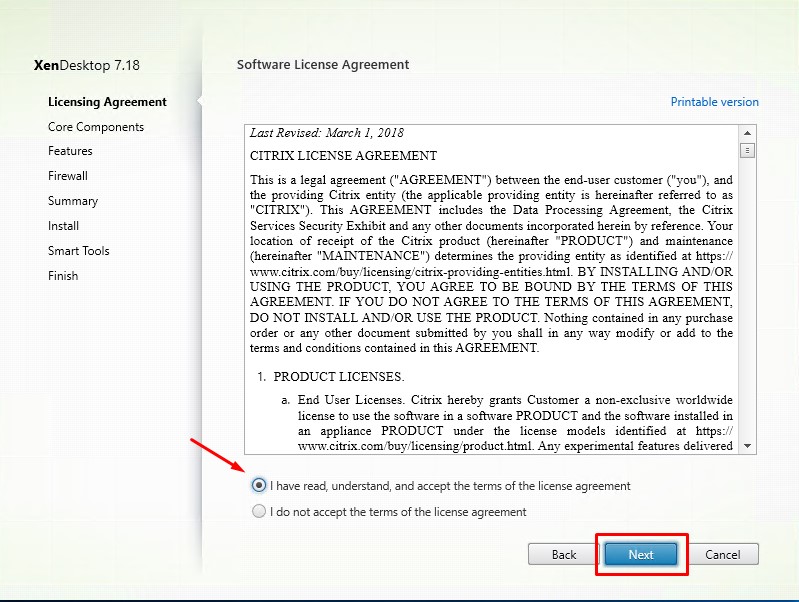
Agree with the Software License Agreement here. Click then on Next.
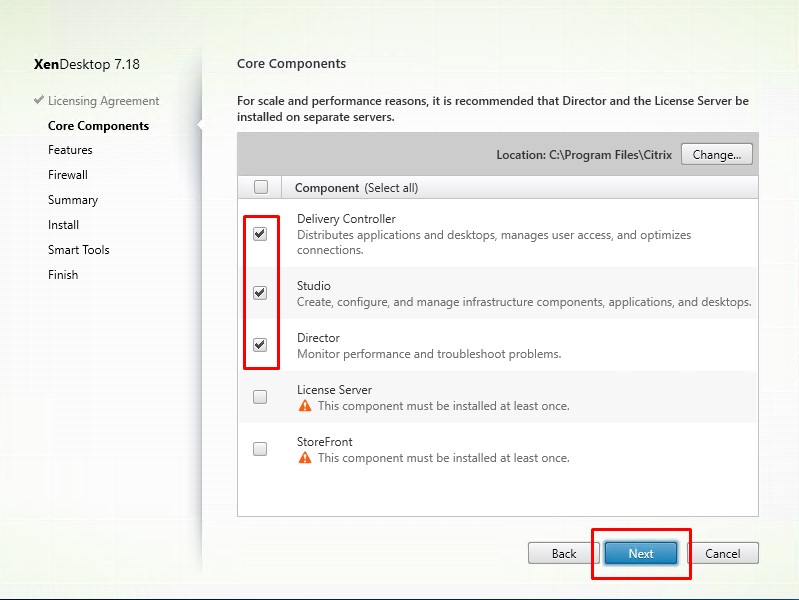
Select the components you wish to install and click on Next.
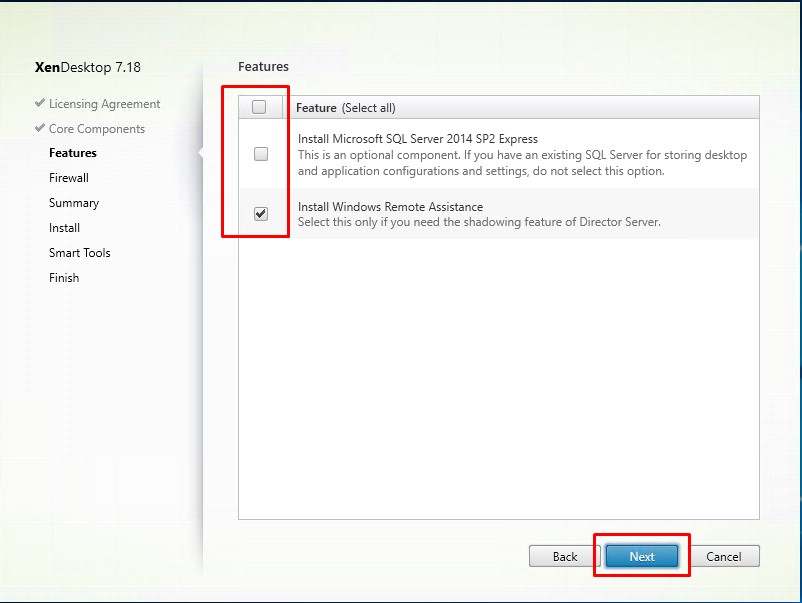
Again select the options you wish. I have a dedicated SQL server so I will not install SQL Express. Click on Next.
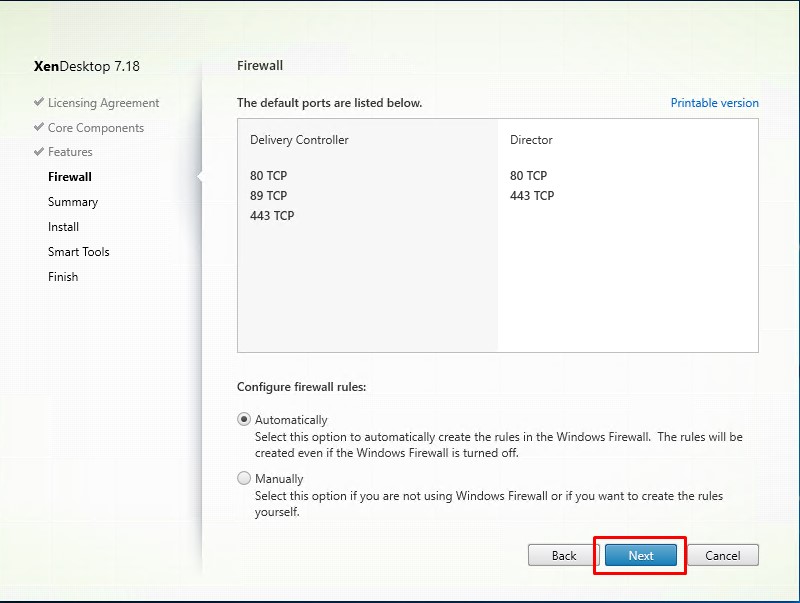
Leave the options default and the wizard will configure the firewall on the server. Click on Next.
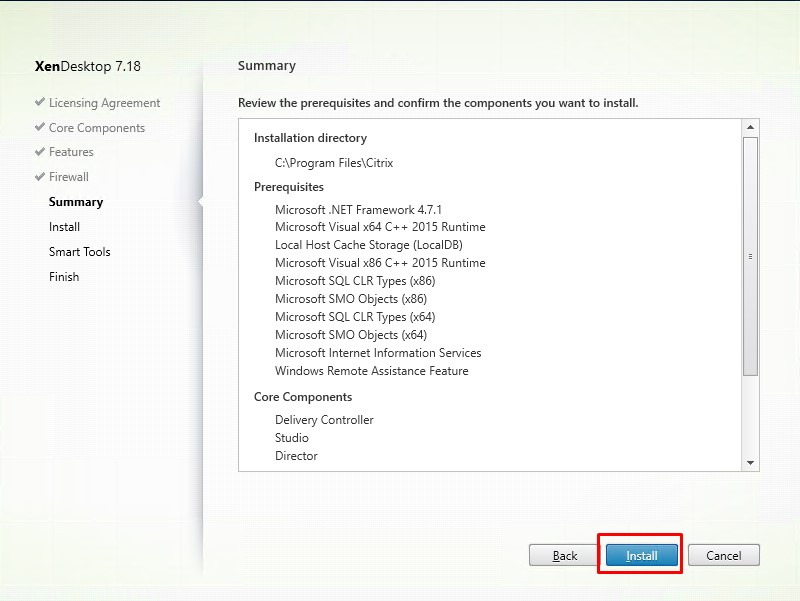
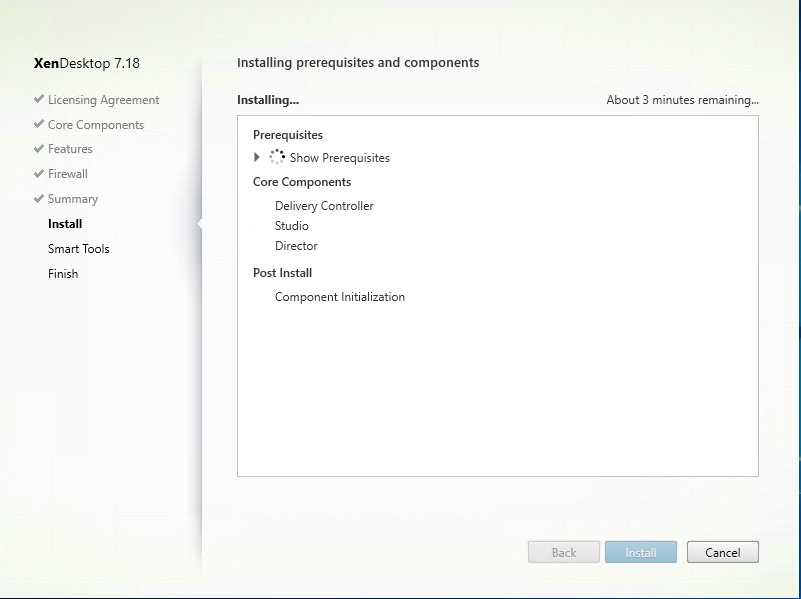
You will get a overview of the components that will be installed. Click on Install.
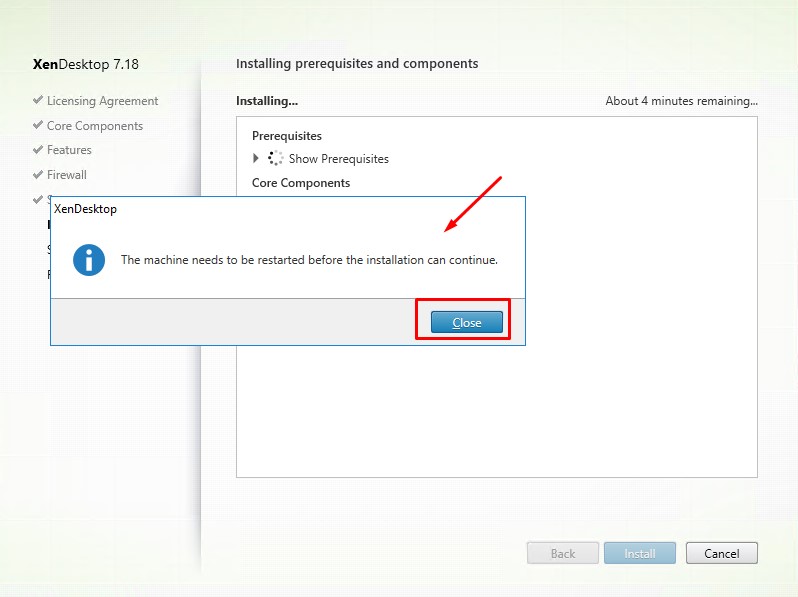
You will see a popup about rebooting your server. Click on Close.
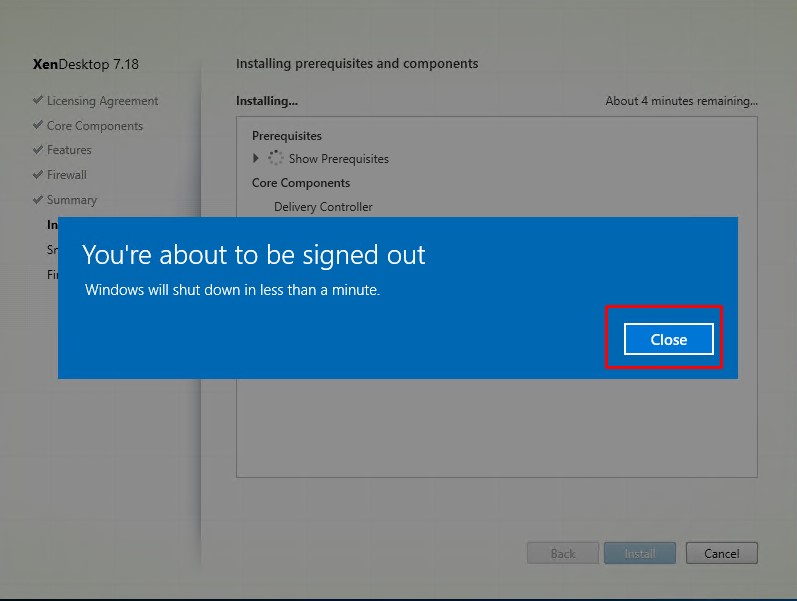
You will be signed out from the server and it will reboot. You can click on Close or wait for the server to sign you out.
After you logging in you will be asked for the XenDesktop setup files. Do NOT close this window.
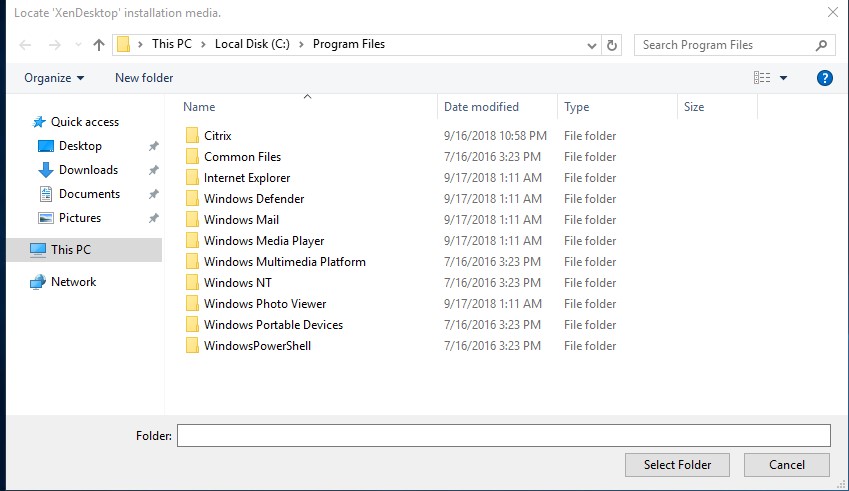
Open up Windows explorer and re-mount the ISO.
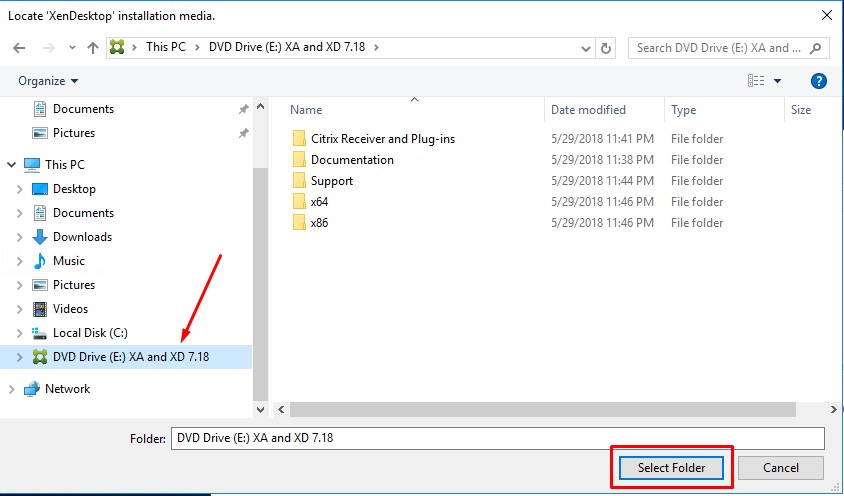
Now go back to the window that opened up after the reboot labeled Locate XenDesktop installation media and browse to the XenDesktop ISO you just mounted. Select the DVD drive in the left column. Then click on Select Folder.
The setup will now continue.
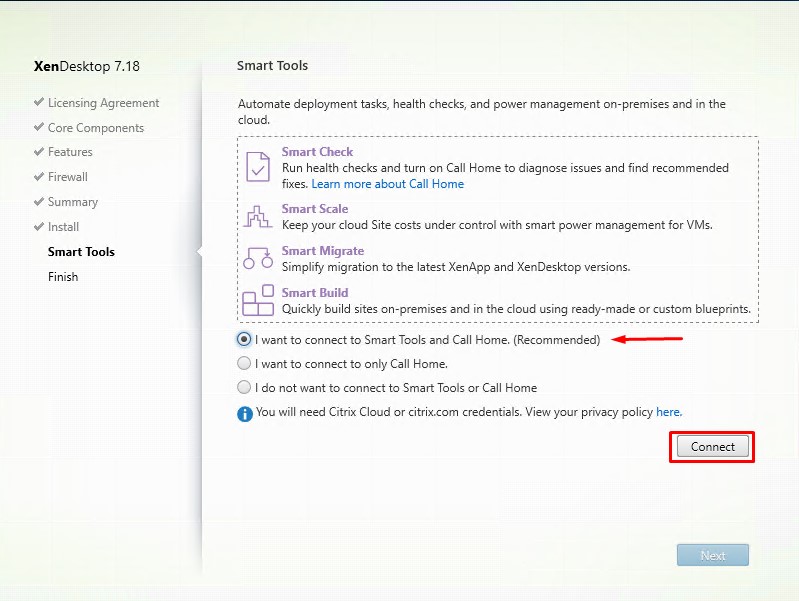
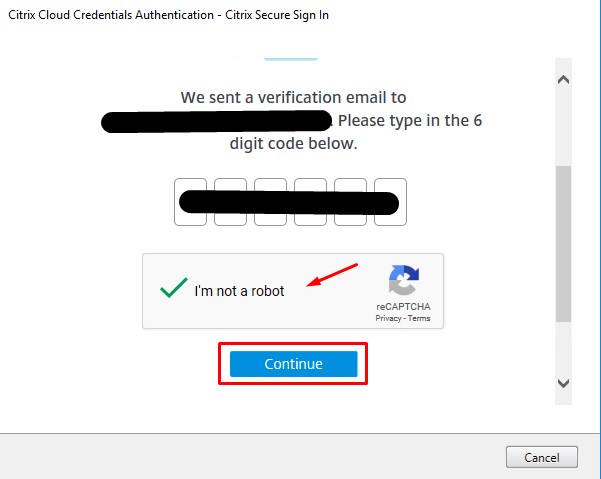
At the Smart Tools window you can select the option I want to connect to Smart Tools and Call Home. Click on the Connect button to sign in with your Citrix account. Of course you can select another option according to your needs.
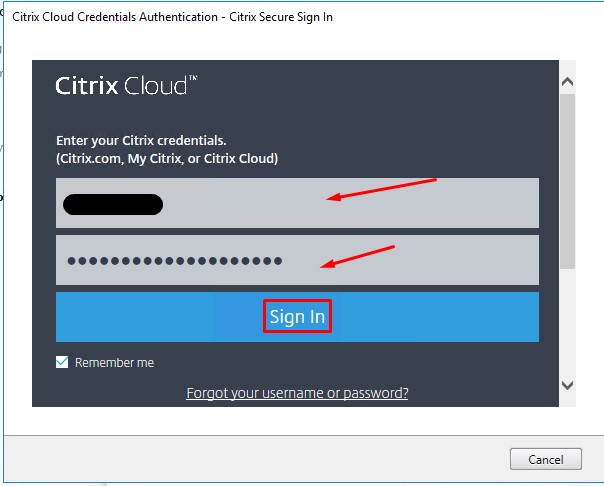
If you choose I want to connect to Smart Tools and Call Home you will have to supply your Citrix credentials. Then click on Sign In.
You will be prompted for a verification code. This code will be send to the email address associated with the Citrix account you entered. Fill in all the info and click on Continue.
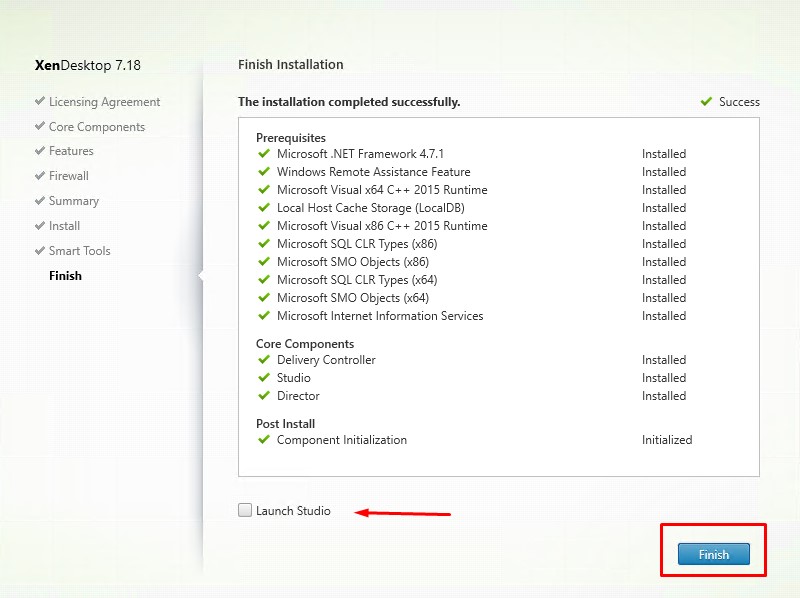
The installer will not continue. I choose to deselect the Launch Studio option. Click on Finish.
This concludes this blog post. Next up will be creating a XenDesktop site. Feel free to contact me of you have any questions or comments.
You can follow me on twitter or add the RSS feed from my blog and you will be notified when I add new posts.