

Table of Contents
The case
In this blog post I will show you how to enable secure LDAP for Citrix ADC with LDAP signature signing policy in order to tighten security in your network. As most of you know Microsoft will be retiring insecure LDAP communication on domain controllers. Check the Microsoft article here for an in-depth explanation. You can also check the following articles about LDAP signature signing:
- CVE-2017-8563 – Windows Elevation of Privilege Vulnerability
- ADV190023 – Microsoft Guidance for Enabling LDAP Channel Binding and LDAP Signing
So insecure communications to Active Directory is going away and we all need to switch the components in our network (which are talking to Active Directory for authentication) to use Secure LDAP (LDAPS). LDAPS uses SSL or TLS to encrypt traffic. Because the LDAPS traffic is encrypted we don’t need to worry about someone intercepting the traffic. If you intercept it, it’s encrypted so you won’t be able to read it. This change then is a good thing!
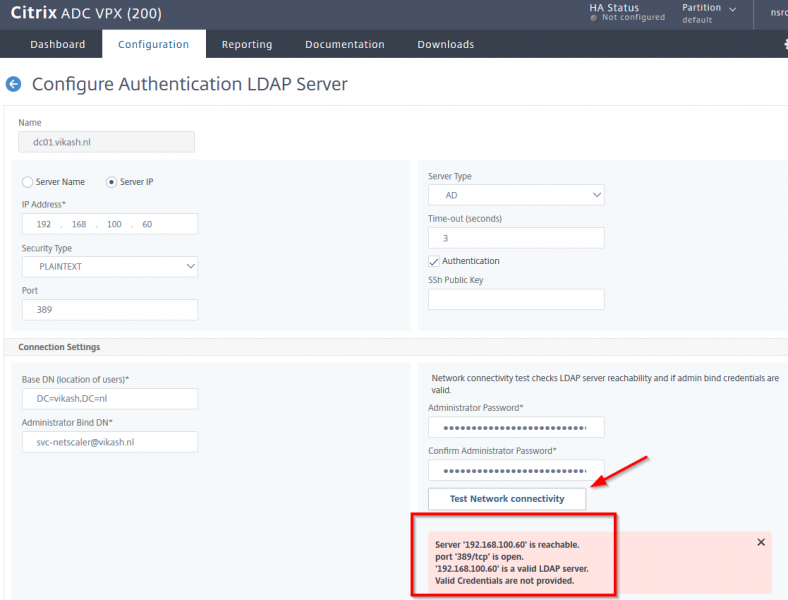
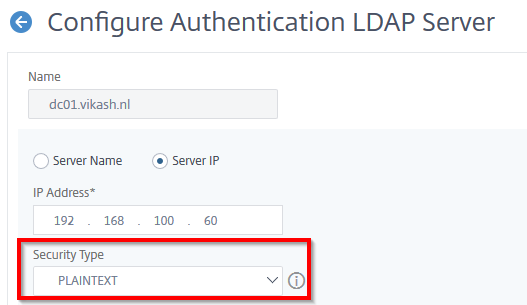
It so happens that a lot of ADC’s out there use insecure insecure LDAP to talk to domain controllers. As you can see in the screenshot below my own ADC has been setup to talk to my domain controller using insecure LDAP on port 389:

The screenshot above shows the basic LDAP server configuration pointing to my Active Directory domain controller. When I click the Test Network Connectivity button you see that everything is fine. This is the way a lot of these ADC’s are setup and when insecure LDAP to domain controllers is not working anymore somewhere during this year, this will break and that means that users will not be able to authenticate on you ADC and login to for instance Access Gateway VPN (if they are using that). In the end it will affect everything the ADC is providing your users with that require authentication from your Active Directory.
That’s why I will show you in this blog post how to get ahead of this change from Microsoft and prepare you Citrix ADC to Enable secure LDAP for Citrix ADC with LDAP signature signing.
What needs to be done
We need to reconfigure the ADC to use Secure LDAP (LDAPS). This can be done using that same insecure LDAP port (port 389) but tell the Citrix ADC to use TLS communication. Or you can choose to communicate to the Active Directory using port 636 and use the SSL option. The Active Directory only listens to LDAP with SSL encrypted traffic on port 636.
What group policy are we talking about
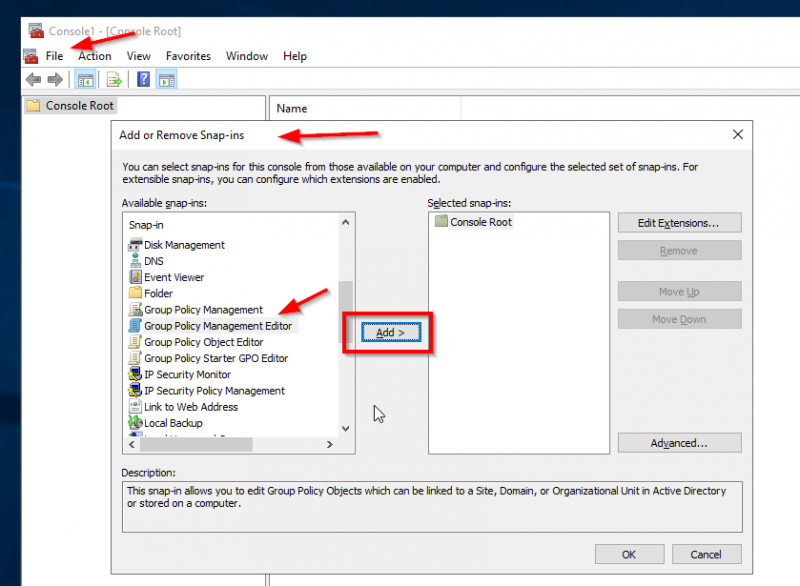
Ok all those articles are fine but let’s get pragmatic and let’s find the policy on the domain controller which will (somewhere this year) block insecure LDAP. In the end you want to know what will cause the problem and how to resolve it. Let me show you. To find the policy start mmc.exe on your Active Directory domain controller. Then click on File -> Add or Remove Snap-ins and find the Group Policy Management Editor. Click on Add:
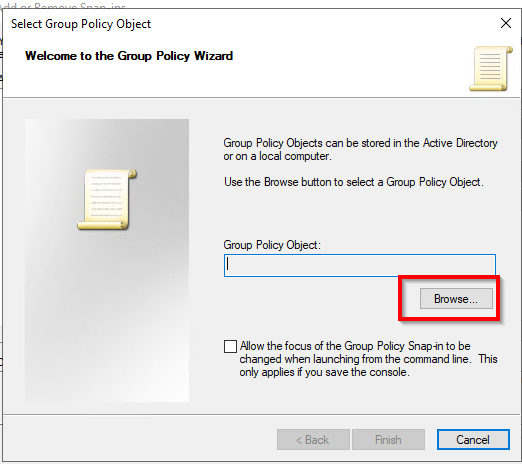
Click on Browse:
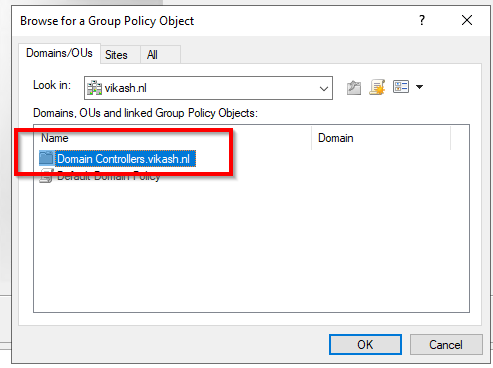
Make sure you doubleclick the Domain Controllers folder here! You will see that the folder has the name of your domain in it. In my case it is Domain Controllers.vikash.nl:
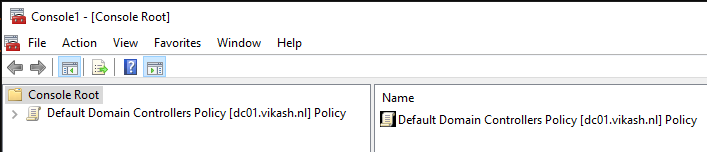
Once you are in the folder you will find the policy we are looking for. The name should be Default Domain Controllers Policy. Select that and click on OK and then Finish. Finally click on OK and you should see the mmc showing you something like this:
The policy setting Microsoft is going to change in order to enforce Secure LDAP is named Domain controller: LDAP server signing requirements. Find it under Computer Configuration -> Policies -> Windows Settings -> Security Settings -> Local Policies -> Security Options:
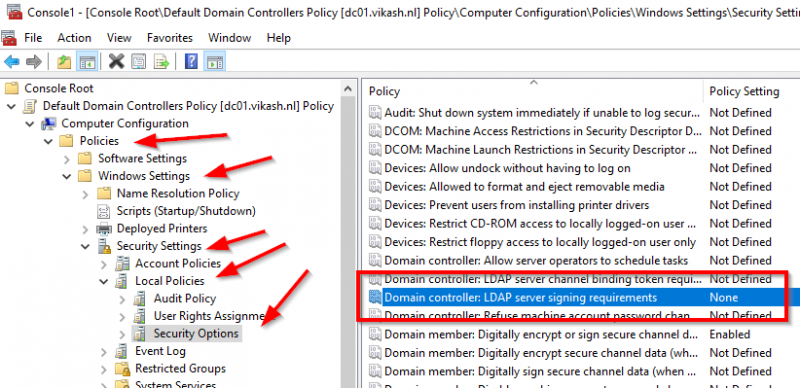
You can see that the setting here is None. This is the default setting and Microsoft eventually will change this to Require signing and in the basic this is all there is :). So for testing purpose let’s change the setting to Required signing and re-test our LDAP Server setting on the Citrix ADC. Note that when you change the setting to Require signing you will get a popup with a warning message. Click on Yes:

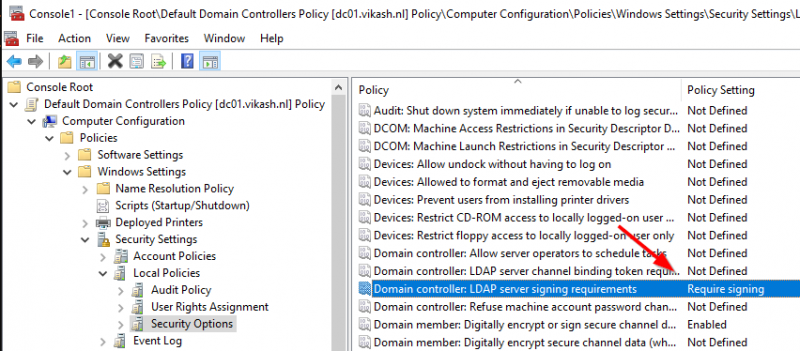
Now the setting is changed and Secure LDAP is being enforced because now it says Require signing. The policy setting will look like this:
Head over to the management webgui on the ADC and go to the Authentication LDAP Server page and click on Test Network connectivity. It will show an error which basically tells us that the Active Directory domain controller is not accepting insecure LDAP anymore:
Ok now we have the policy on the Active Directory to require LDAP signature signing and the expected error on the ADC when we make a PLAINTEXT LDAP request. Now I will show you how to fix this.
Domain Controller Certificate
Before we can do secure LDAP requests to our Active Directory Domain Controllers we have to make sure that the domain controller is using a Certificate. This is a requirement so make sure that this is working and in place. On my domain controller I am running AD Certificate Authority Role (CA):
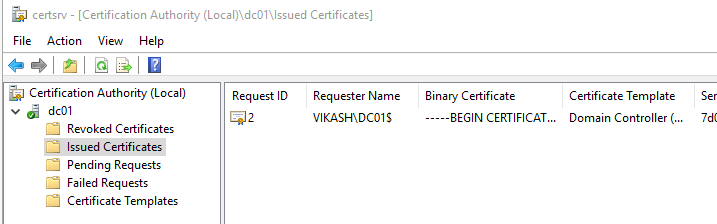
The CA role allows me to easily issue certificates in my domain. In the screenshot below you can see that I have a certificate issued and activated on my domain controller:

Note that if you don’t have a certificate on your domain controller installed and active you will not be able to let the Citrix ADC do secure LDAP requests.
Enable Secure LDAP on Citrix ADC
Ok now we have our certificate setup on our domain controller and let’s continue to setup secure LDAP on ADC. You can do secure LDAP on port 389 with TLS or switch to port 636 with SSL. Please keep in mind that, depending on which of the below solutions you choose, you might have to adjust firewall rules.
Secure LDAP using port 389 with TLS
If your ADC is setup to use insecure LDAP it is doing this using port 389. You will see in the management webgui of the ADC that Security Type is set to PLAINTEXT:
So LDAP on port 389 can either be insecure or secure. Now we want it to be secure so the only thing you have to change here is set the Security Type to TLS. You won’t even have to change your firewall rules and everything will be running fine. So set the Security Type to TLS and click on Test Network Connectivity:
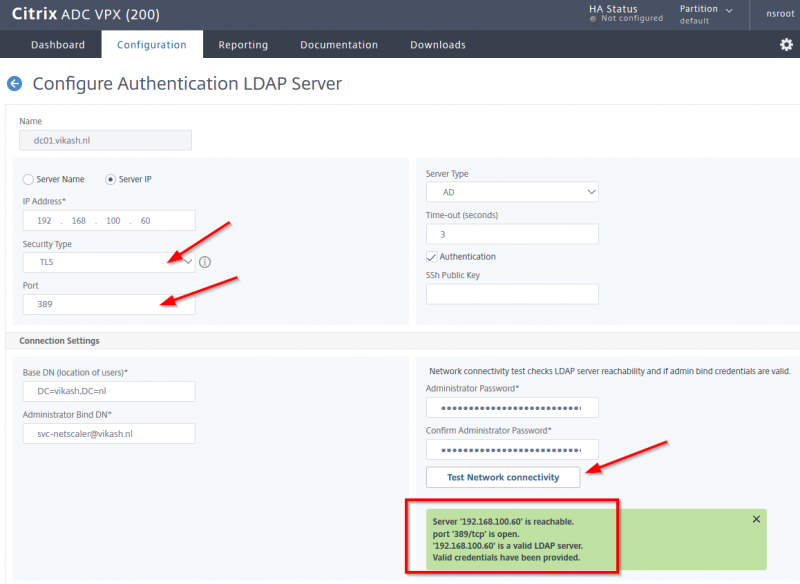
You should get all greens now and no errors. Make sure to press OK on the bottom of this screen to save your changes.
Secure LDAP using port 636 with SSL
The other option is to switch over to port 636 for LDAP requests. All LDAP communication on port 636 require encryption unlike LDAP on port 389. So on the ADC management webgui navigate to the LDAP configuration server and not set the Security Type to SSL. You will see that the ADC automatically changes the port to 636. Click on the Test Network Connectivity button and everything should be fine and green:
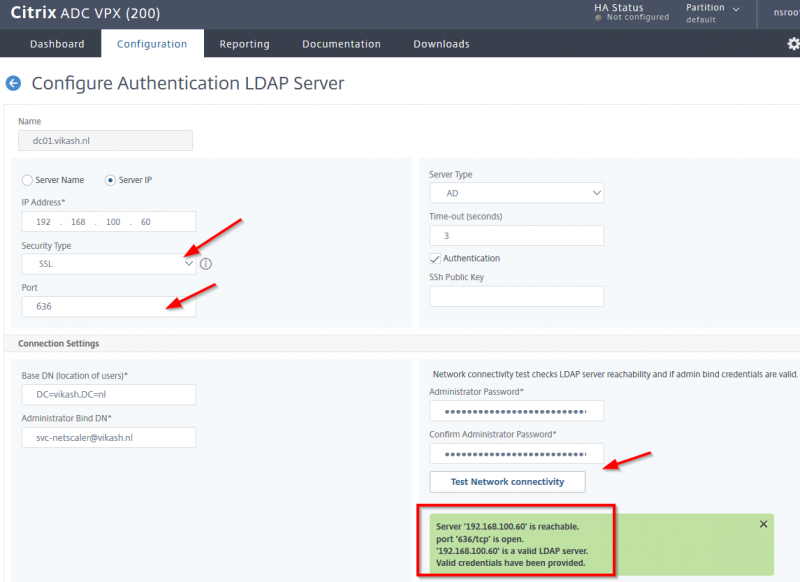
Note that in the green field it will say that LDAP communication is making use of port 636 now. Make sure to press OK on the bottom of this screen to save your changes.
To sum up
Using Secure LDAP on the Citrix ADC not only gives you a better security but also gives you other advantages like allowing password changes for users. If your users are able to do password changes already then chances are that you already have everything in place for that moment when Microsoft decides to enforce LDAP signature signing. And if not then I hope this blog post has helped you enable secure LDAP for Citrix ADC with LDAP signature signing. Be secure!